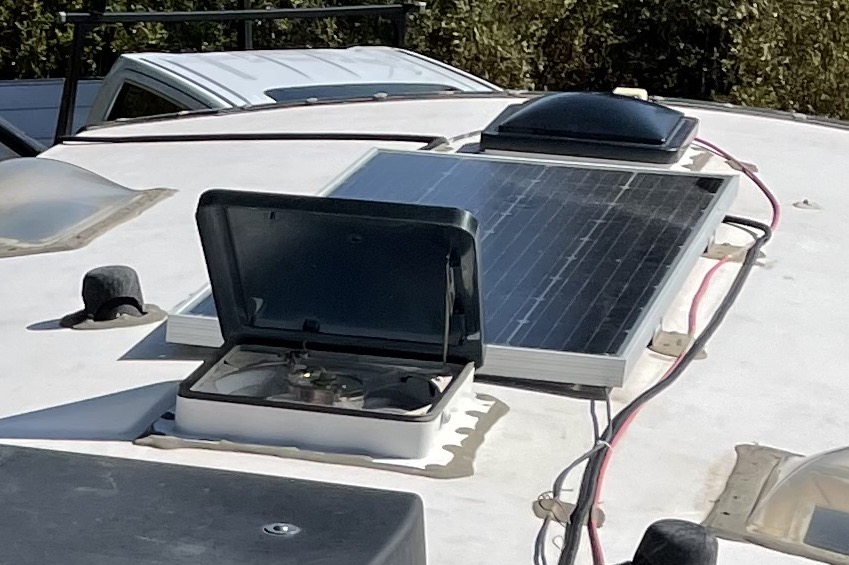
Most, if not all, RVs have several vent fans on their roof. Our 2016 Outdoors RV 240 RKSB has one in our bedroom, one in the bathroom, and one in the kitchen. Our fans all have wall-mounted remotes that allow the fan speed to be adjusted, but our fans only draw air from the trailer and exhaust it to the great outdoors. On many occasions, I have desired to draw air from outside and exhaust it into our living space. Many newer fans have this capability as a standard feature, but I was uninterested in the expense and labor of purchasing, installing, and sealing new units when our current fans were fine.
Fan Basics
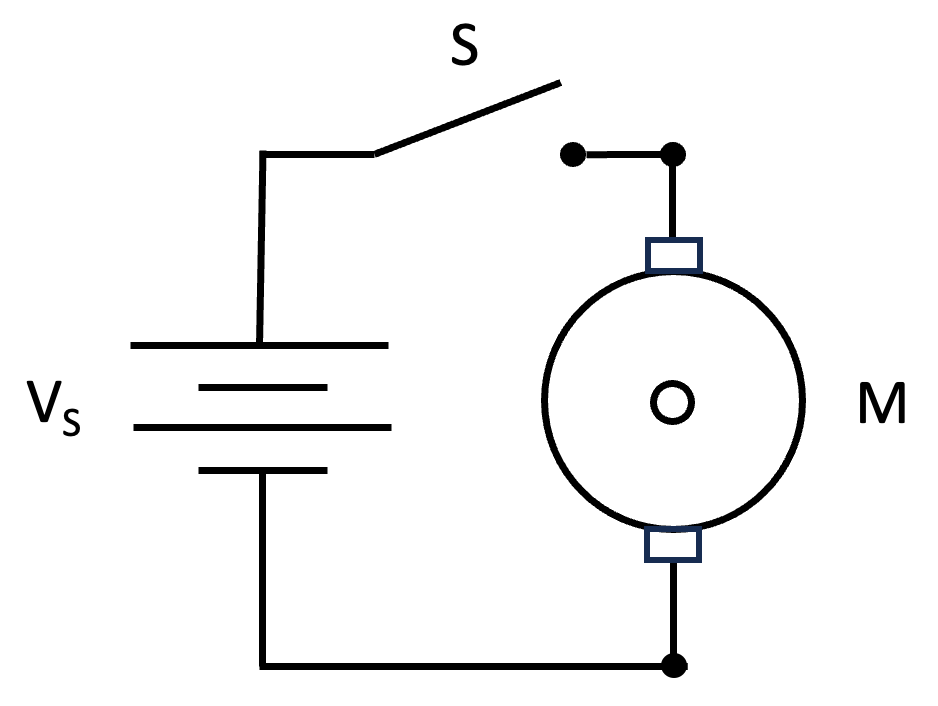
A basic controllable fan circuit consists of a DC motor M, a DC voltage source VS and a switch S. A fan of appropriate size and style is then connected to the motor shaft. When the switch is depressed, the motor spins, and the connected fan moves air.
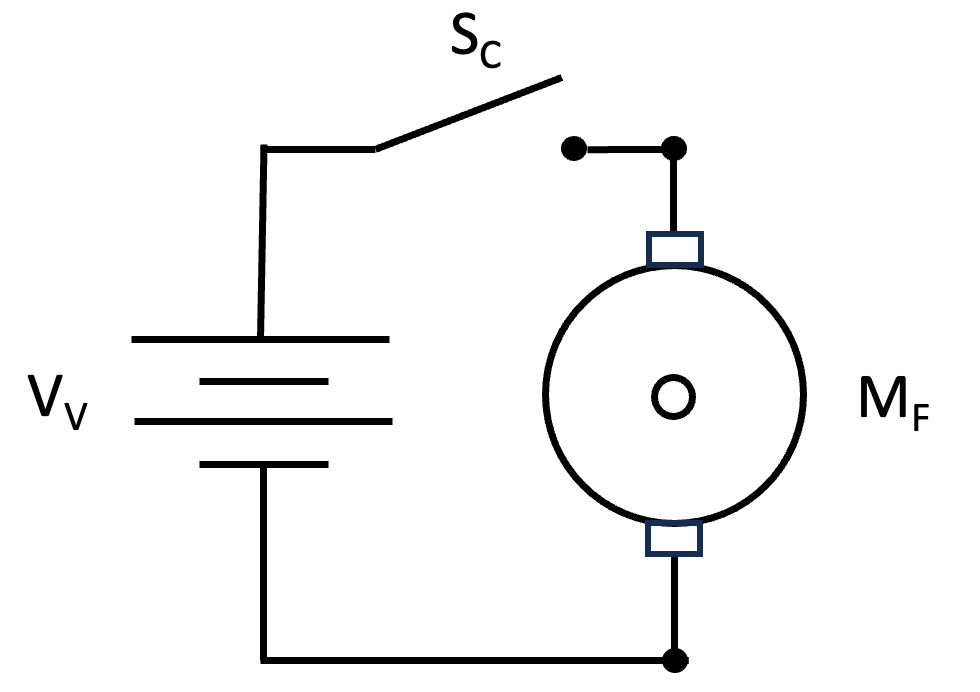
Our current RV fan is only slightly more complicated than the basic circuit described above. The constant DC voltage source depicted in the previous figure is replaced by a variable or pulse width modulated DC voltage source VV and the switch is replaced with a push button switch SC that completes the circuit and drives the motor and fan MF when the fan cover is open.
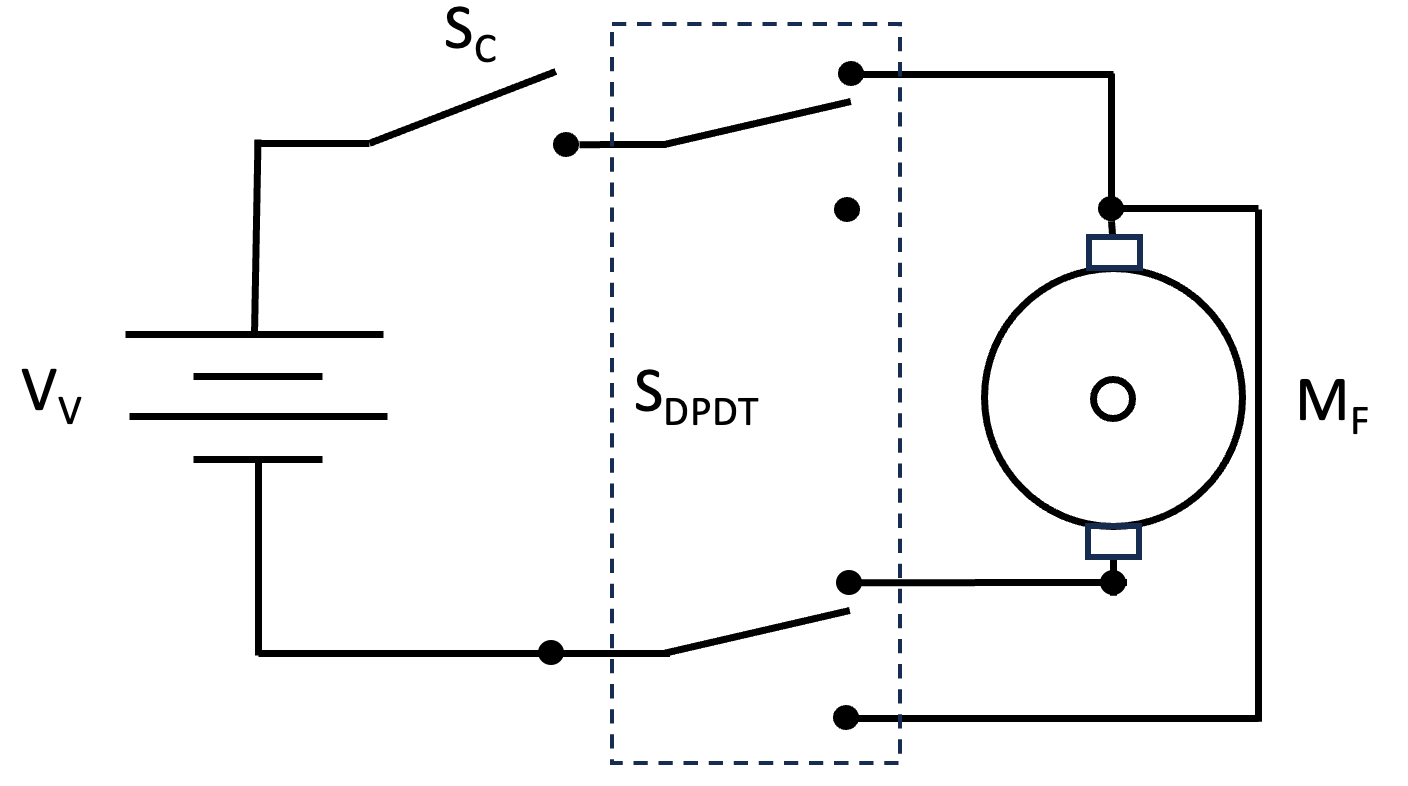
DC motors are easily reversed by reversing the polarity of their power source. This is easily accomplished using a double-pole double-throw (DPDT) switch, as shown in the figure. By adding the DPDT switch SDPDT after the voltage source VV and switch SC, we don’t have to concern ourselves with how and when the appropriate power is delivered; we simply need to provide it to the motor MF in one of two directions. With the switch in the upper position, a positive voltage is connected to the upper motor connection, and the negative source voltage is connected to the lower motor terminal. When the DPDT switch is in the lower position, the polarity is reversed.
Our Implementation
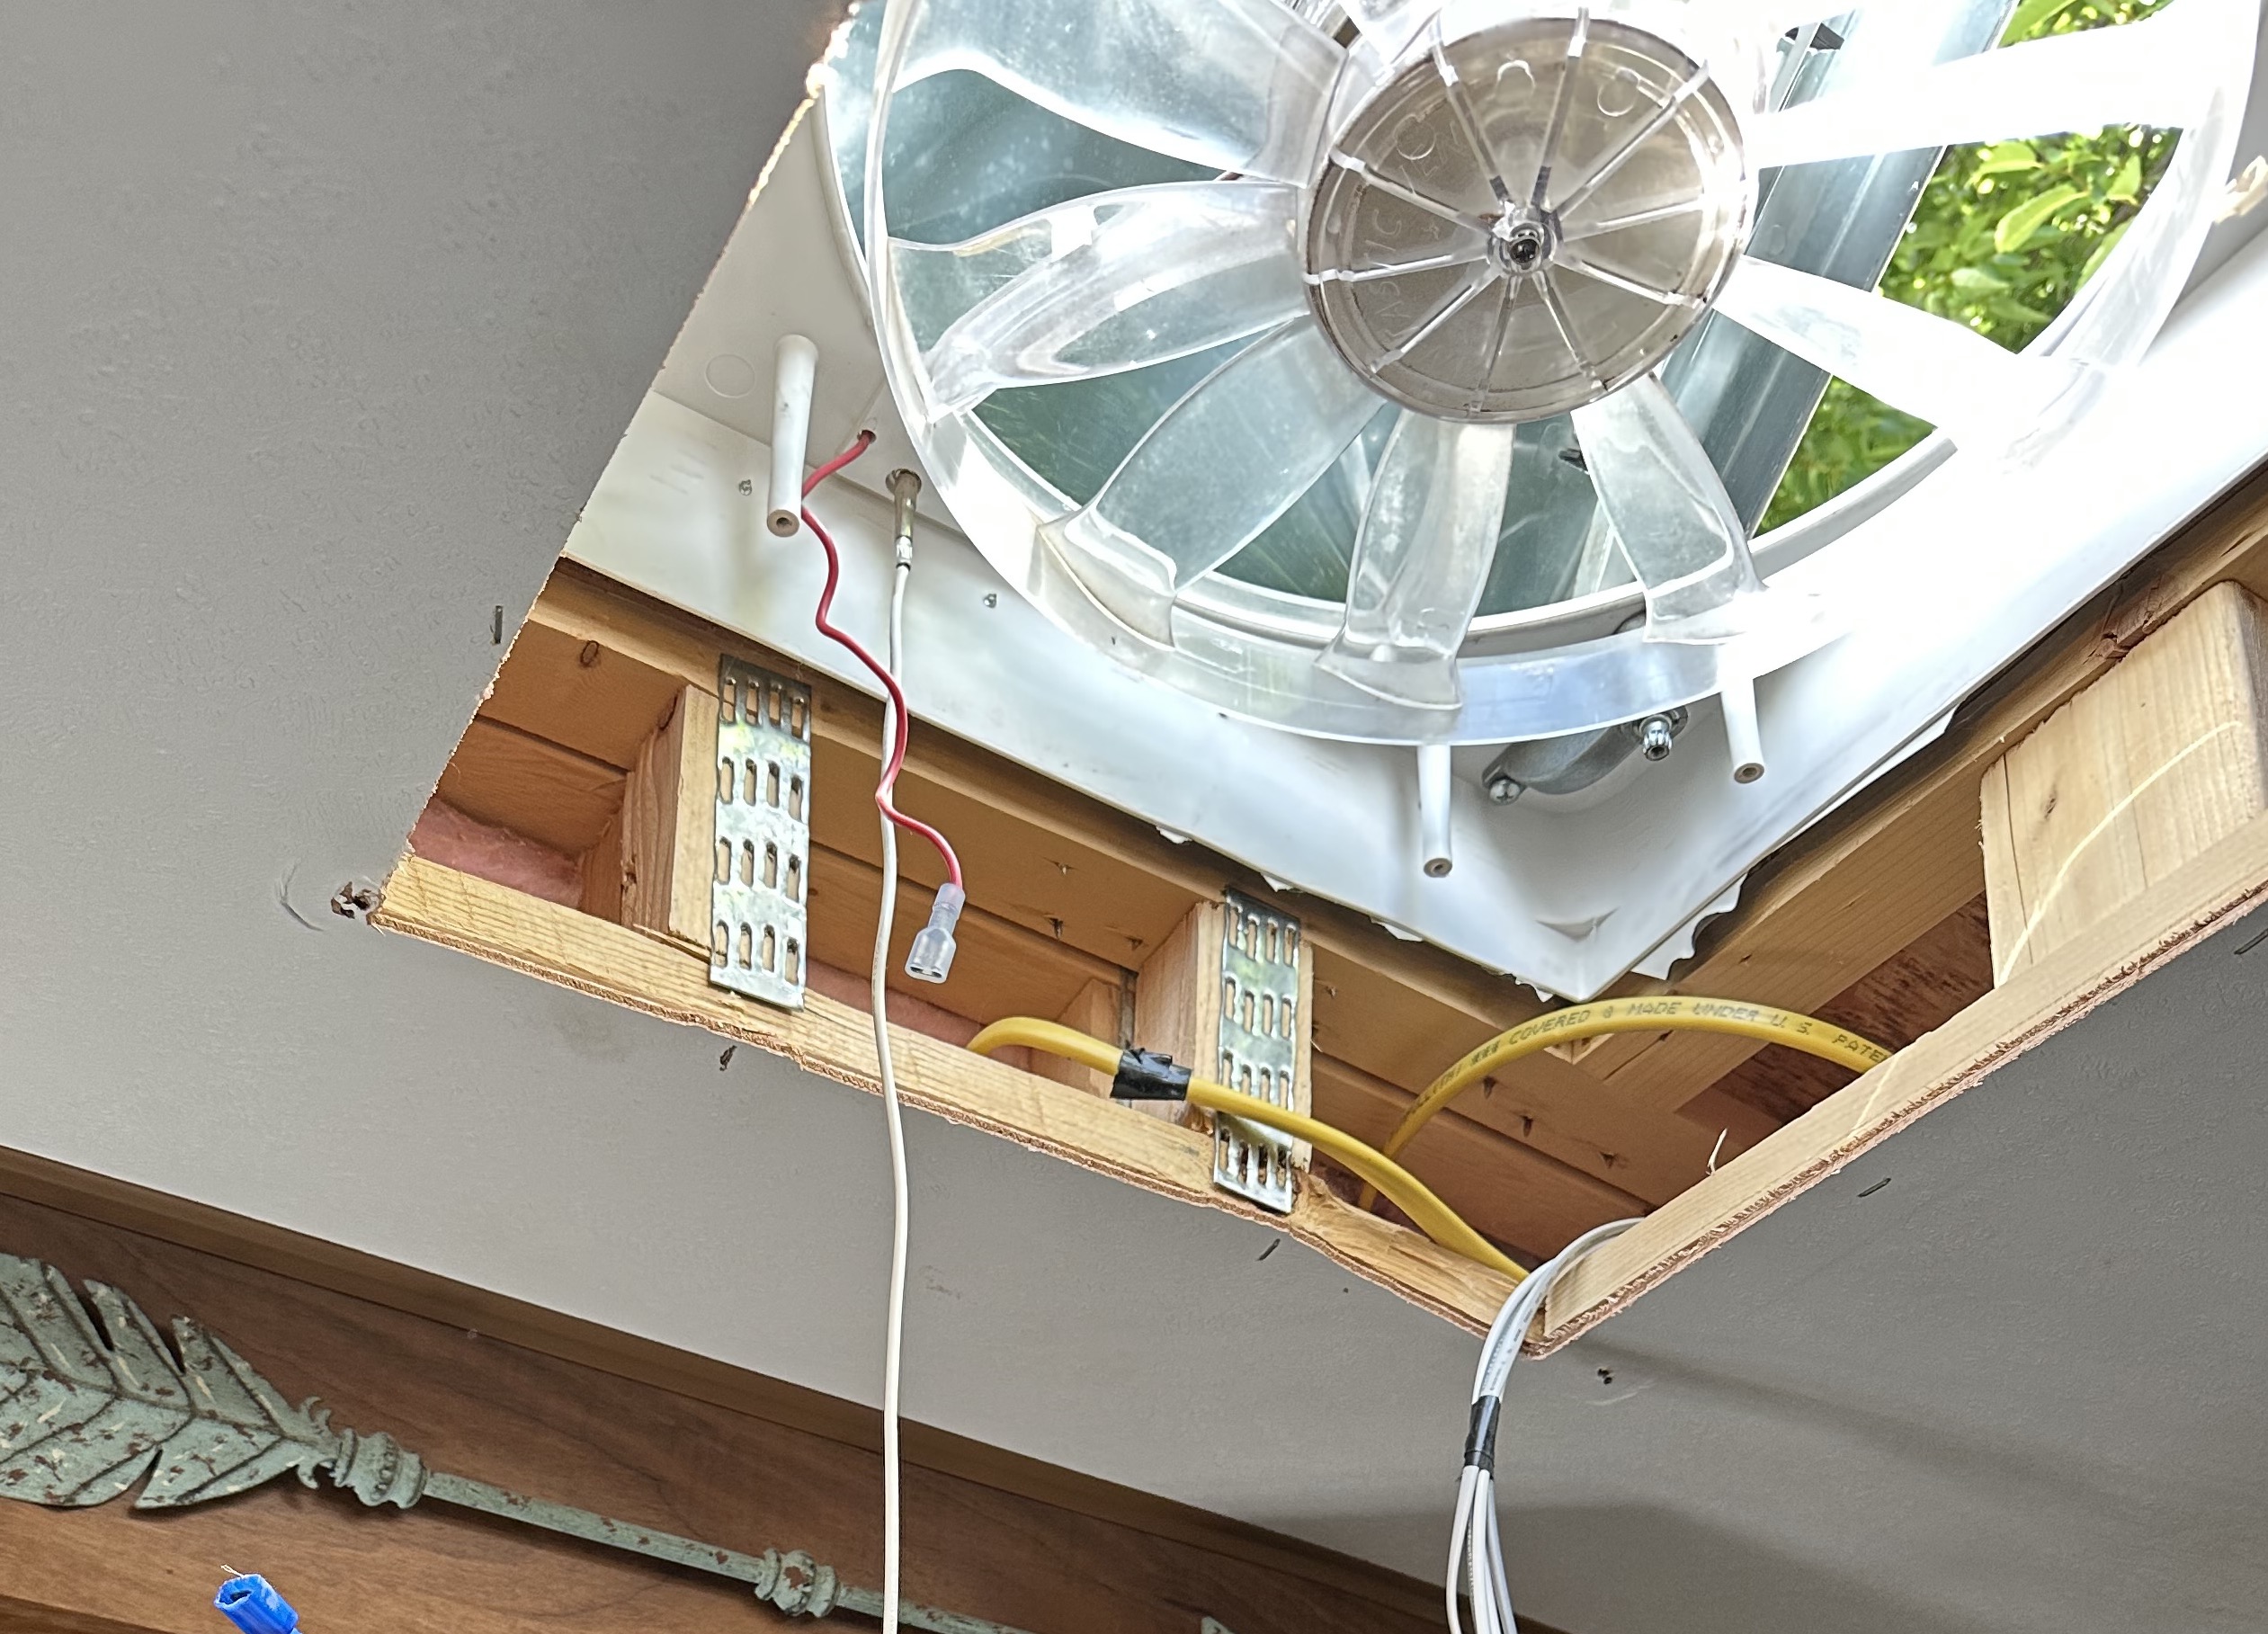
A fun part of every project is tearing things up and being creative. After removing the internal trim of the fan box and the fan cover, it became apparent that this project would be easier than expected. There was plenty of room on every side of the fan to accommodate an additional switch, and the wiring was straightforward.
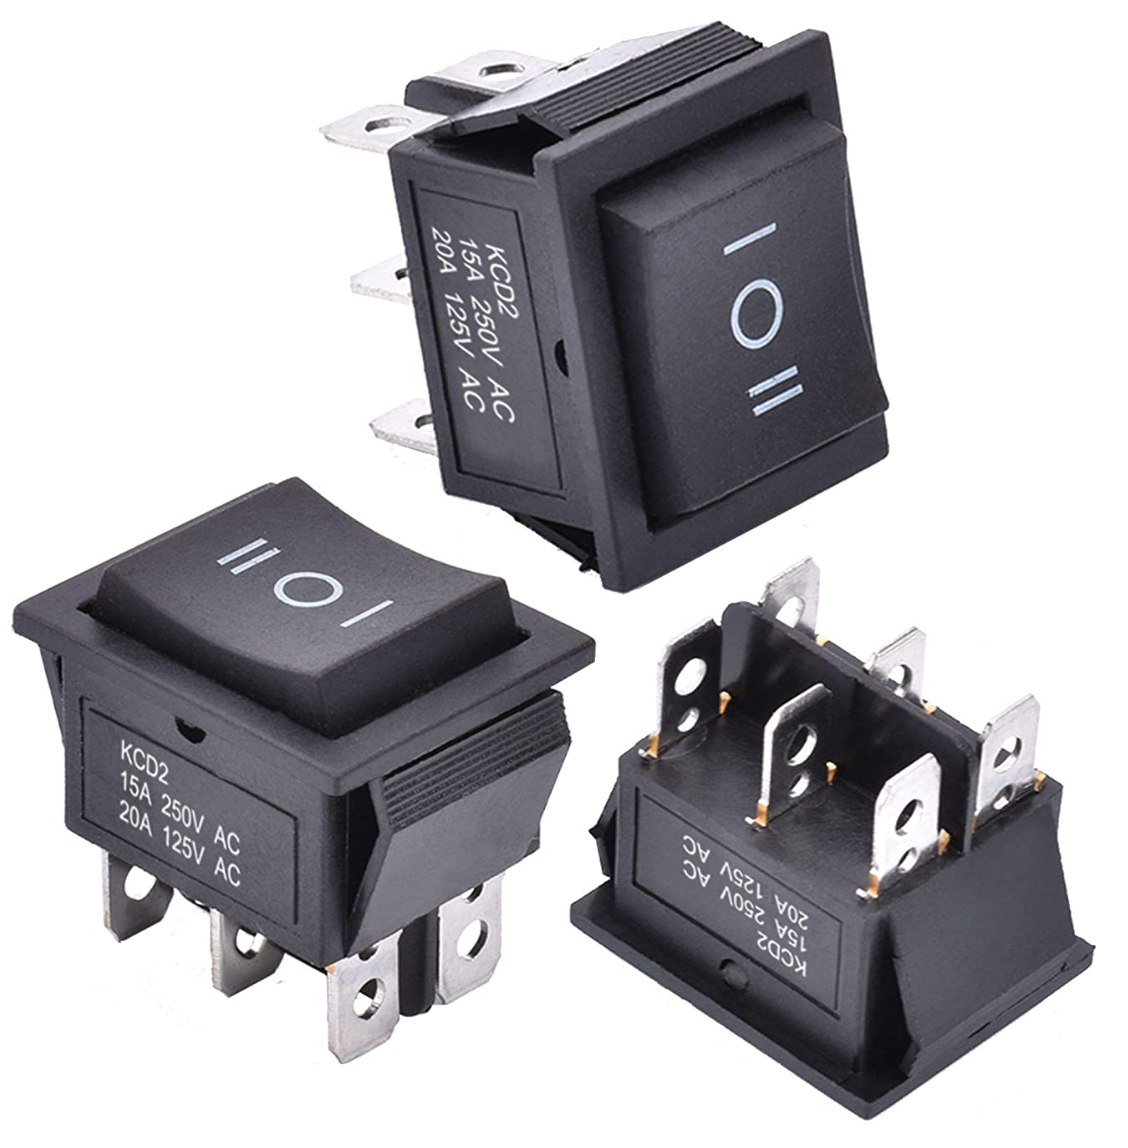
With plenty of available space, I selected a DPDT switch with appropriate voltage and current characteristics. I knew from previous measurements that our fans draw far less than 10 A of current and run off the 12 V supply. I chose a rocker switch that met these requirements and has a low profile. Notice that this switch has six blade-type connections. The center two connections are connected to two outer connections in position one and the other two outer connections in position two. We connect our variable voltage source to the center two connections and then wire the fan motor to the others.
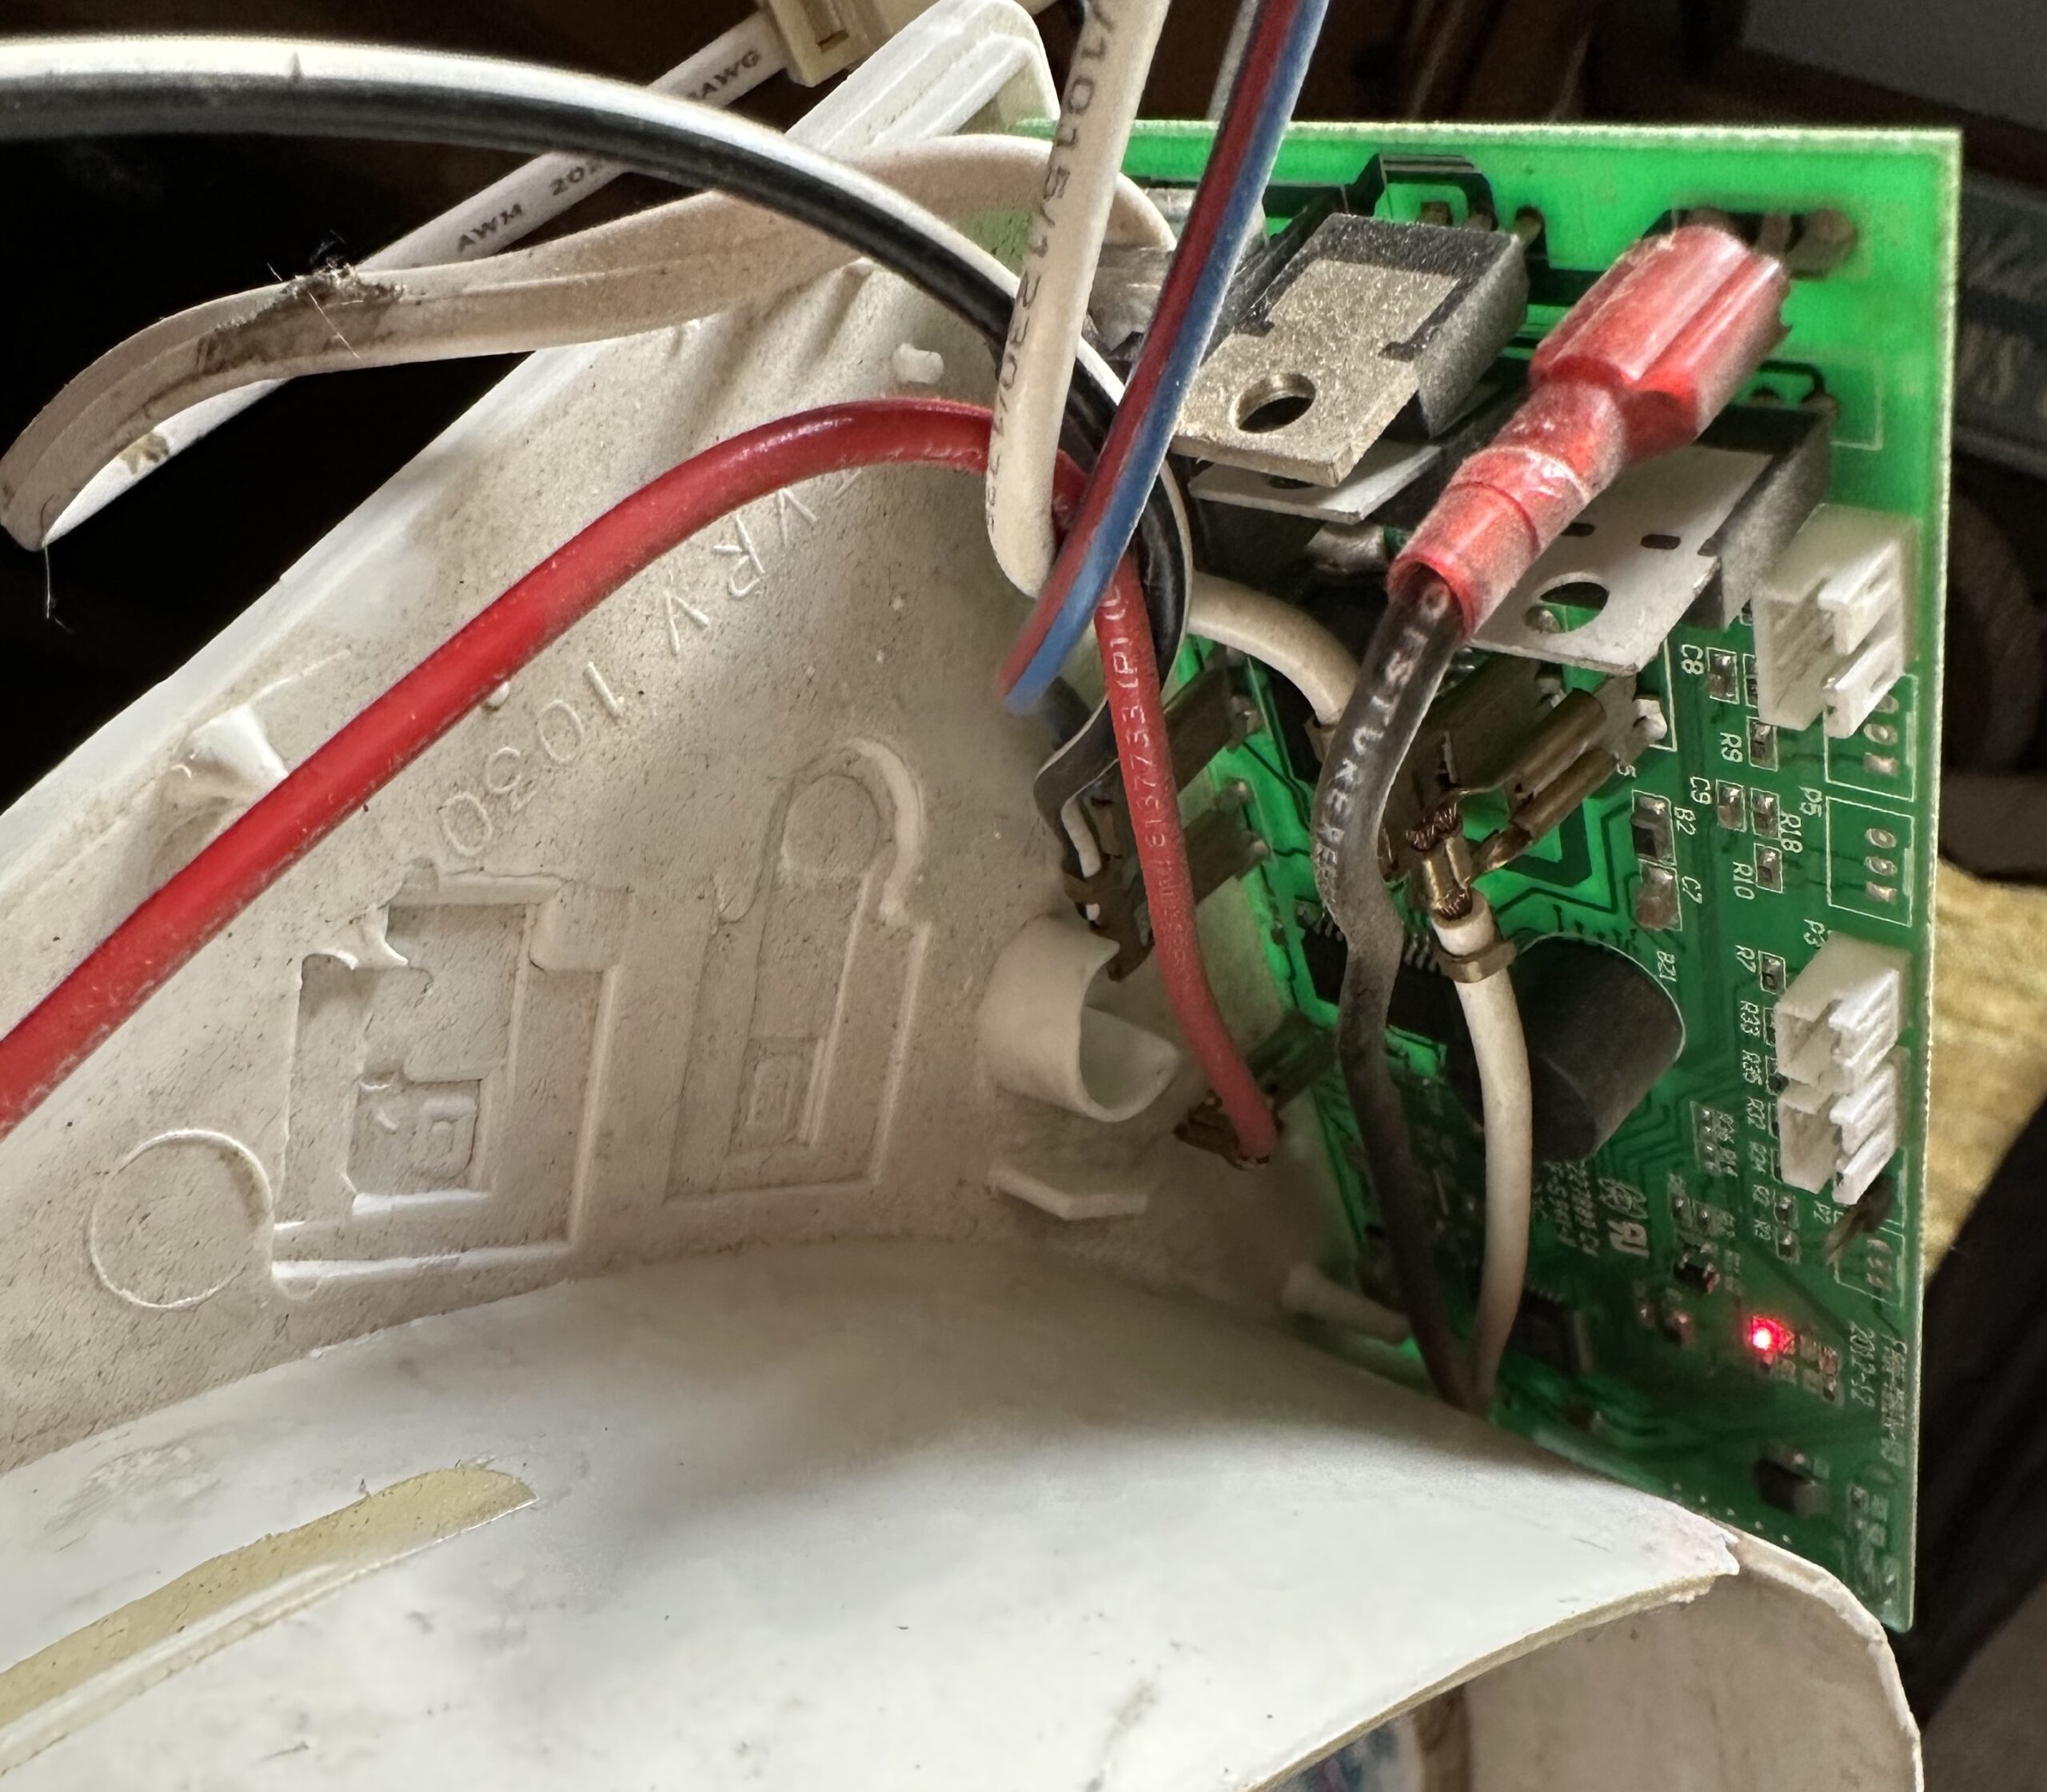
The two wires that connect to the fan motor come from the fan controller illustrated in the figure on the right. The red and white wires of interest were easily traced around the fan housing, up through the fan box, and across one of the cross-arms holding the motor in place.
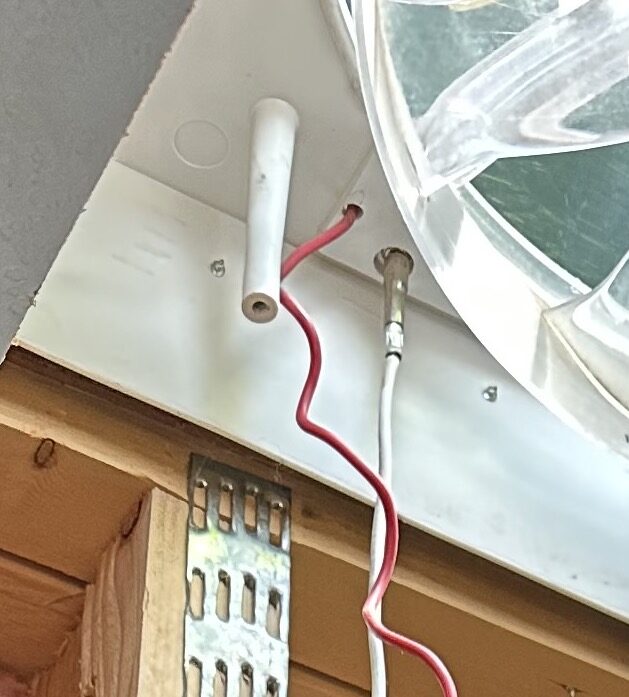
In the following figure, you can easily see the same red and white wires. As previously mentioned, these wires come from the fan controller and up through the fan box, across a cross-arm, and connect to the motor. Notice that the white wire goes through a silver cylinder which is the switch that completes the circuit when the fan cover is open.
While our initial intention was to wire our implementation according to the schematics previously discussed, it would have been much more challenging to get to the wiring on the motor side of the fan cover switch. While our wiring doesn’t match the presented schematics, it is functionally equivalent. The fan cover switch is connected to one of the motor terminals, while the other terminal of the fan cover switch is divided and attached to the DPDT switch.
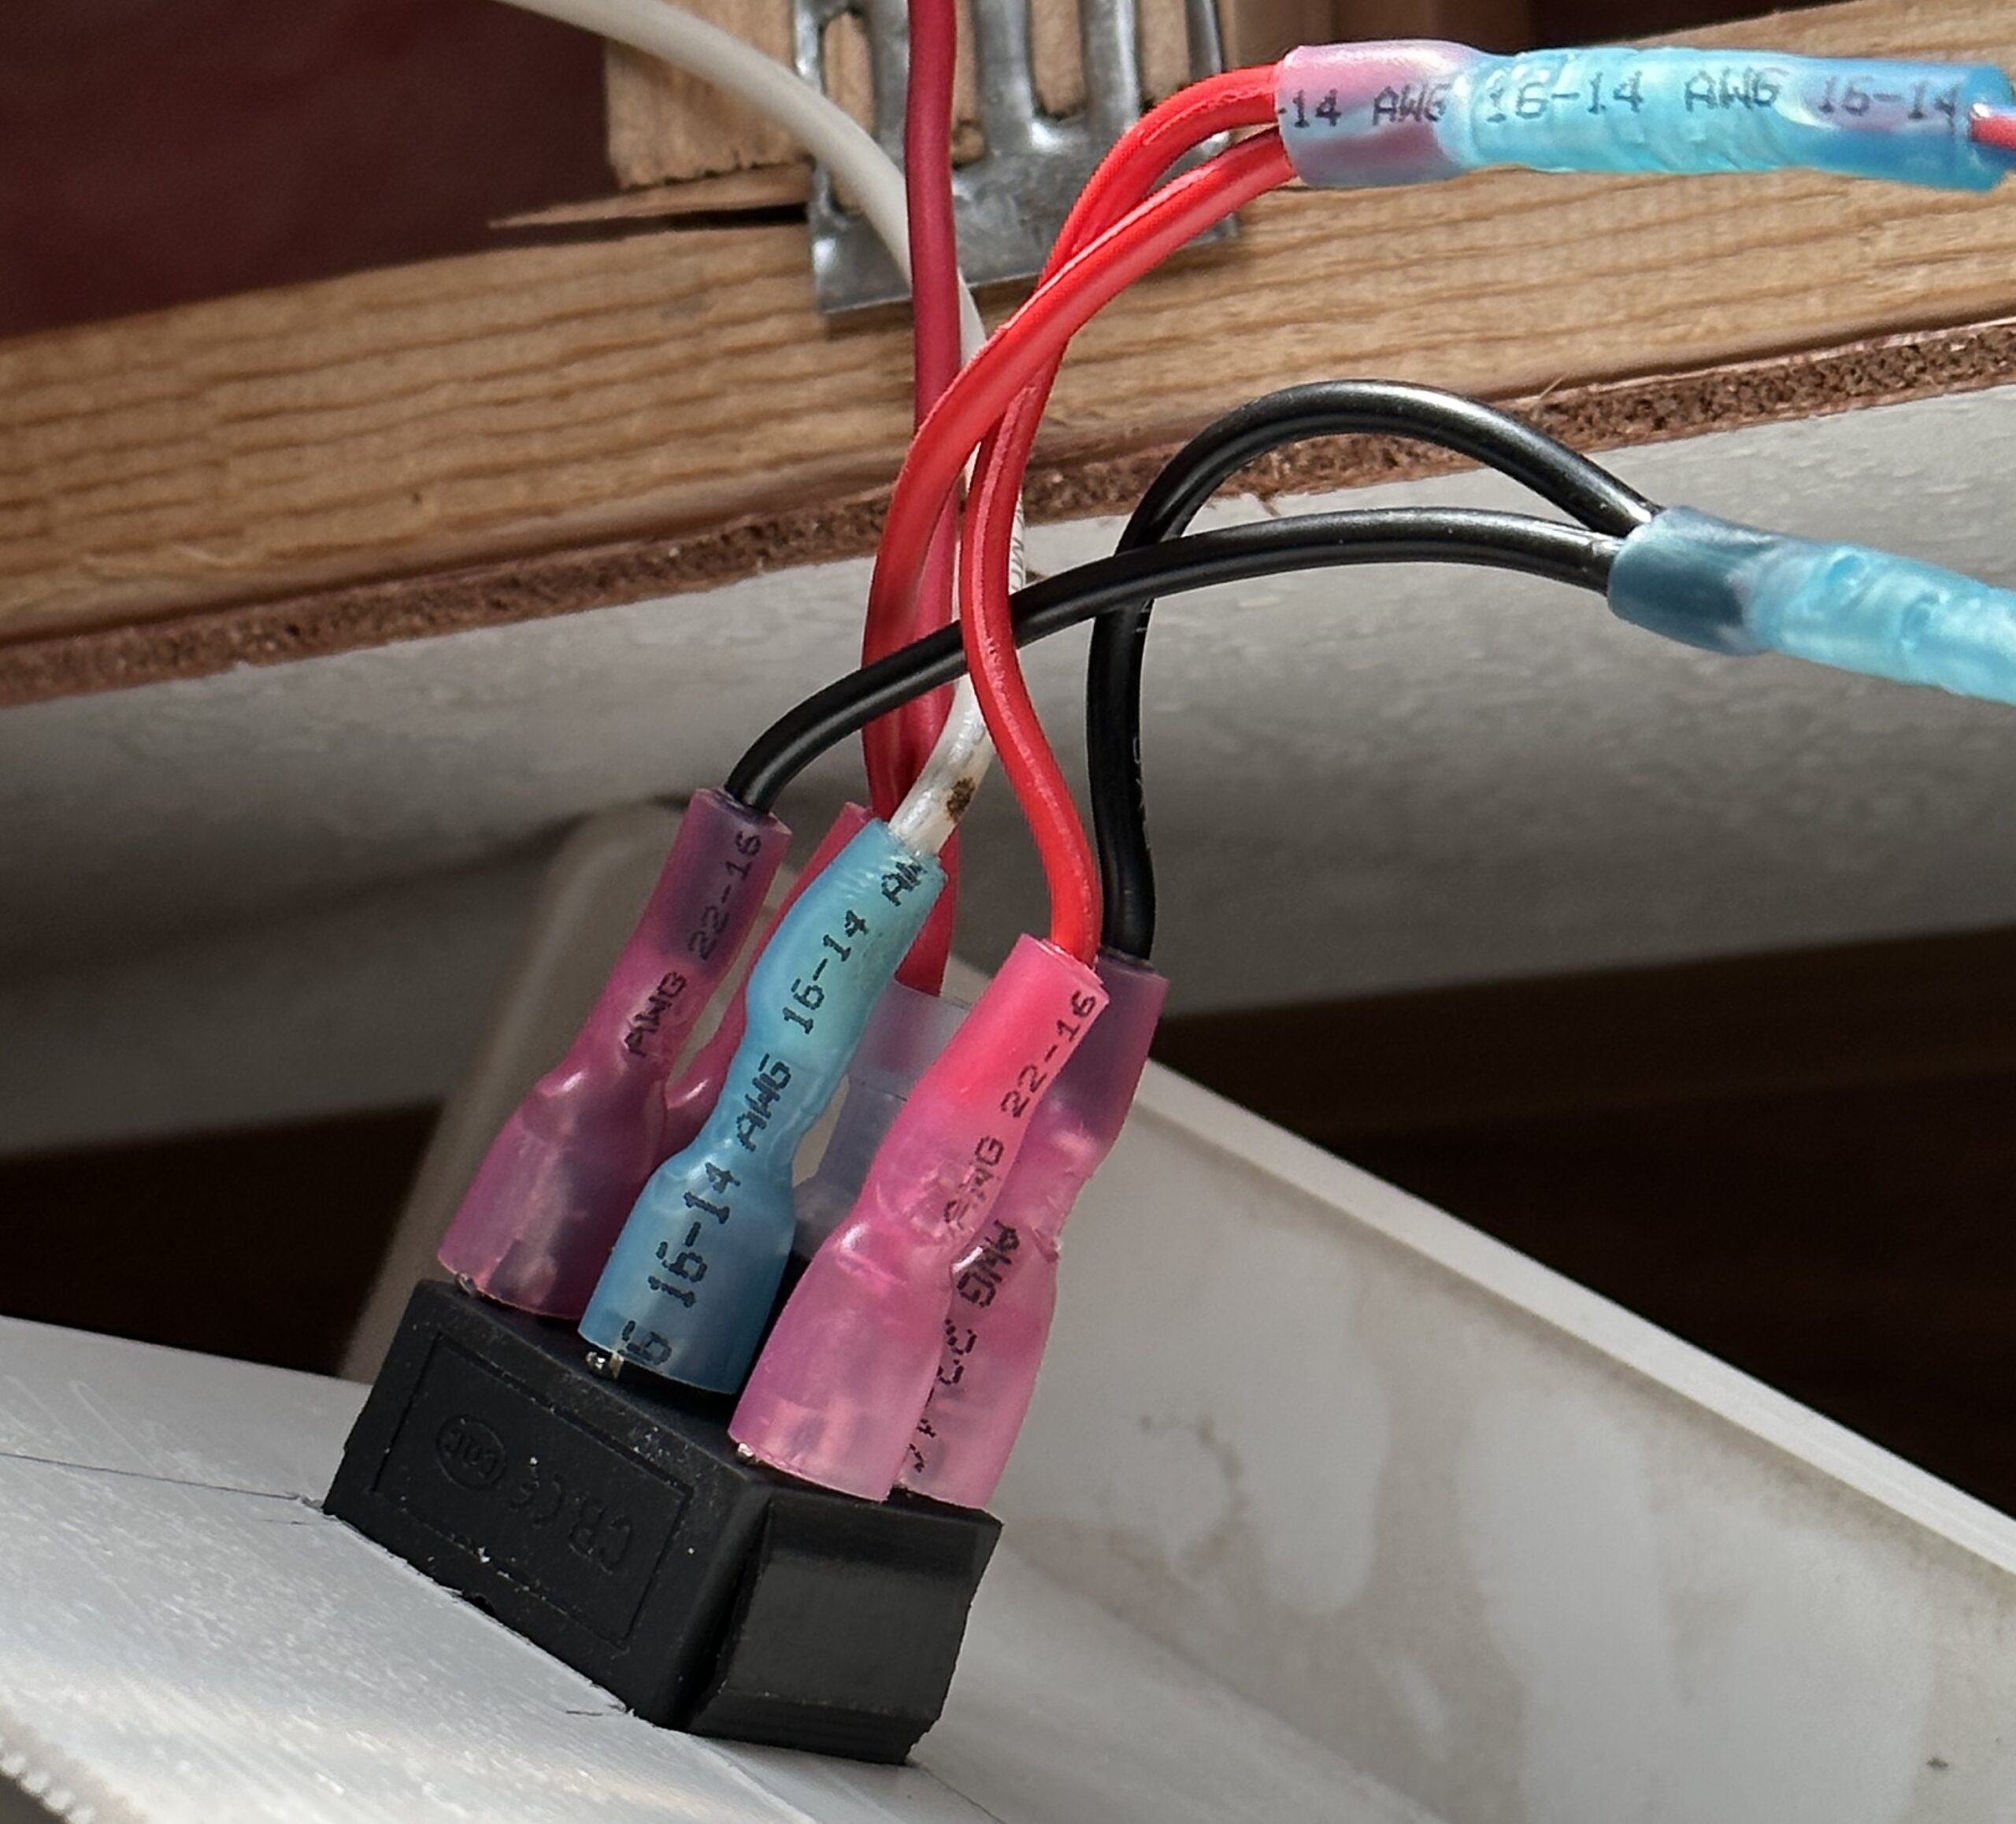
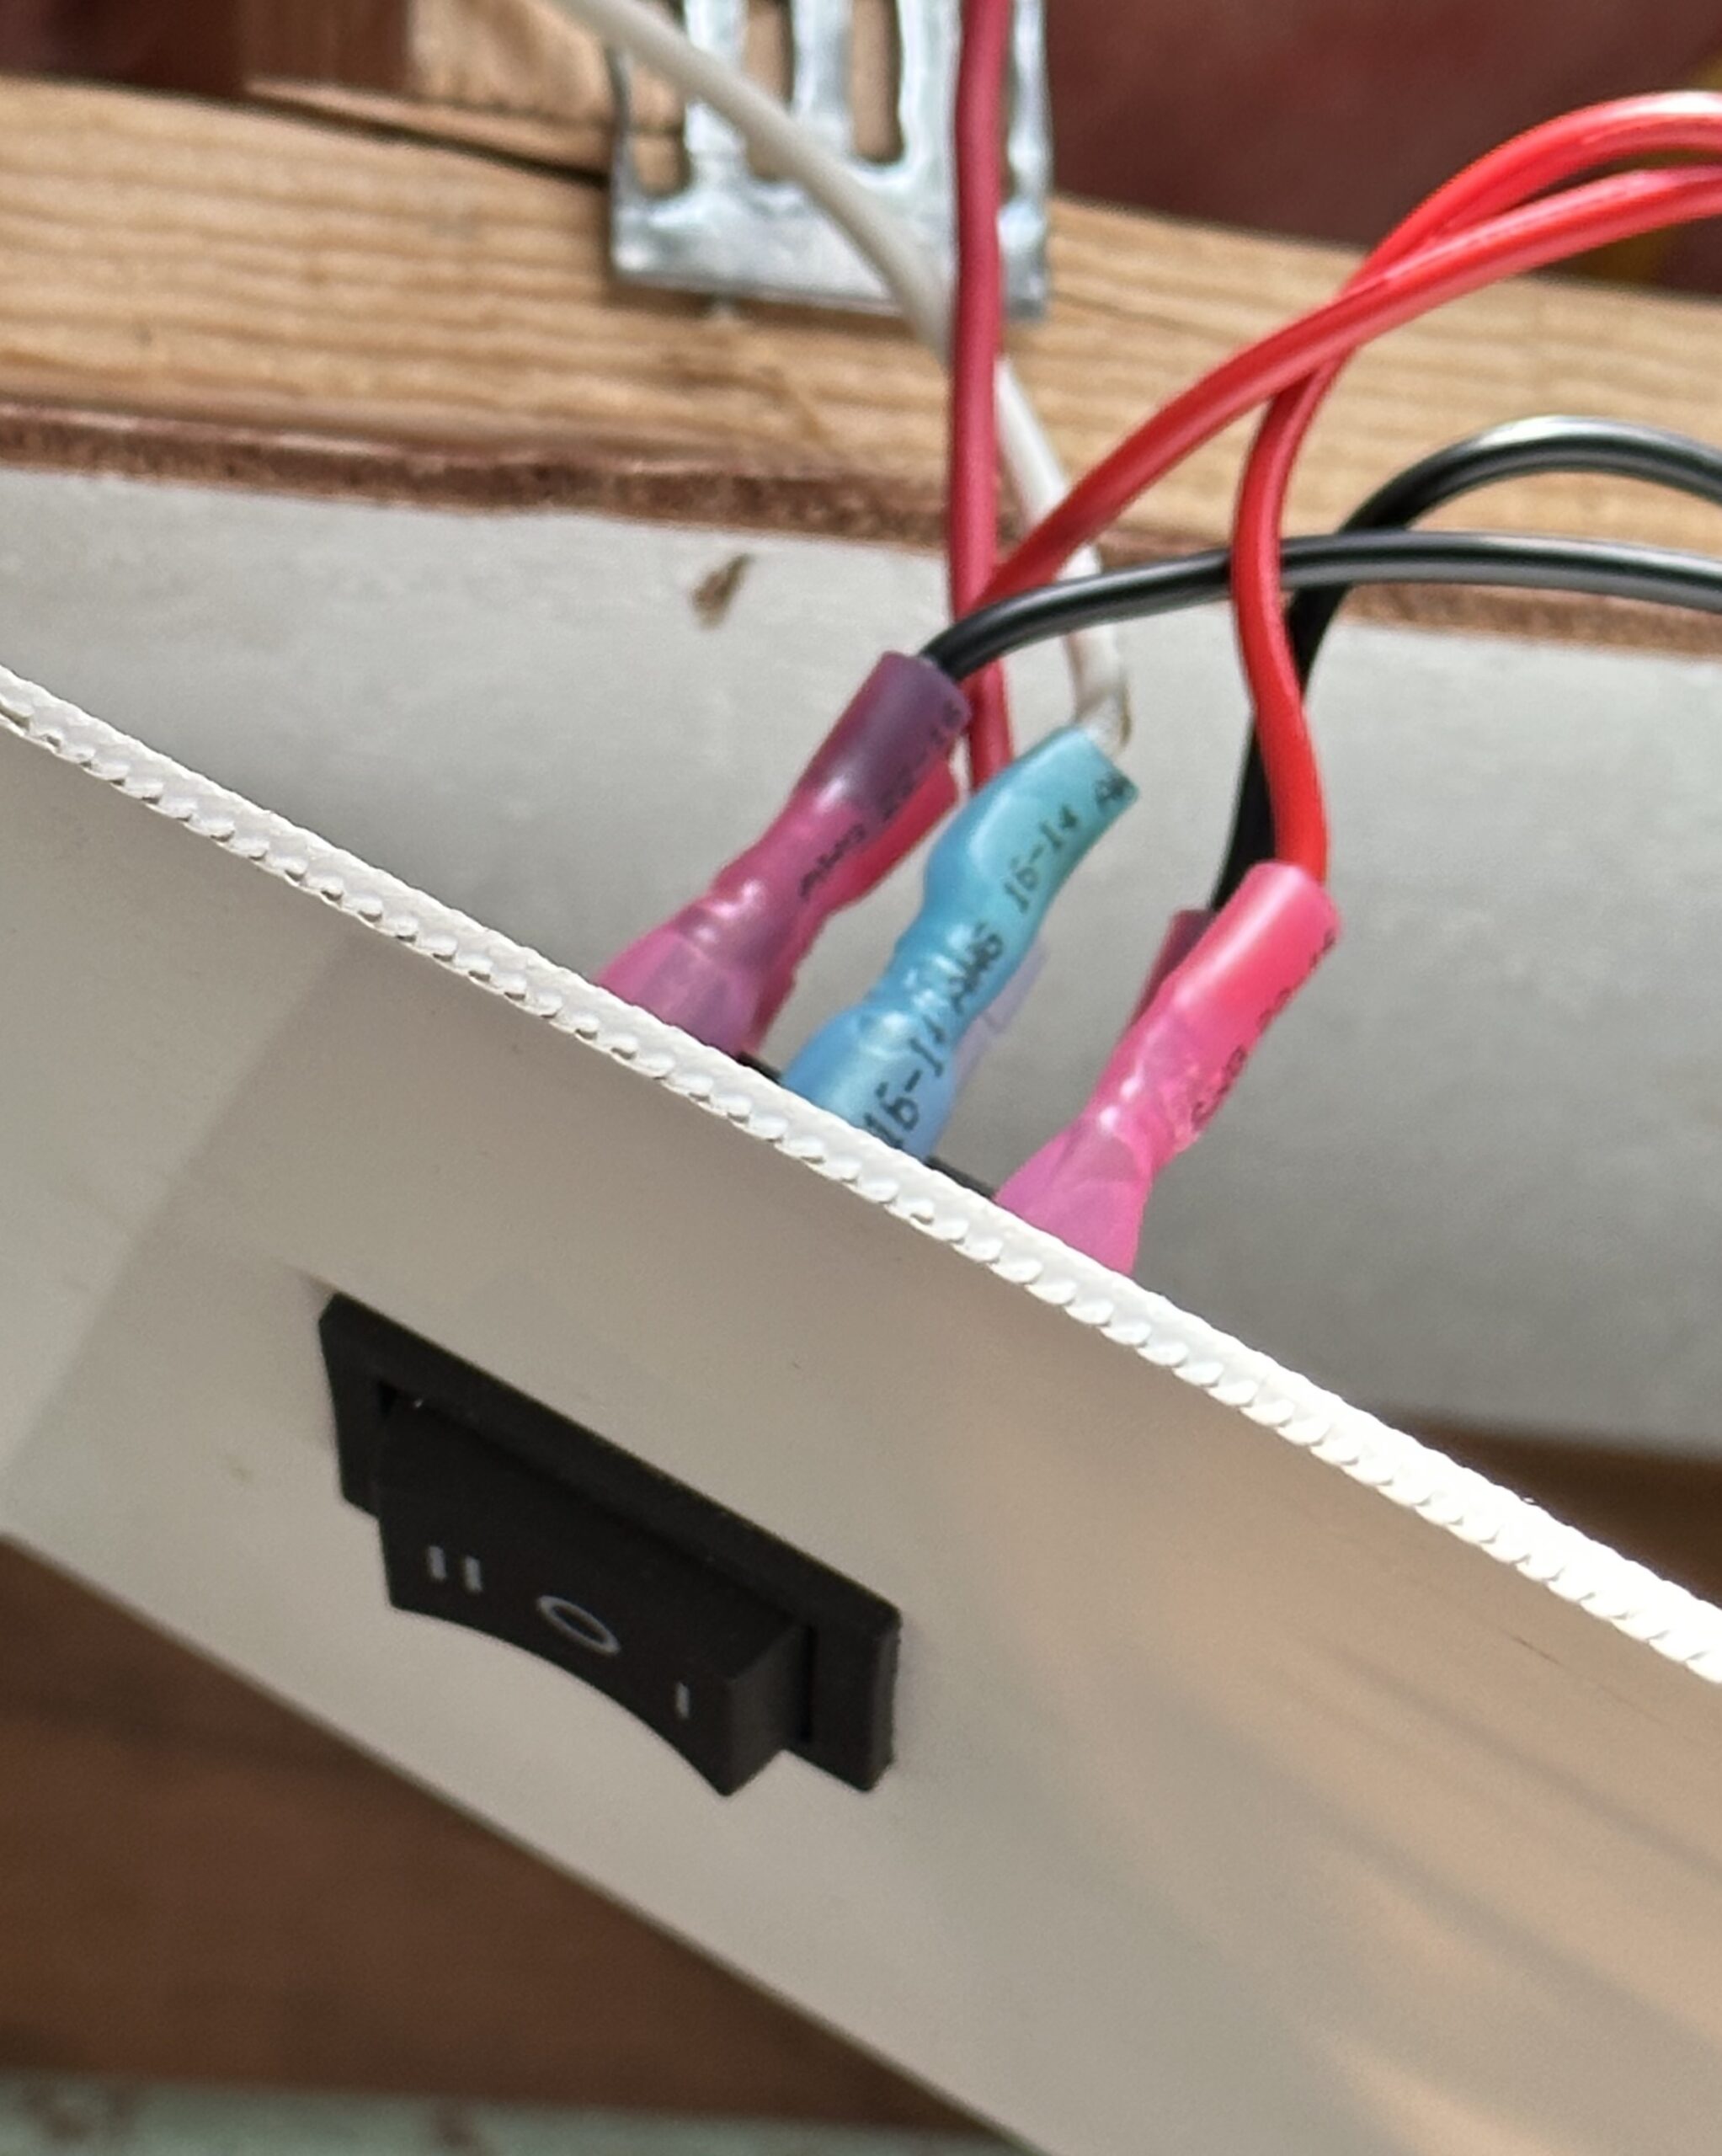
We cut the red and white wires. The pair of wires from the fan controller are connected to the center two connections on our DPDT rocker switch. These two connections were made with crimp-on blue spade connectors and can be seen in the figure to the right. The red and white wires that go up to the fan motor are doubled, resulting in two red wires and two black wires. We changed from white to black because I didn’t have any white wire. These connections were made using solder seal wire connectors; these things are amazing. These pairs of wires can be seen in the figure. One pair is connected to an outer pair of contacts on the rocker switch, while the other pair is connected to the remaining outer contacts in the opposite direction. These connections were also made with crimp-on spade connectors.
The rectangular hole for the rocker switch was made in the thin plastic fan trim with a sharp chisel. It is essential to cut the initial hole small and then increase the size slowly while repeatedly trying to snap the switch in place. It’s much easier to make the hole slightly larger than smaller!
The switch was snapped in place before the wiring was finalized so wires could be appropriately routed. The mounted switch and the associated wiring can be seen in the figure to the left.
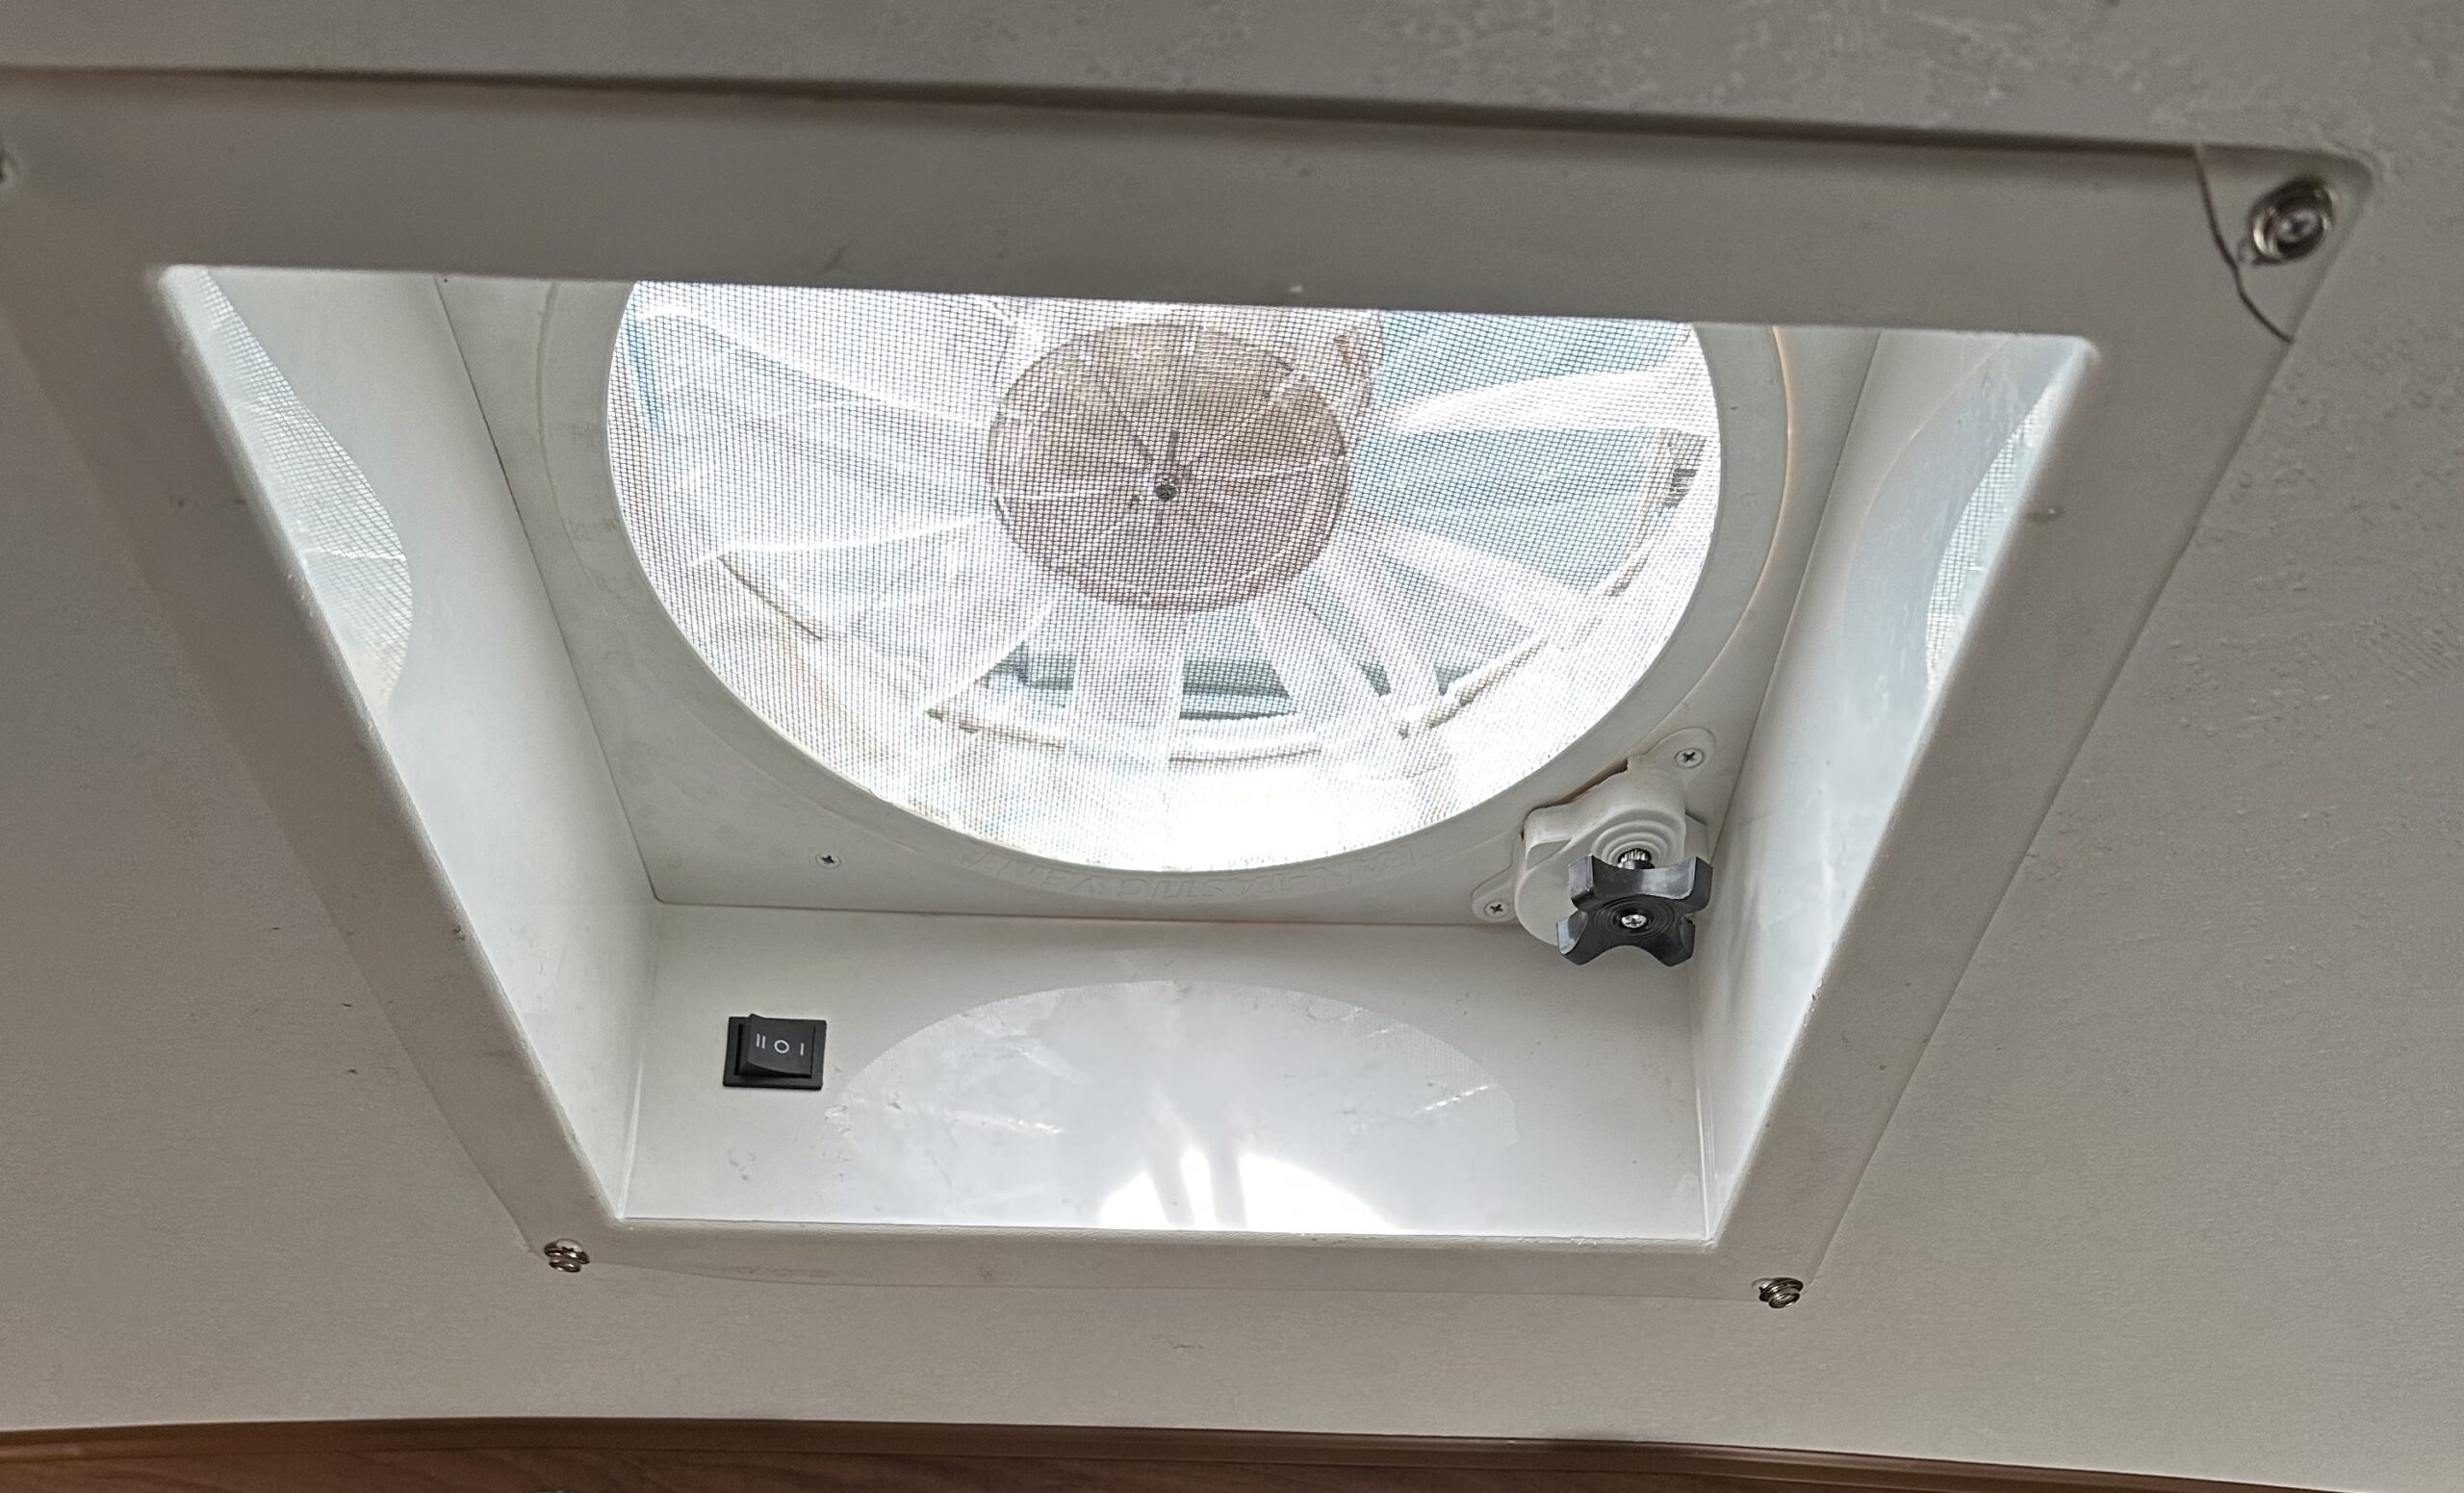
After ensuring everything worked as expected, the wiring was neatly tucked away, and the fan cover and trim were replaced. The final product can be seen in the figure to the right.
With a few connectors, a couple of feet of wire, a $3 switch, and an hour of time, I was able to make my RV fan reversible. The result looks fine, works great, and saves me time and money in the long run.

