
This post is the seventh of an ongoing series of articles documenting and describing our RV electrical upgrade. Our previous post in this series described the original shore power wiring and our improvements. In addition, we discussed a severe flaw that was difficult to find but eventually corrected. In this post, we describe non-power-related improvements to the pass-through storage area. These improvements include thermal insulation and an acquired storage system.
Thermal Insulation
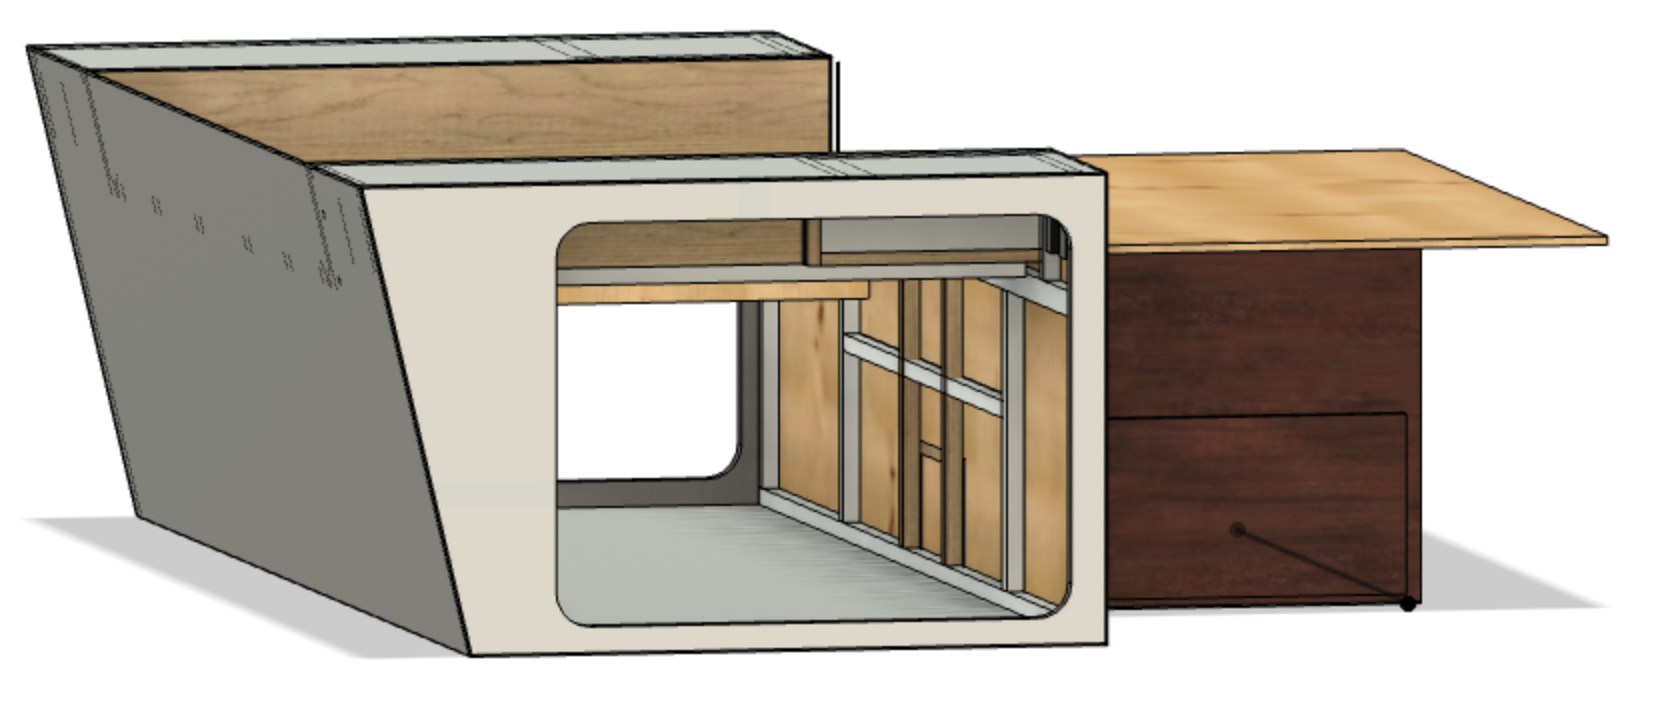
Only thin materials separate the ceiling and rear wall of our pass-through storage area from the bedroom area of our trailer, as illustrated in Figure 1. These materials provide little thermal insulation between the near outdoor conditions of our storage area and our living quarters. During colder weather, the front and top of each nightstand and the sides and bottom of the upper portion of the bed get cold.
Jason Evans‘ post inspired us to mitigate this issue by insulating our pass-through area. Jason reported using R 1.93 insulation panels, while we chose to use R 3.85 panels that offer twice the insulation at, you guessed it, nearly twice the price.
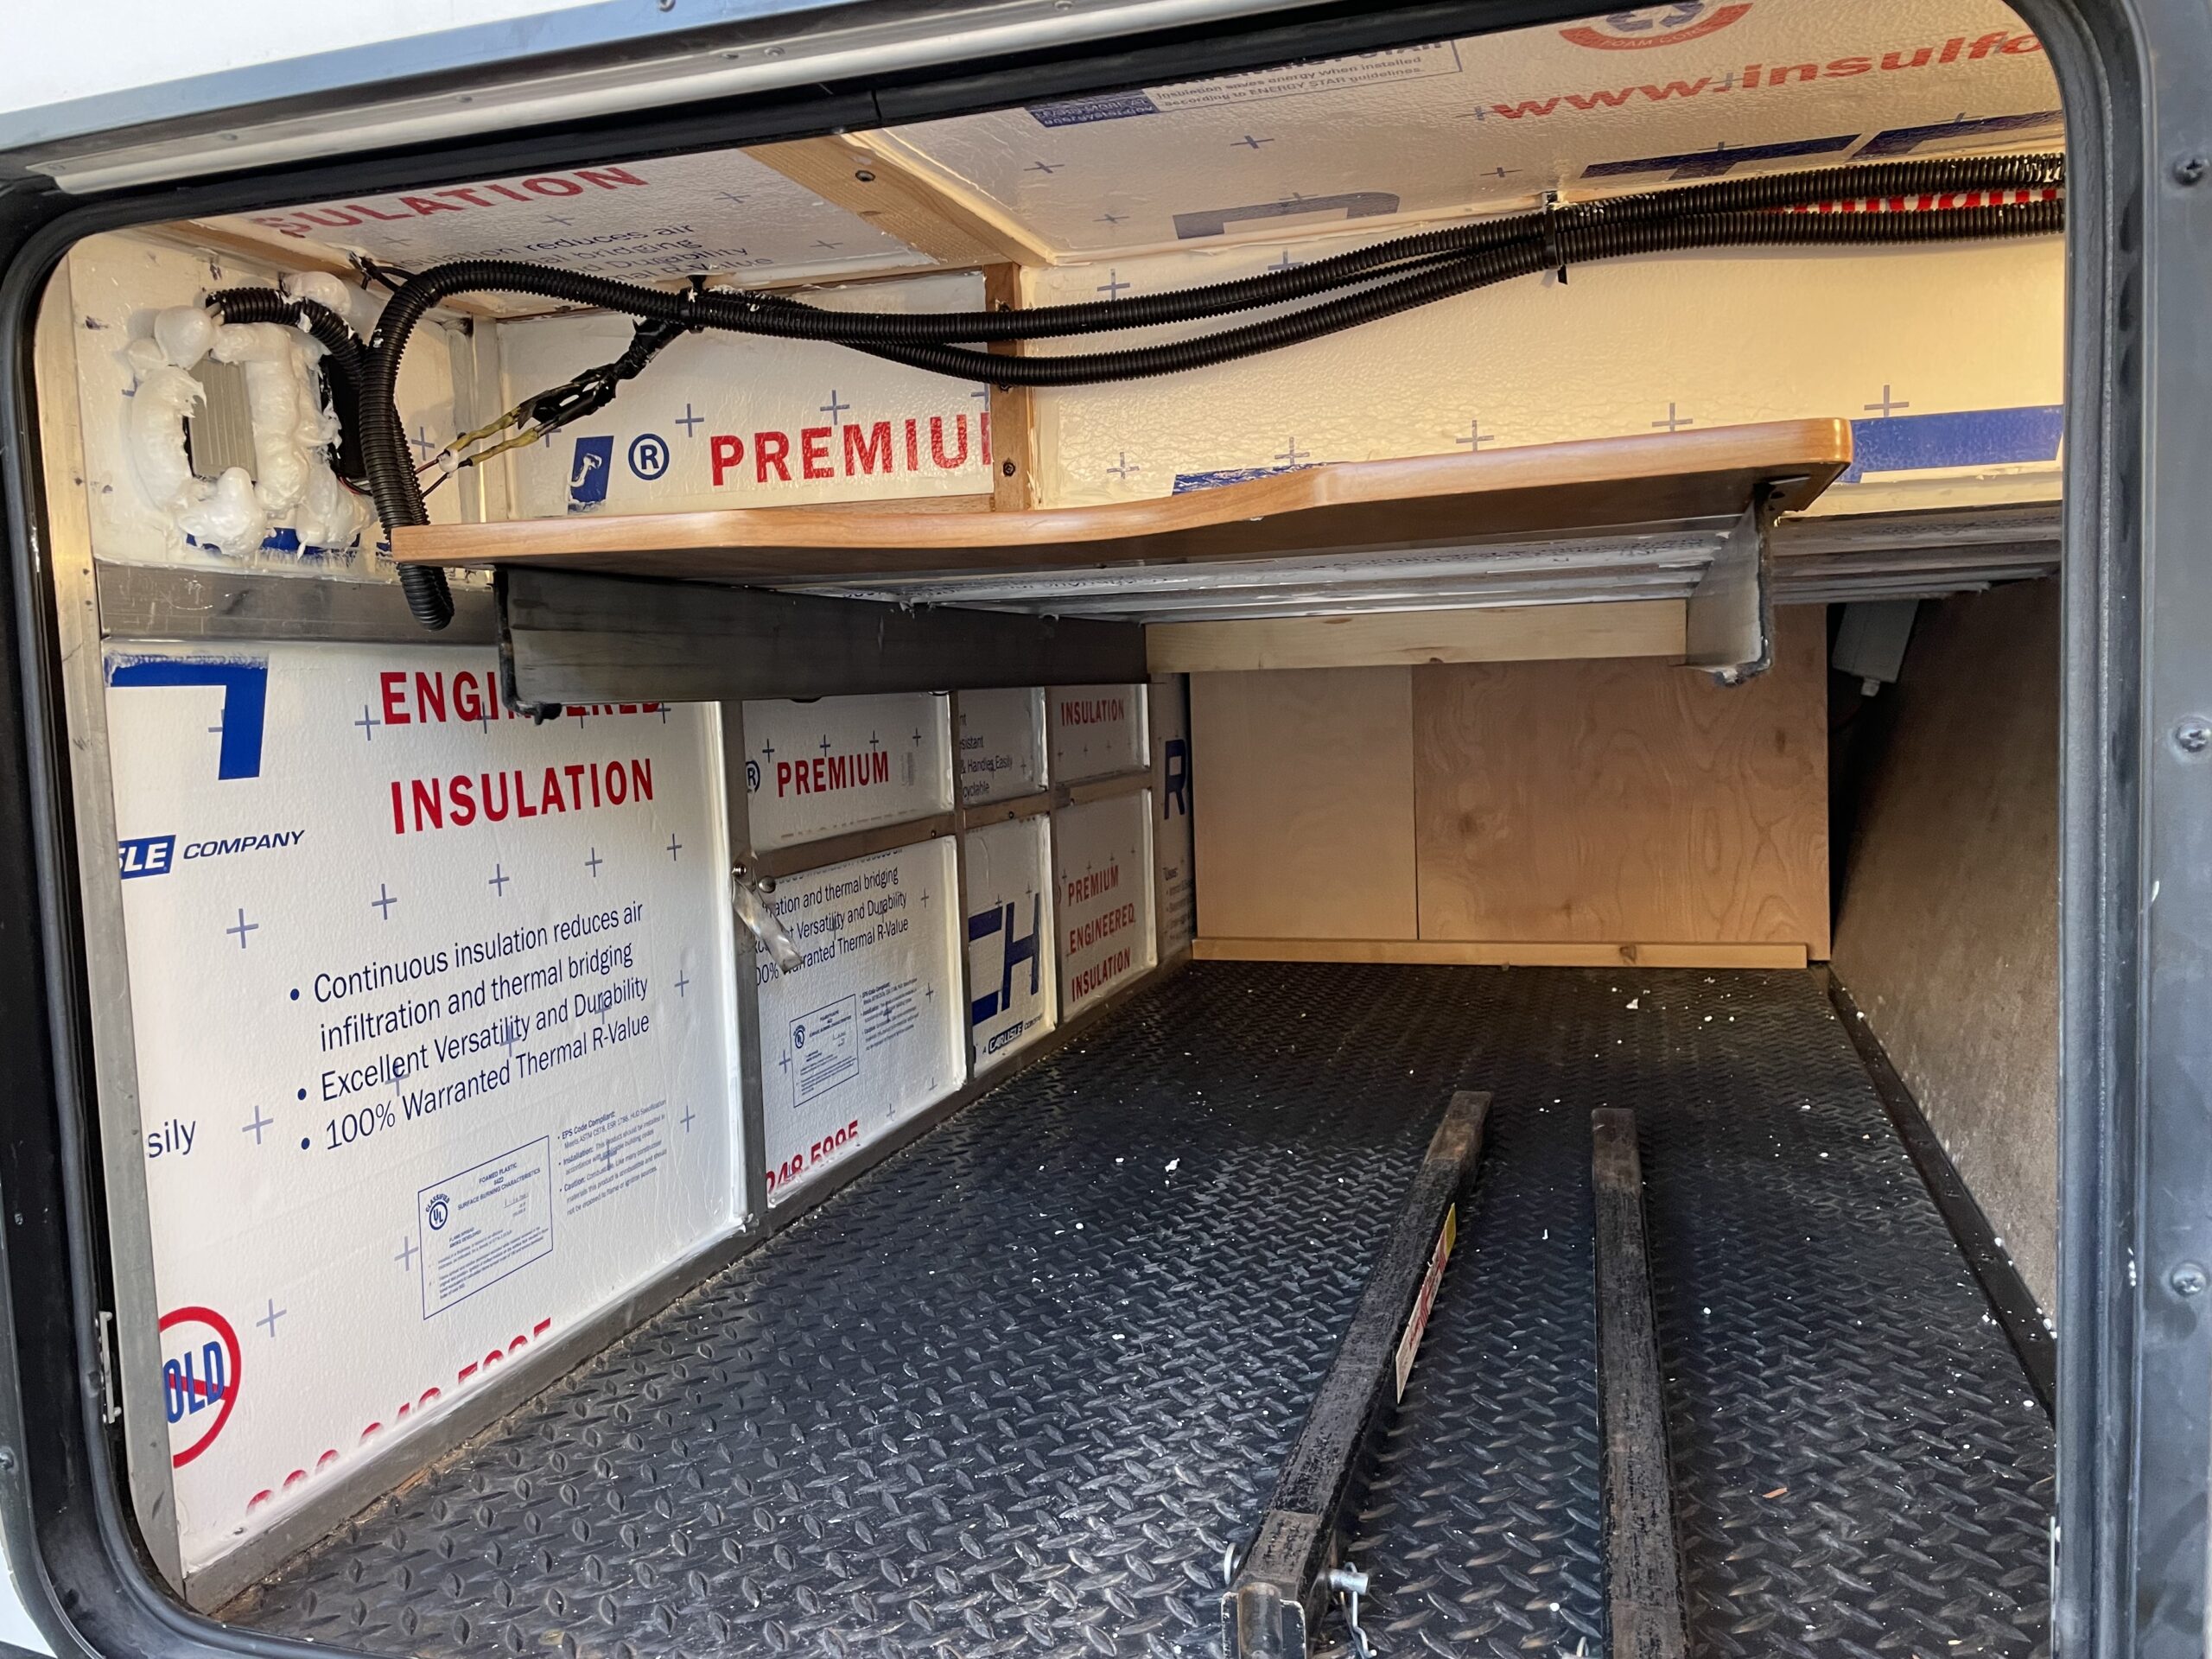
Our space required nearly two 4′ by 8′ sheets of material. First, we used a box cutter and straightedge to subdivide each panel. Then, we gently pushed each piece into position and caulked them to keep them from falling out of place. We thought this was particularly important for those loosely hanging from the storage area ceiling. Figure 2 illustrates the complete installation. We also used expanding foam to seal around the 120 V outlets and USB port outlets on each nightstand. These modifications should help keep the cold and heat out and reduce the noise of our soon-to-be-added inverter/charger.
Sliding Storage Tray
When we built our power center, we inadvertently created a bit of a storage dilemma by adding the wall visible at the far end of the pass-through storage area in Figure 2. As a result, we eliminated easy access to the far end of the nearly 7′ deep remaining storage space accessible only via the remaining hatch. This depth would make it very difficult to get items from the far end of the area.
To facilitate retrieving items from this area, we have acquired a MORryde CTG80-2672-2DW 80% extension cargo tray, illustrated in Figure 3. This tray is 26″ wide and 72″ long, perfectly fitting our space. In addition, the tray walls are 4.3″ tall, and the tray floor comes pre carpeted. The structure bolts to the bottom of our storage area, and the tray rides on heavy-duty roller bearings and can support 500 pounds of gear. Working on electrical wiring in that area is now simple. I pull out the cargo tray, lay on it with my tools, and pull myself in.
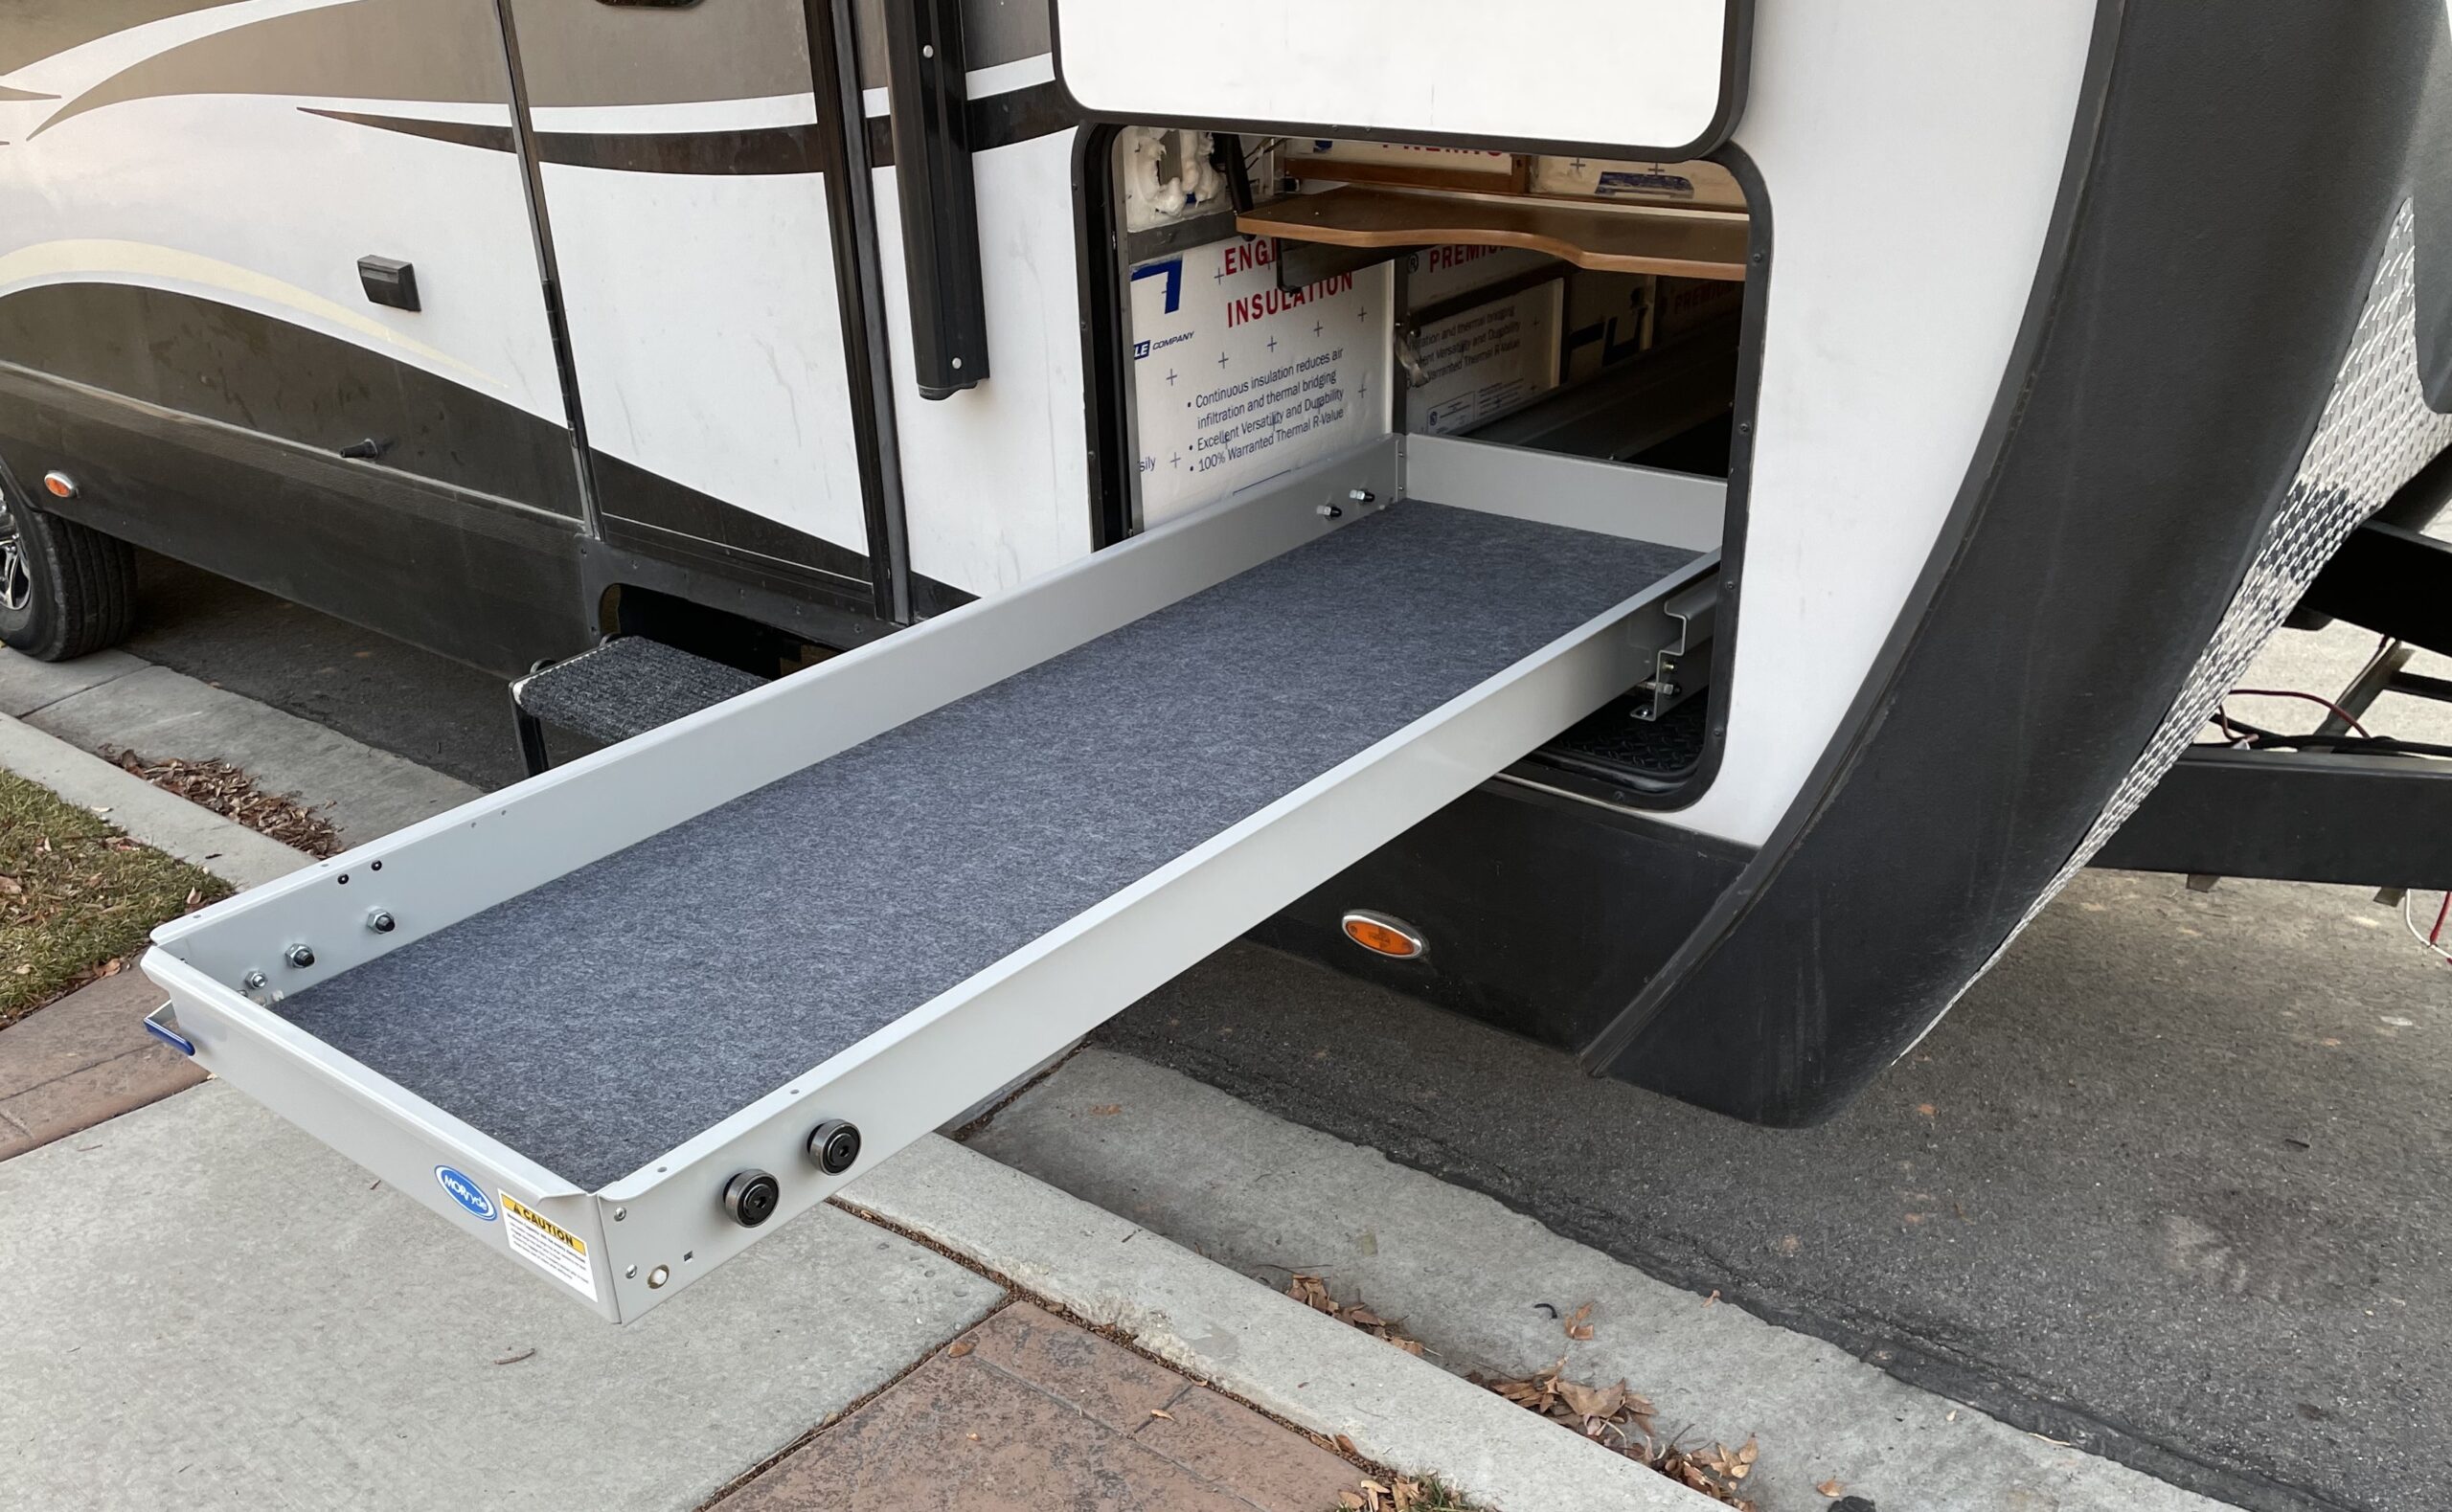
MORryde offers 60% extension trays that only move in one direction, and while they support heavier loads, they also cost a bit more than the 80% extension trays. The 80% MORryde extension trays are intended to slide in both directions, but we won’t use this feature in our application. With the tray extended to 80% of its length, as illustrated in Figure 3, little of the tray remains within the storage space, making the extraction of items simple. Less drawer would stay within the storage space in some installations, but we chose to set ours back from the door nearly 8 inches (see Figure 4).
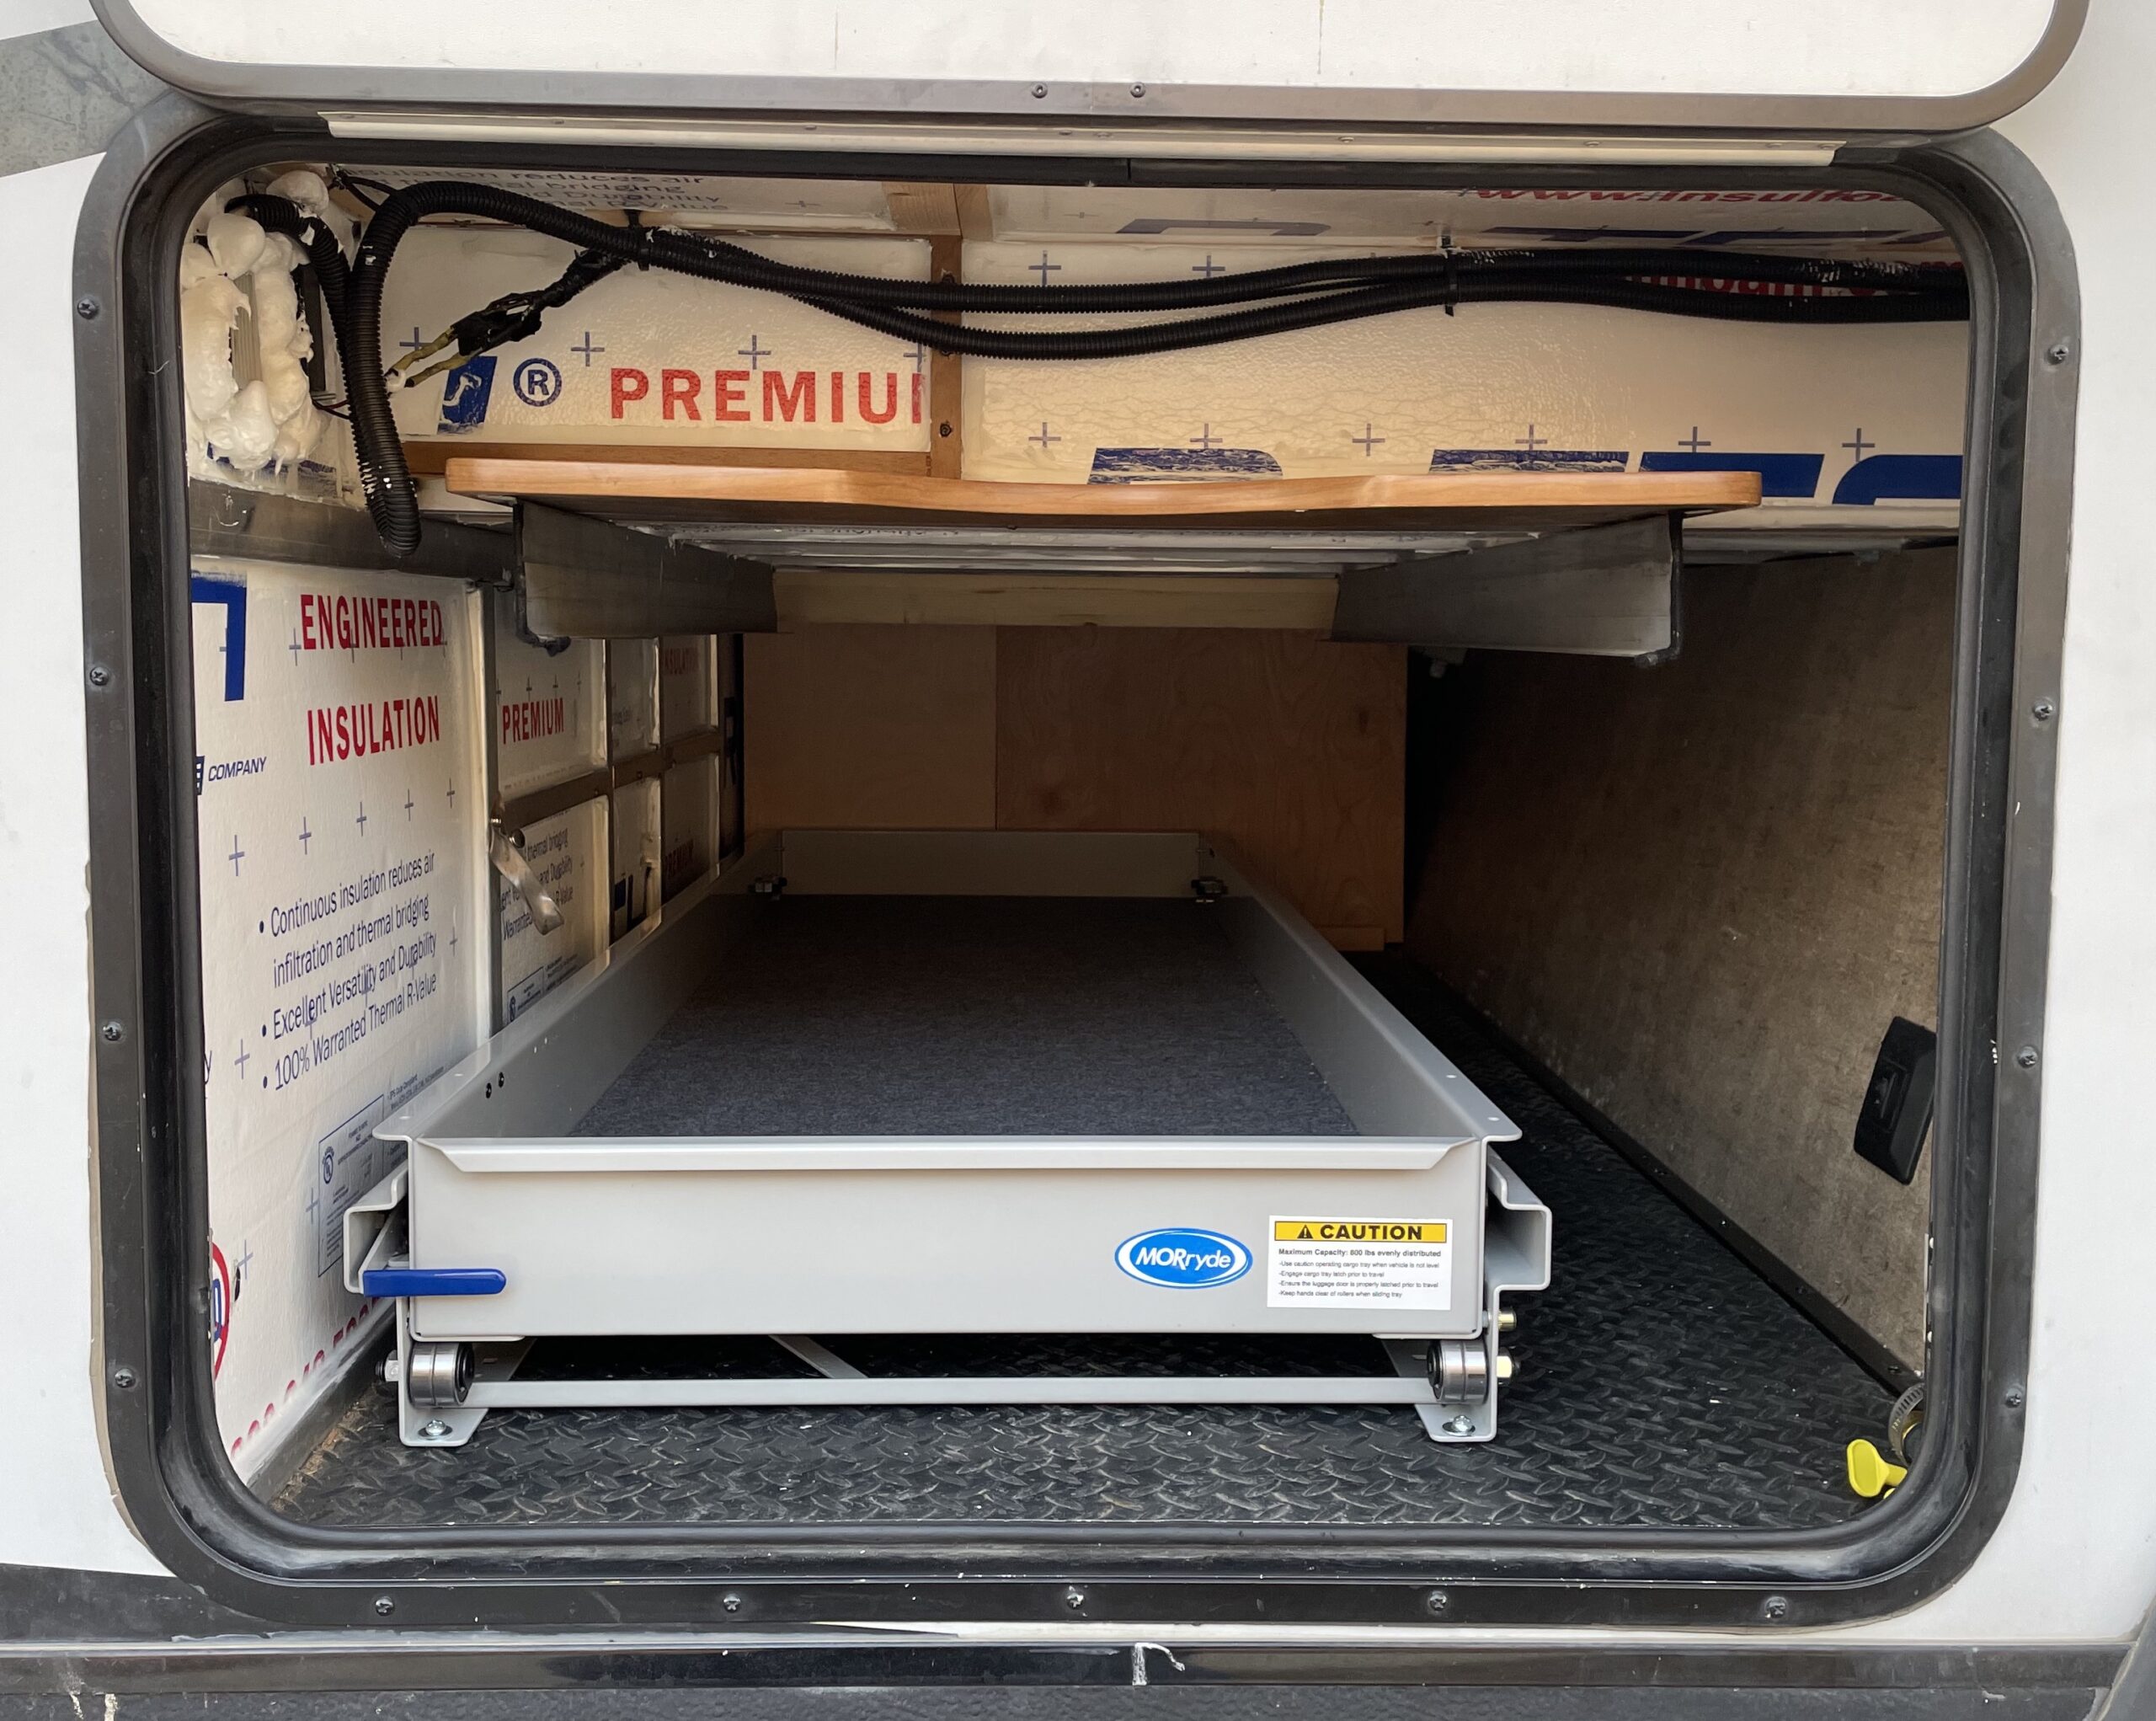
Another nice feature of the MORryde cargo trays is that they lock into place when stowed away. It is a simple matter to lift the blue handle on the unit’s left while pulling the tray out. When you push the tray back in, it locks in place. Figure 4 also illustrates how we chose to mount our tray towards the rear of the RV to leave space for long items we don’t often access. We’ll also take advantage of the wall space to the left and right of the tray for hanging light and narrow items such as axes, hammers, jack handles, etc. While this is an unexpected additional cost to our power upgrade project, it will create a better storage experience.
Summary
This one was the most obvious and straightforward of all the projects we’ve tackled thus far. We cut some foam to size, put it in place, caulked the seams, and installed a pre-constructed cargo tray. Frankly, it was refreshing to begin a project with few unknowns, with an obvious list of steps to accomplish, and resulting in an end product that will add value to our camping experience.