
This post is the fifth of an ongoing series of articles documenting and describing our RV electrical upgrade. Our previous post in this series described creating the physical space for our power center, initial wiring, and solar upgrades. In this post, we describe the Victron Energy Lynx Distributor and a minor modification we made to it to meet our needs better.
Victron Lynx Distributor
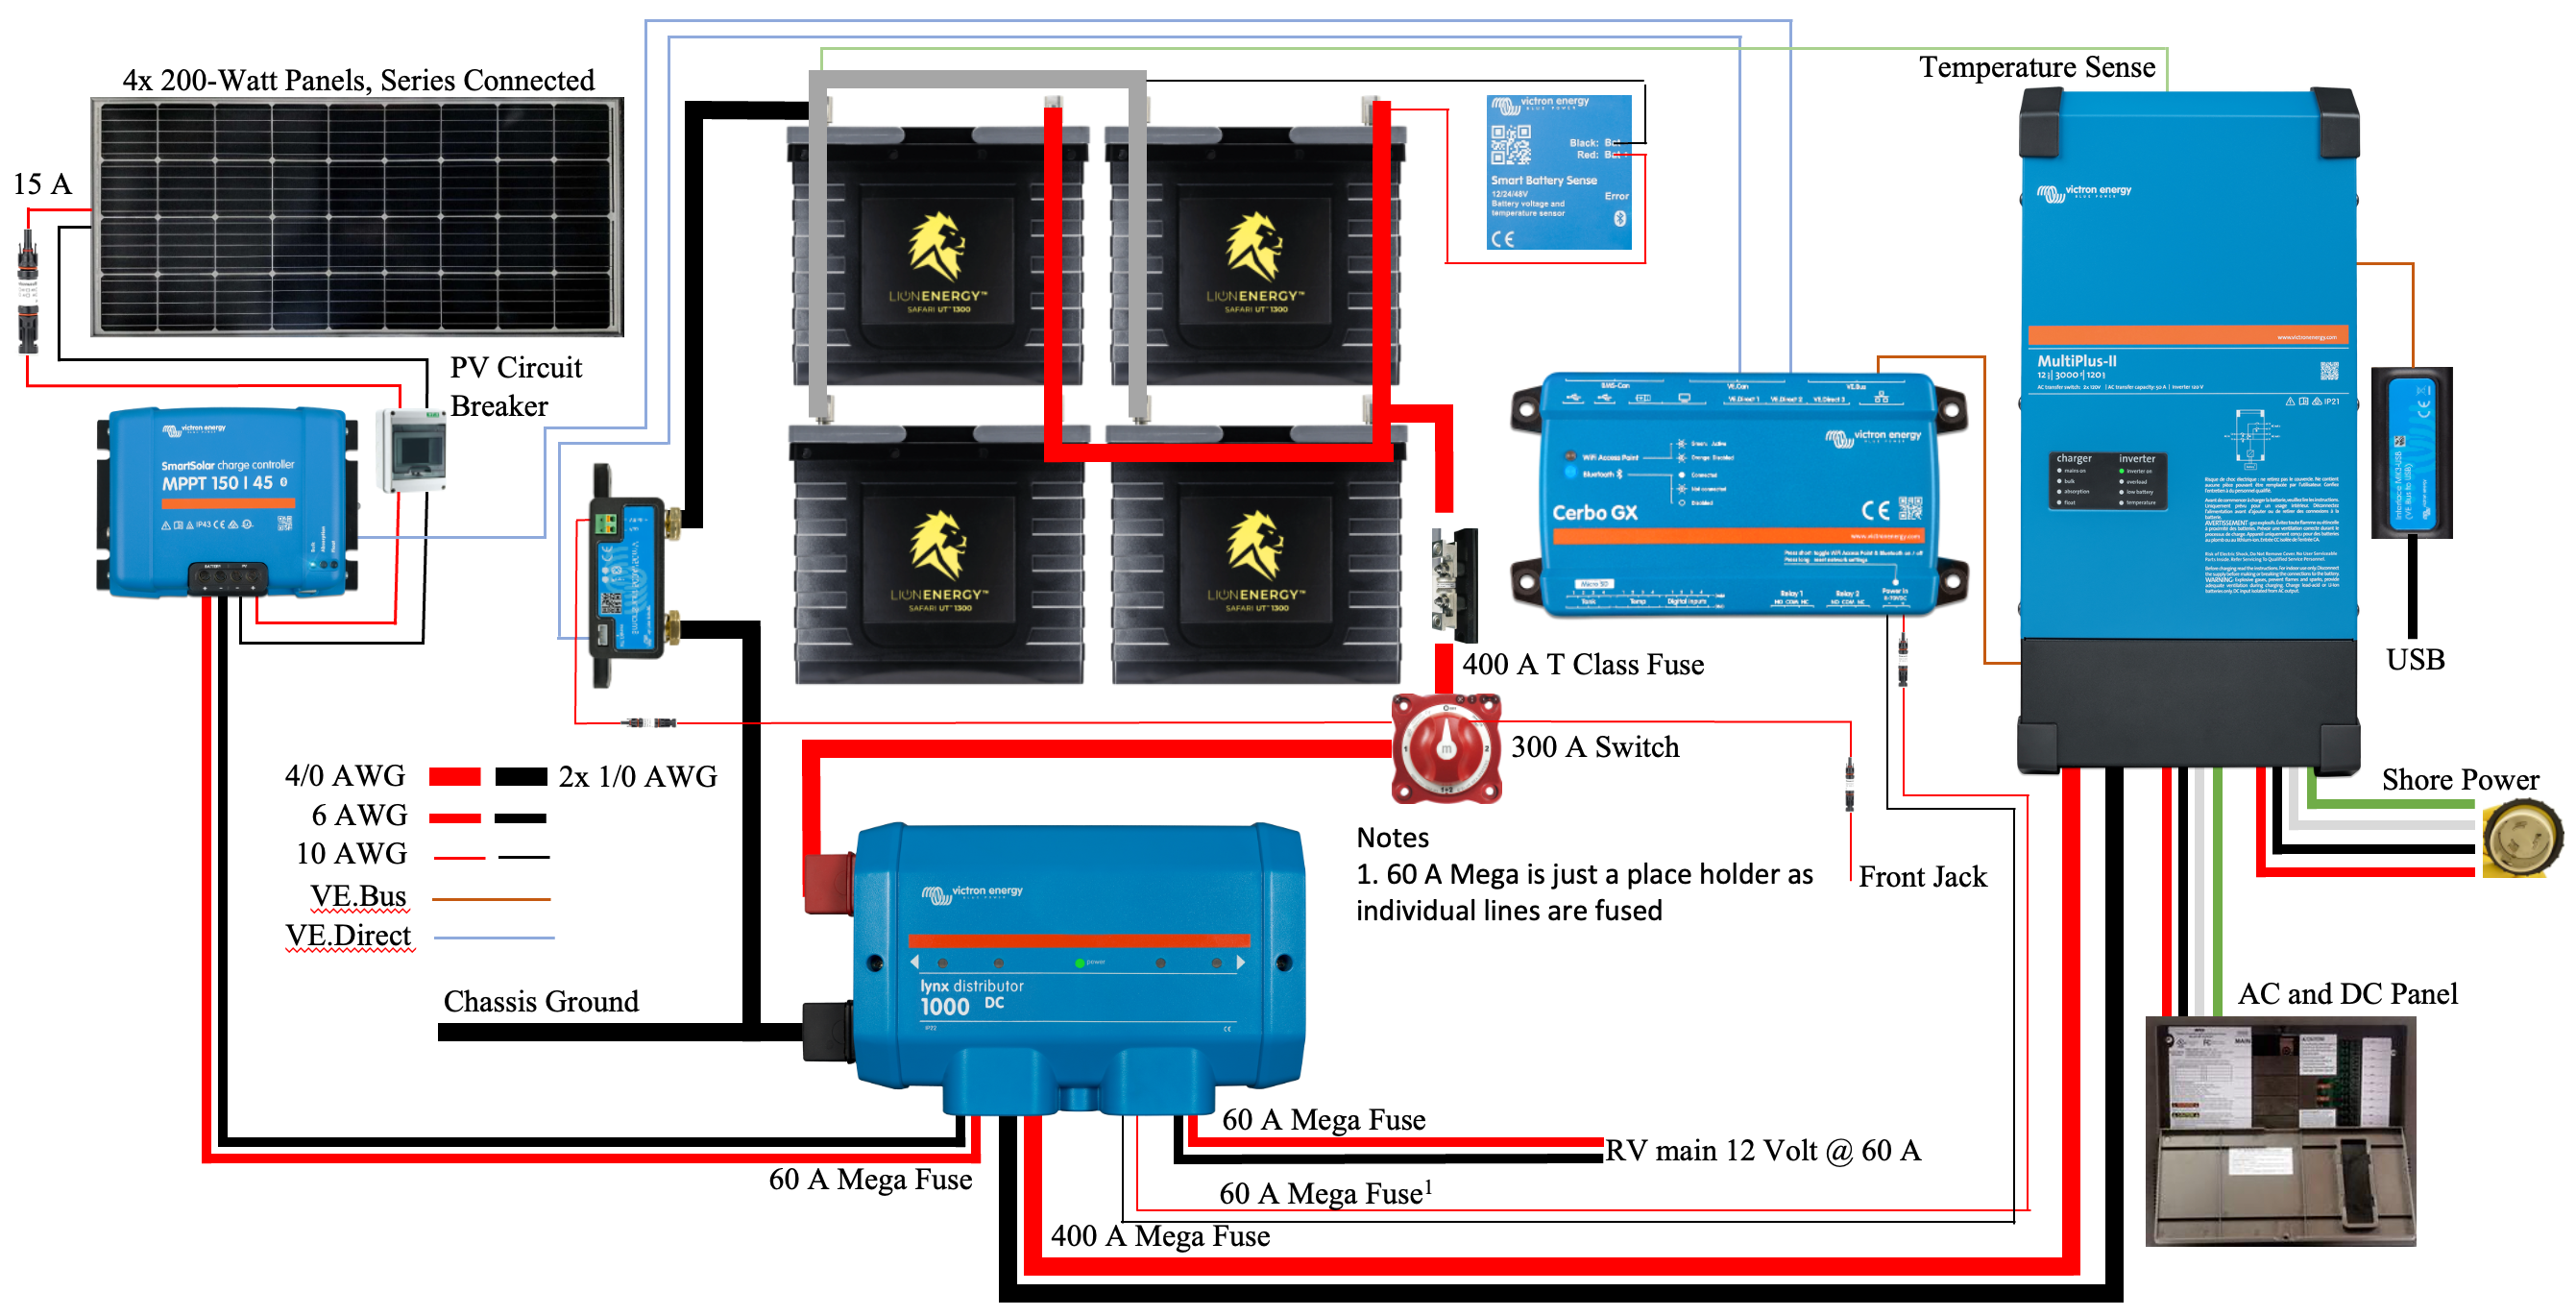
Figure 1 illustrates the schematic of our power center design using a 12 V battery bank. Our 24 V design is very similar, and the differences are irrelevant to our present discussion regarding the Lynx Distributor shown in the lower center of the figure.
Victron describes the Lynx Distributor as “A modular DC busbar, with locations for four DC fuses. It will monitor the status of each fuse, and indicate its condition with a LED on the front”. The Lynx Distributor is one of four Victron components for power distribution:
- Lynx Smart BMS
- Lynx Distributor
- Lynx Shunt VE.Can
- Lynx Power In
See Victron Energy’s website for a complete description of each component with associated datasheets, manuals, certification, etc.
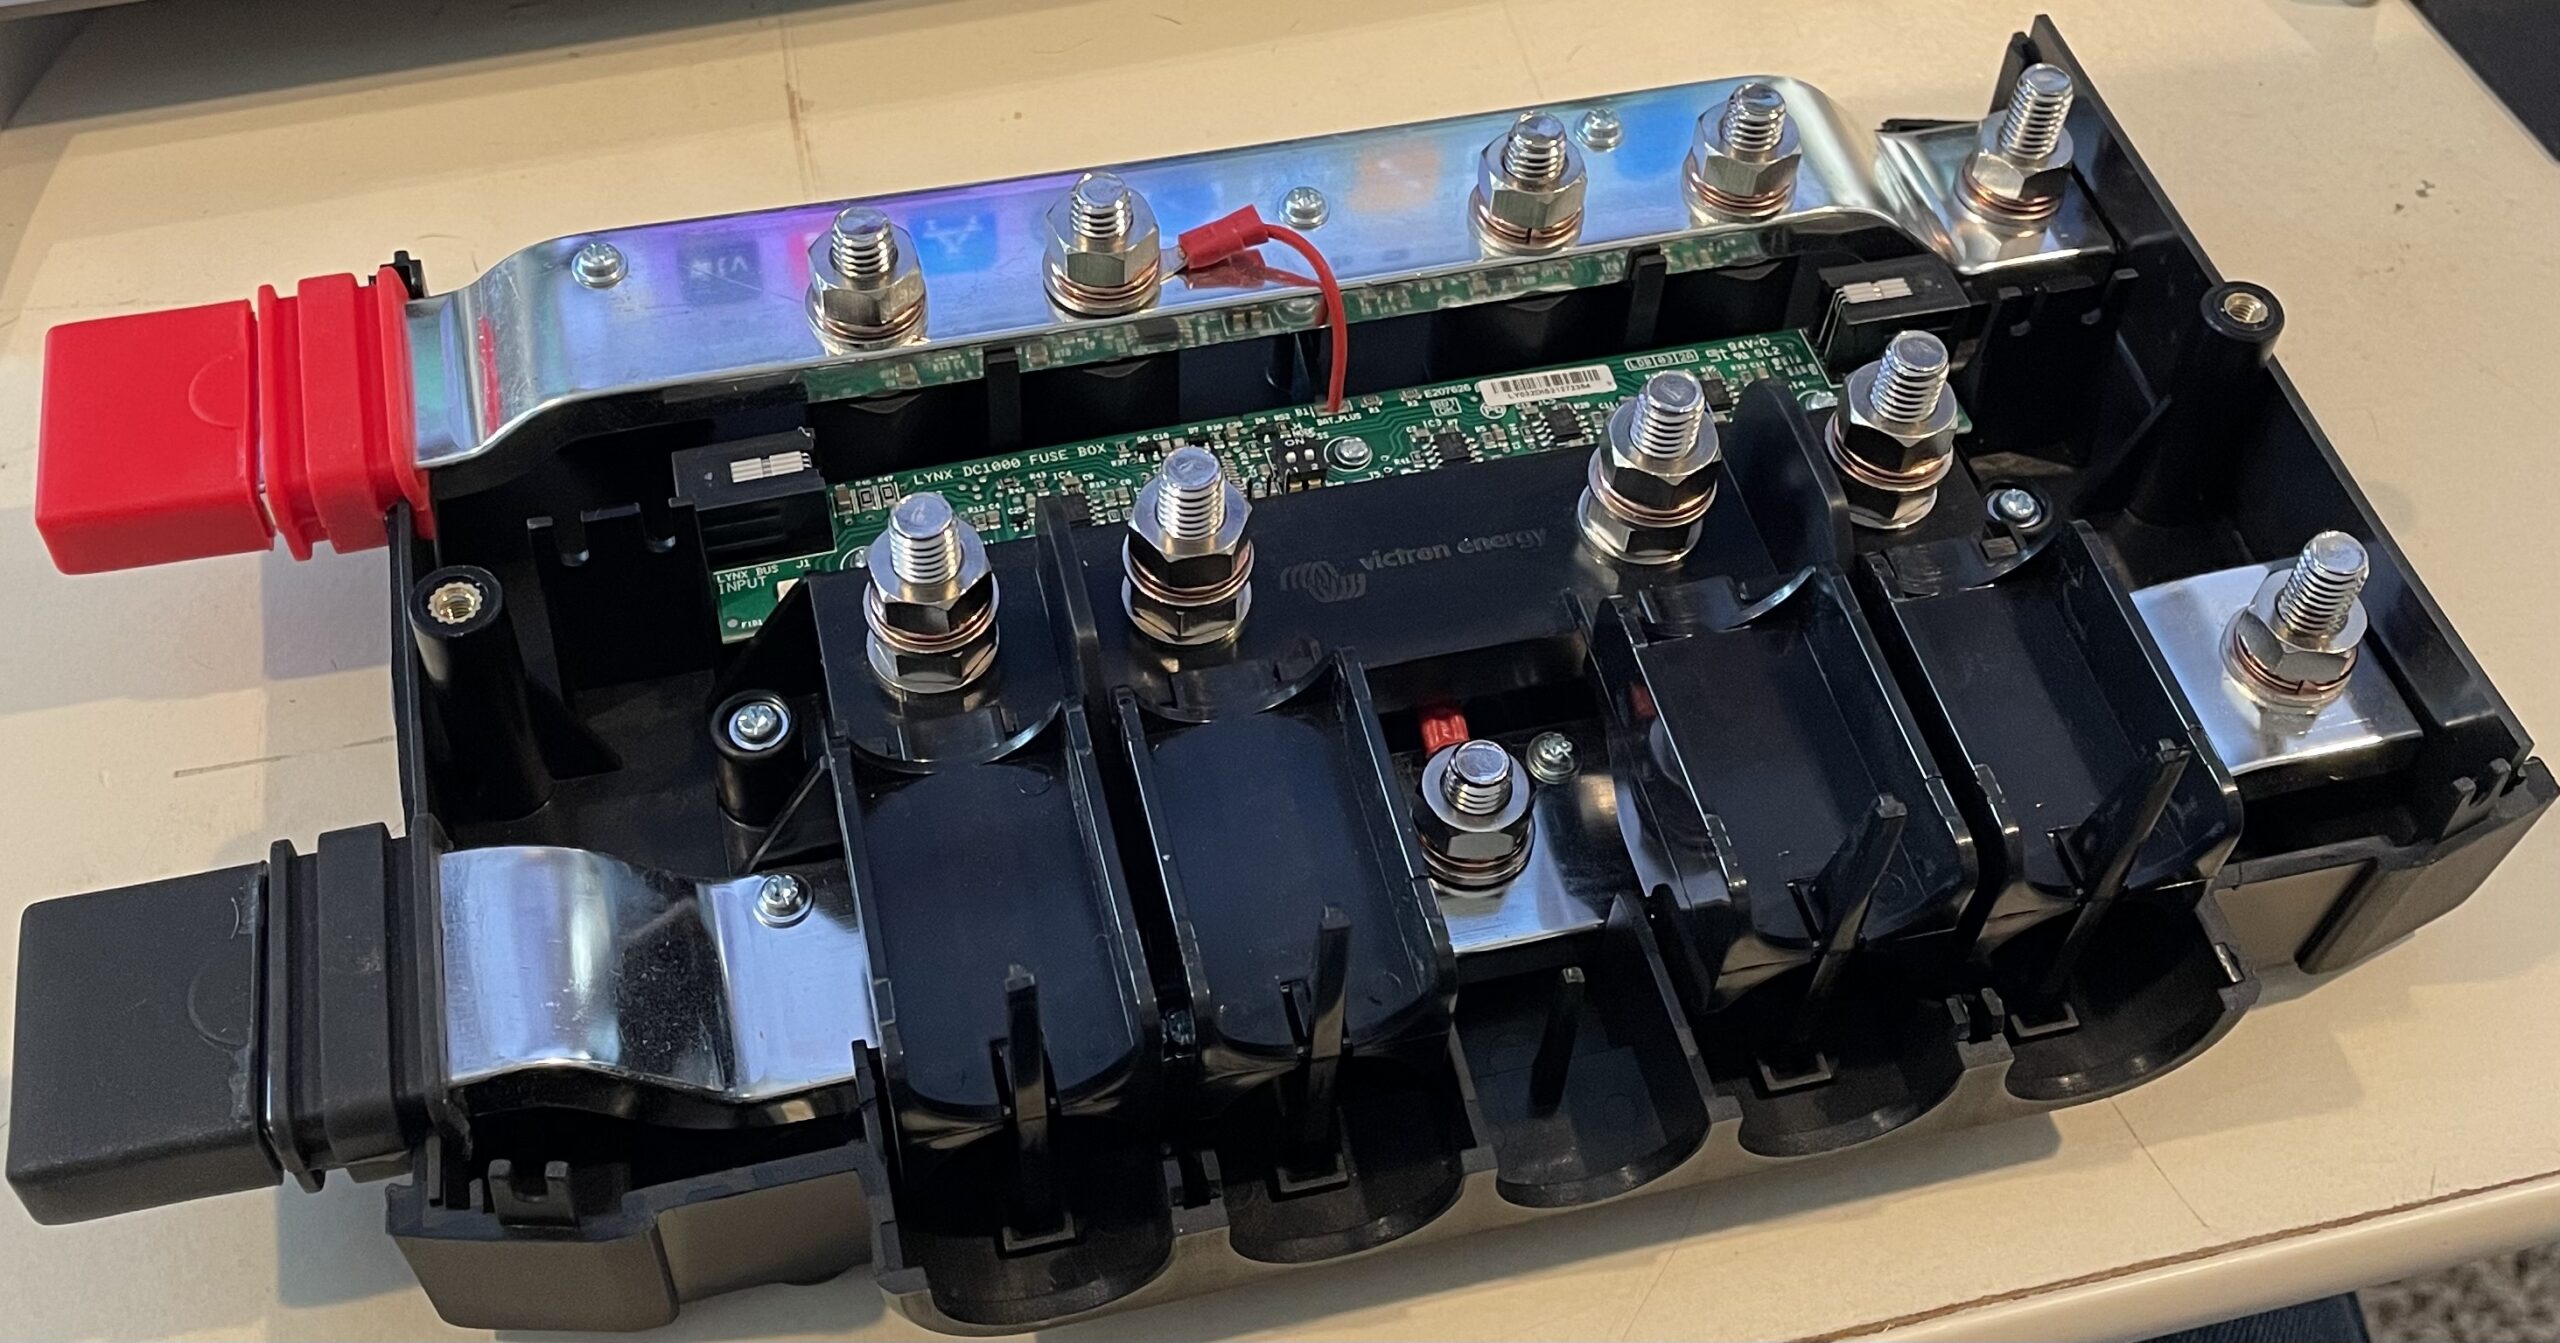
We’ve chosen to use a Lynx Distributor in place of a couple of independent busbars and fuse holders that would otherwise be required. These items are conveniently packaged in the Lynx Distributor, as shown in Figure 2. The cost of separate components is close to the price of the Lynx Distributor, but using the Lynx Distributor should result in a clean, professional-looking result.
Our schematic diagram shows that the Lynx Distributor connects to the battery bank via the disconnect switch and SmartShunt. The Lynx Distributor then distributes power to our inverter/charger, our solar charge controller, and the RV 12 V systems or, in the case of our 24 V design, to a 24 V to 12 V DC to DC converter. Mega fuses, housed within the Lynx Distributor, will protect the wiring between the Lynx Distributor and each of the connected loads.
The Lynx DIstributor can report fuse status via its front panel LEDs if it is connected to a Lynx Smart BMS or a Lynx Shunt VE.Can. We don’t have either of these devices planned for our system. The following section describes how we provided power to the Lynx Distributor circuit board to enable the fuse monitoring feature.
Lynx Distributor Hack
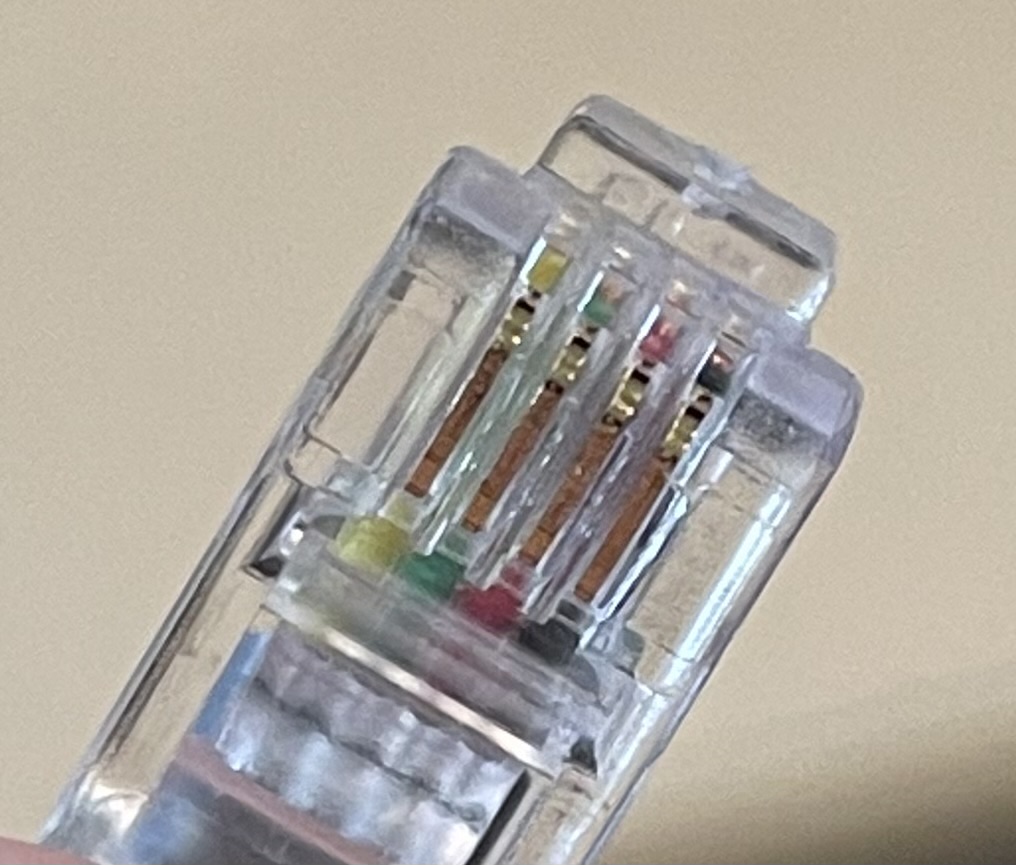
Nate Yarbrough produced a great video describing this hack to enable the lights on the front of a Lynx Distributor without having a Lynx Smart BMS or a Lynx Shunt VE.Can in your system. Victron expects this feature to be enabled by connecting the Lynx Distributor to these other devices with the included cable terminated with RJ-11 jacks. However, the Victron manual for the Lynx Distributor indicates which two of the four lines in the RJ-11 terminated wire are needed to power the device. Victron indicates that the device needs 5 V on pin 1, the yellow wire, and ground on pin 4, the black wire. So the task at hand is to generate 5 V from our available source of either 12 V or 24 V and provide it via an RJ-11 connector.
Fortunately, Victron supplies a cable terminated on both ends with an RJ-11 connector. We cut this cable roughly in half, stripped back the outer covering, cut off the two unneeded wires, and stripped the remaining yellow and black wire in preparation for their connection to a 5 V source.

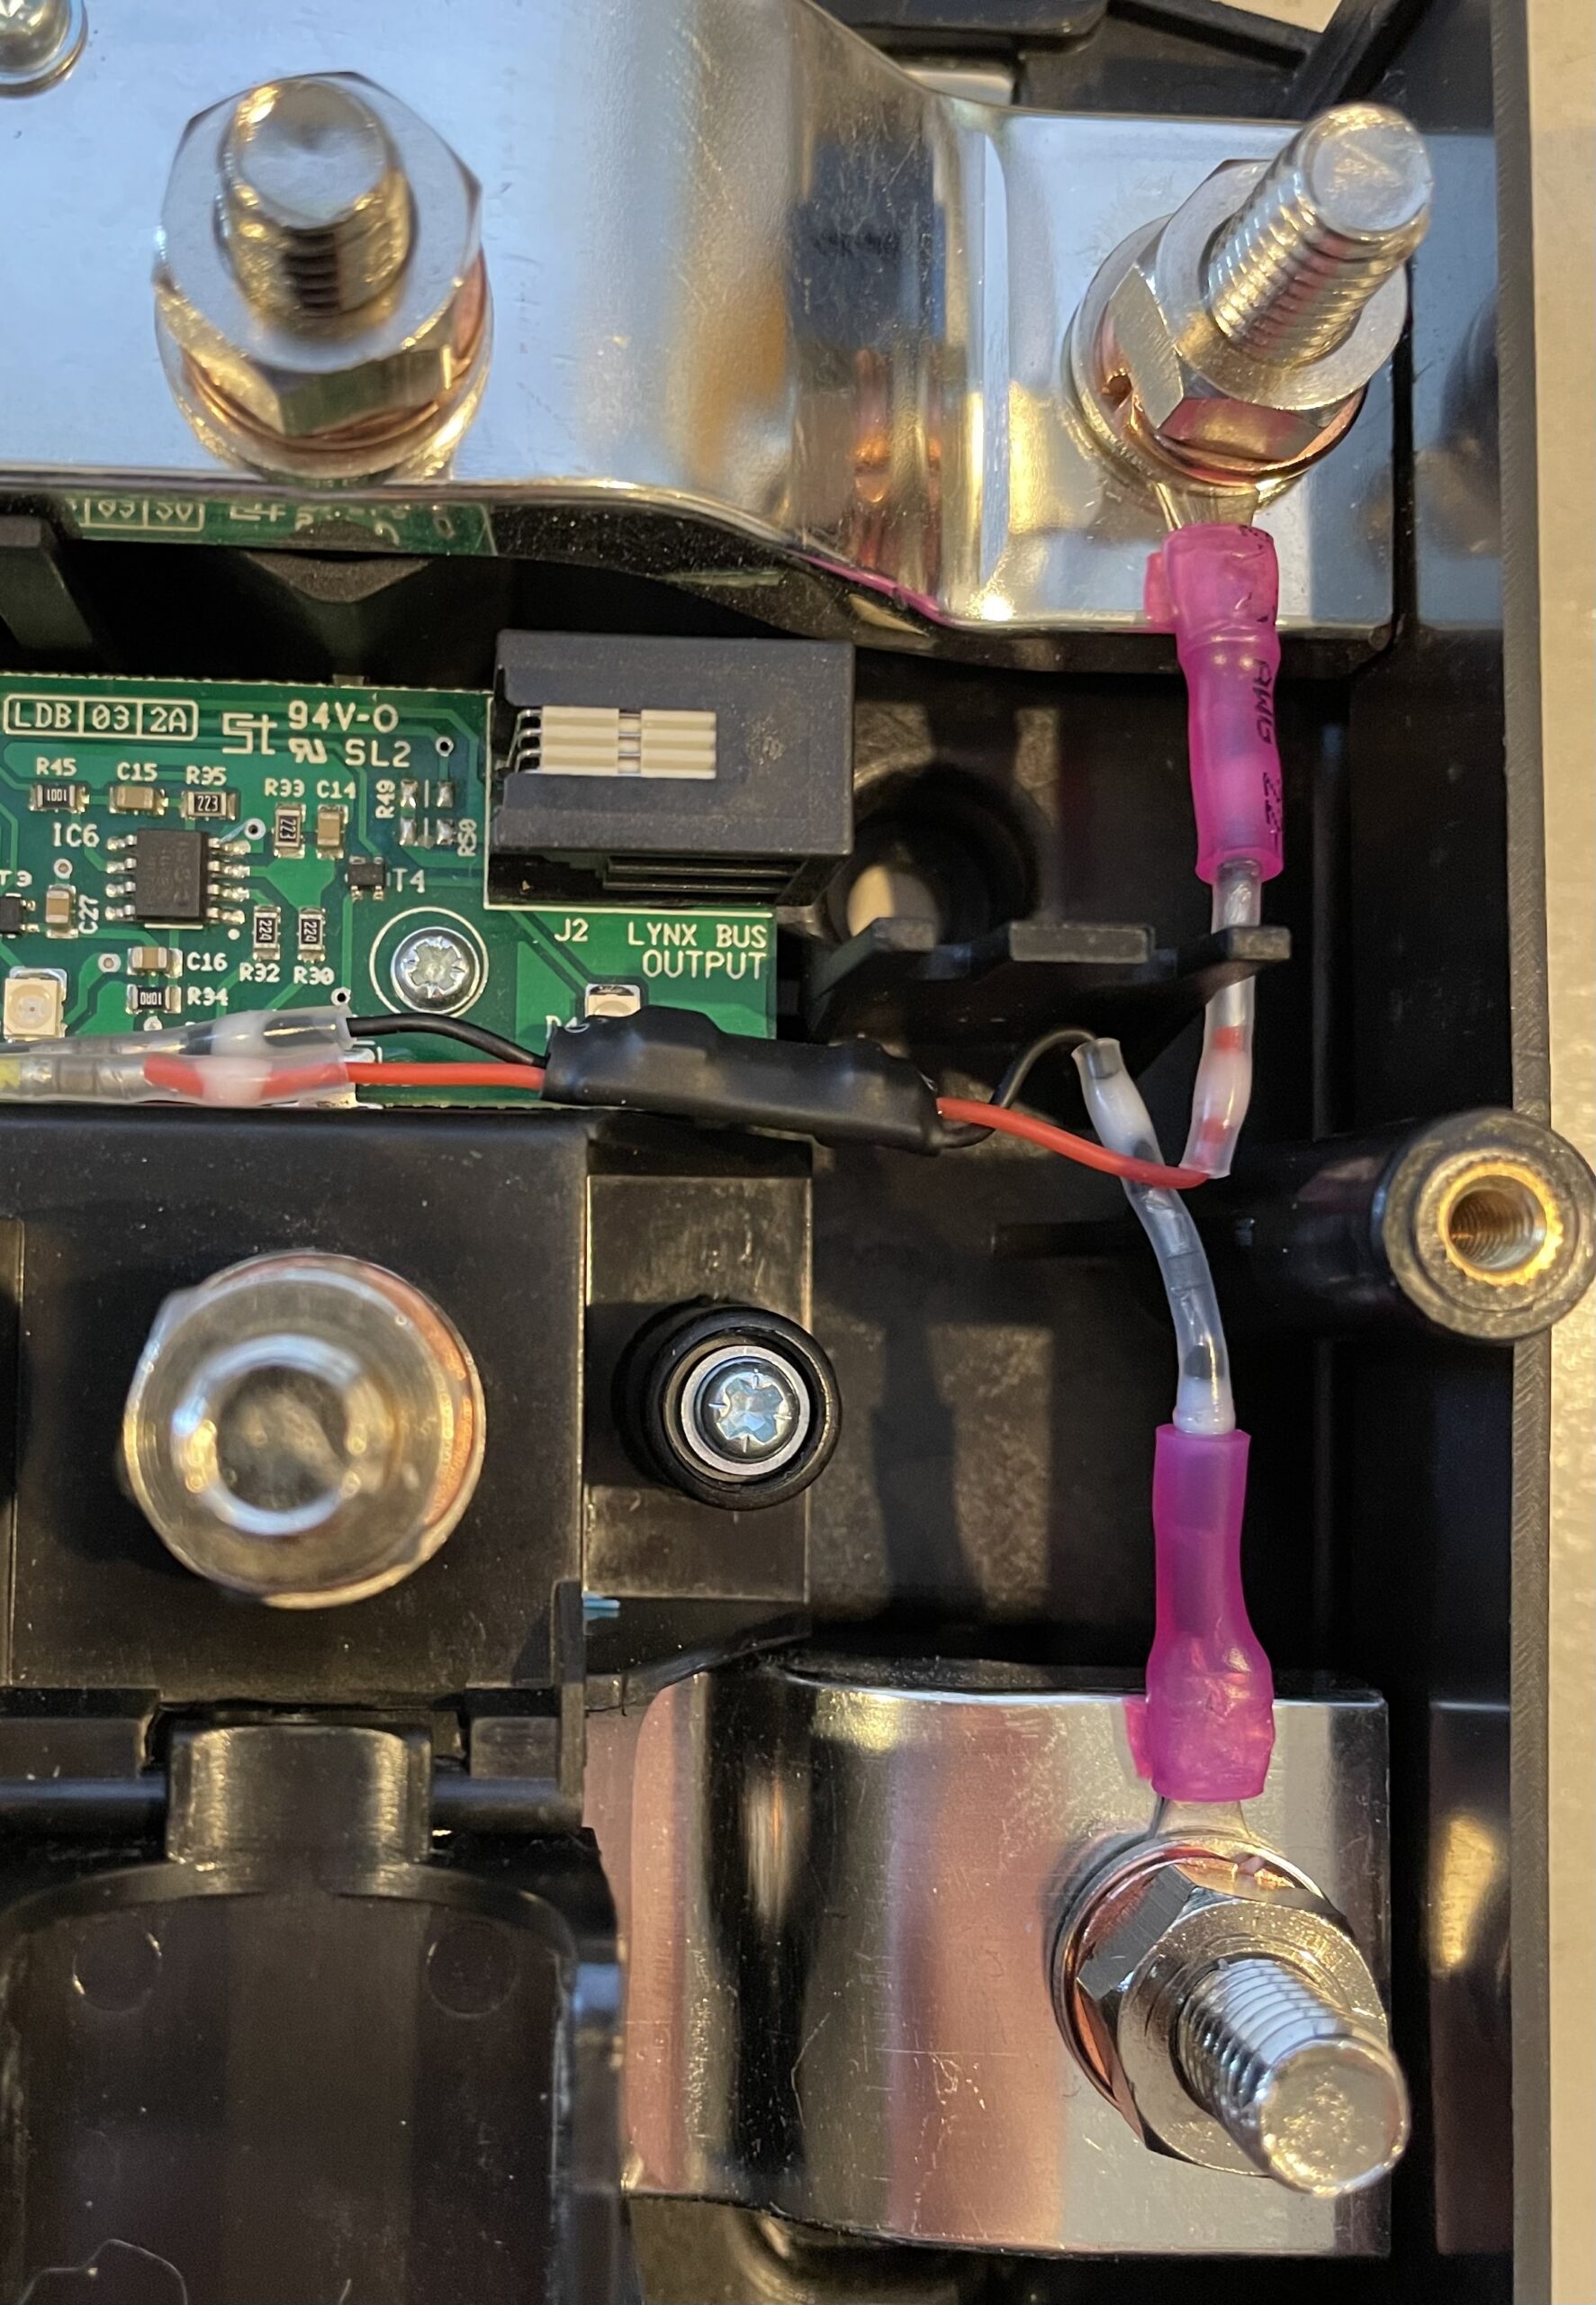
We chose to use a tiny 24 V to 5 V step-down regulator, available here. Four of these devices were approximately $12. They come with wires and connectors attached and covered with heat shrink tubing. It was a simple matter to connect the outputs of this device to the RJ-11 wires and the inputs to two M8 wire lugs, see Figure 3. We then inserted the RJ-11 plug into the Lynx DIstributor and bolted the wire lugs to the busbars where additional Lynx devices could be attached, see Figure 4.
These devices were advertised as 24 V ready, but we wanted to ensure they would handle the voltages in our eventual system. We tested them briefly by applying a voltage source to the Lynx Distributor busbars ranging from approximately 6 V to 30 V. The LEDs continued to function over this entire range. We don’t expect our Lynx Distributor to see voltages outside of this range. If your design operates at 36 V or 48 V, you will need to find an alternative voltage regulator.
Many techniques, devices, and components could be used to accomplish this modification. However, our approach was straightforward. For convenience, we have included a list of the items that we used:
Summary
We will use the Victron Lynx Distributor in our power center to yield the functionality of two 1000 A busbars and four Mega fuse holders in an attractive and safe form factor. We discussed a modification to the Lynx Distributor so we can take advantage of the fuse monitoring capability. Finally, we pointed out a few of the devices we used for this project that we have found helpful many times.