This is the tenth and last post describing our RV power system. Our previous post described the final design and some of its characteristics. This post summarizes the system’s performance on our first overnight outing. First, for convenience, we briefly describe the final system. Next, we describe our outing and associated conditions and finally explain the system’s performance.
Final System
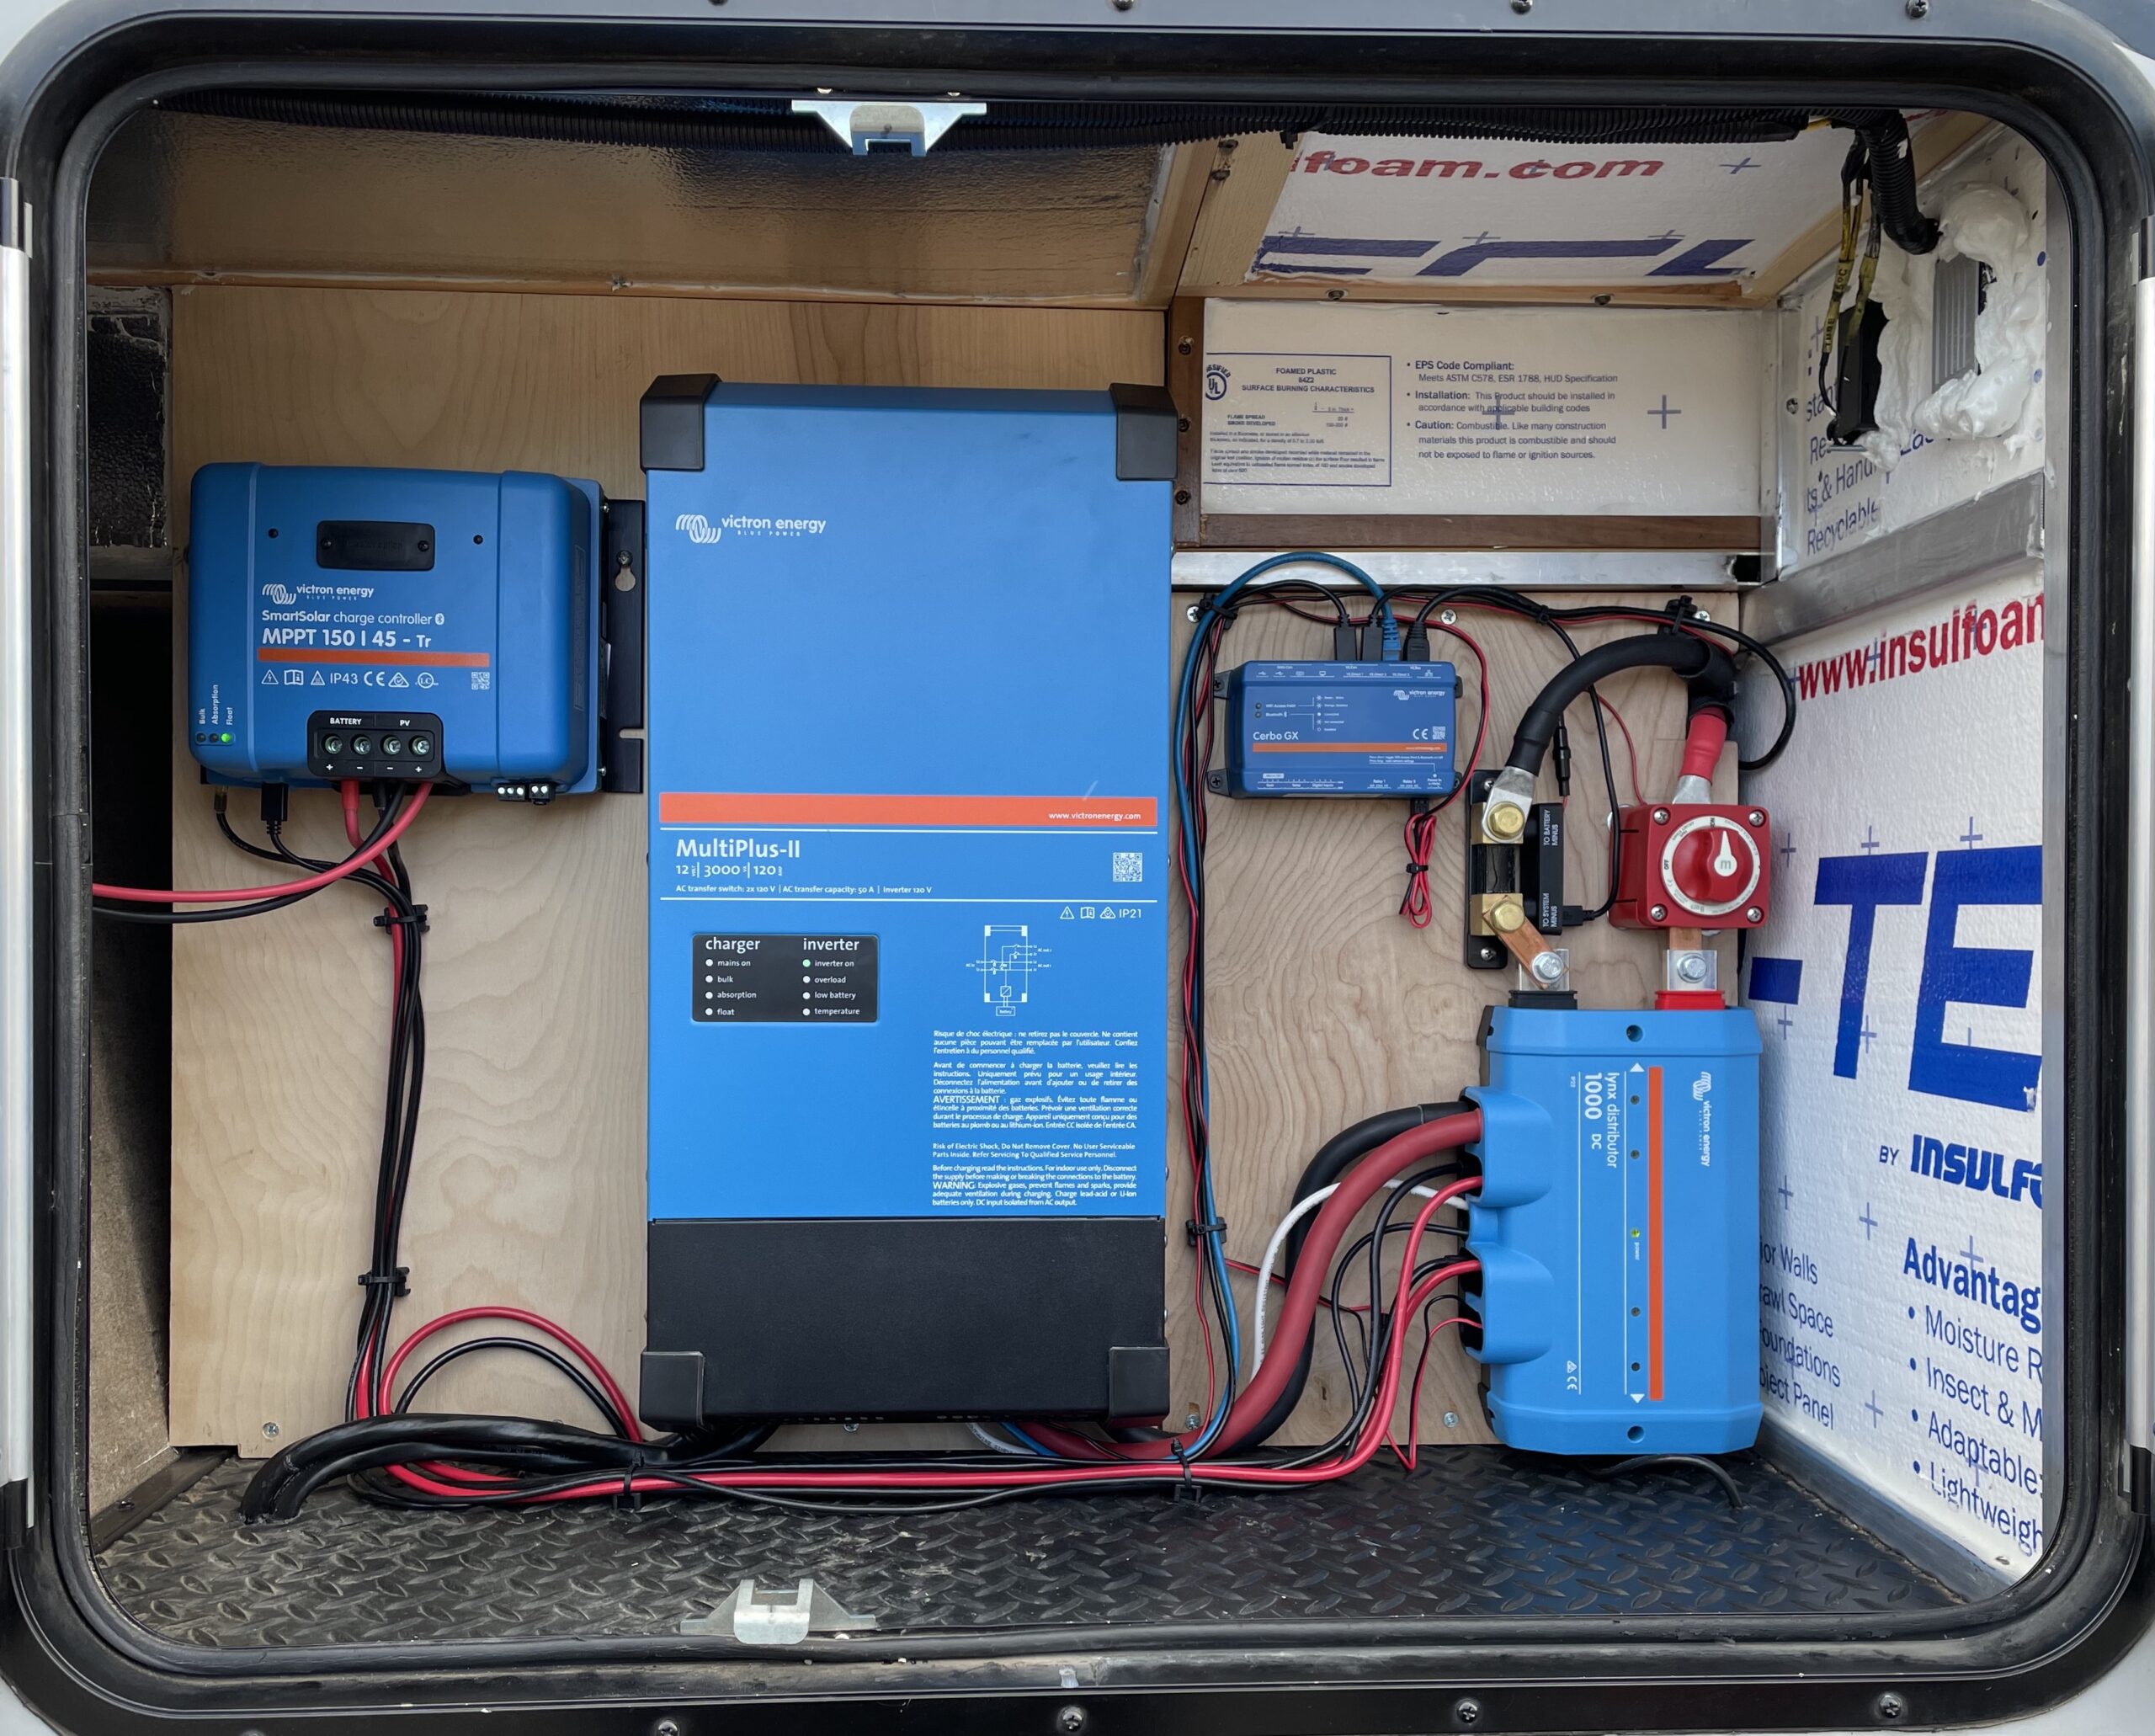
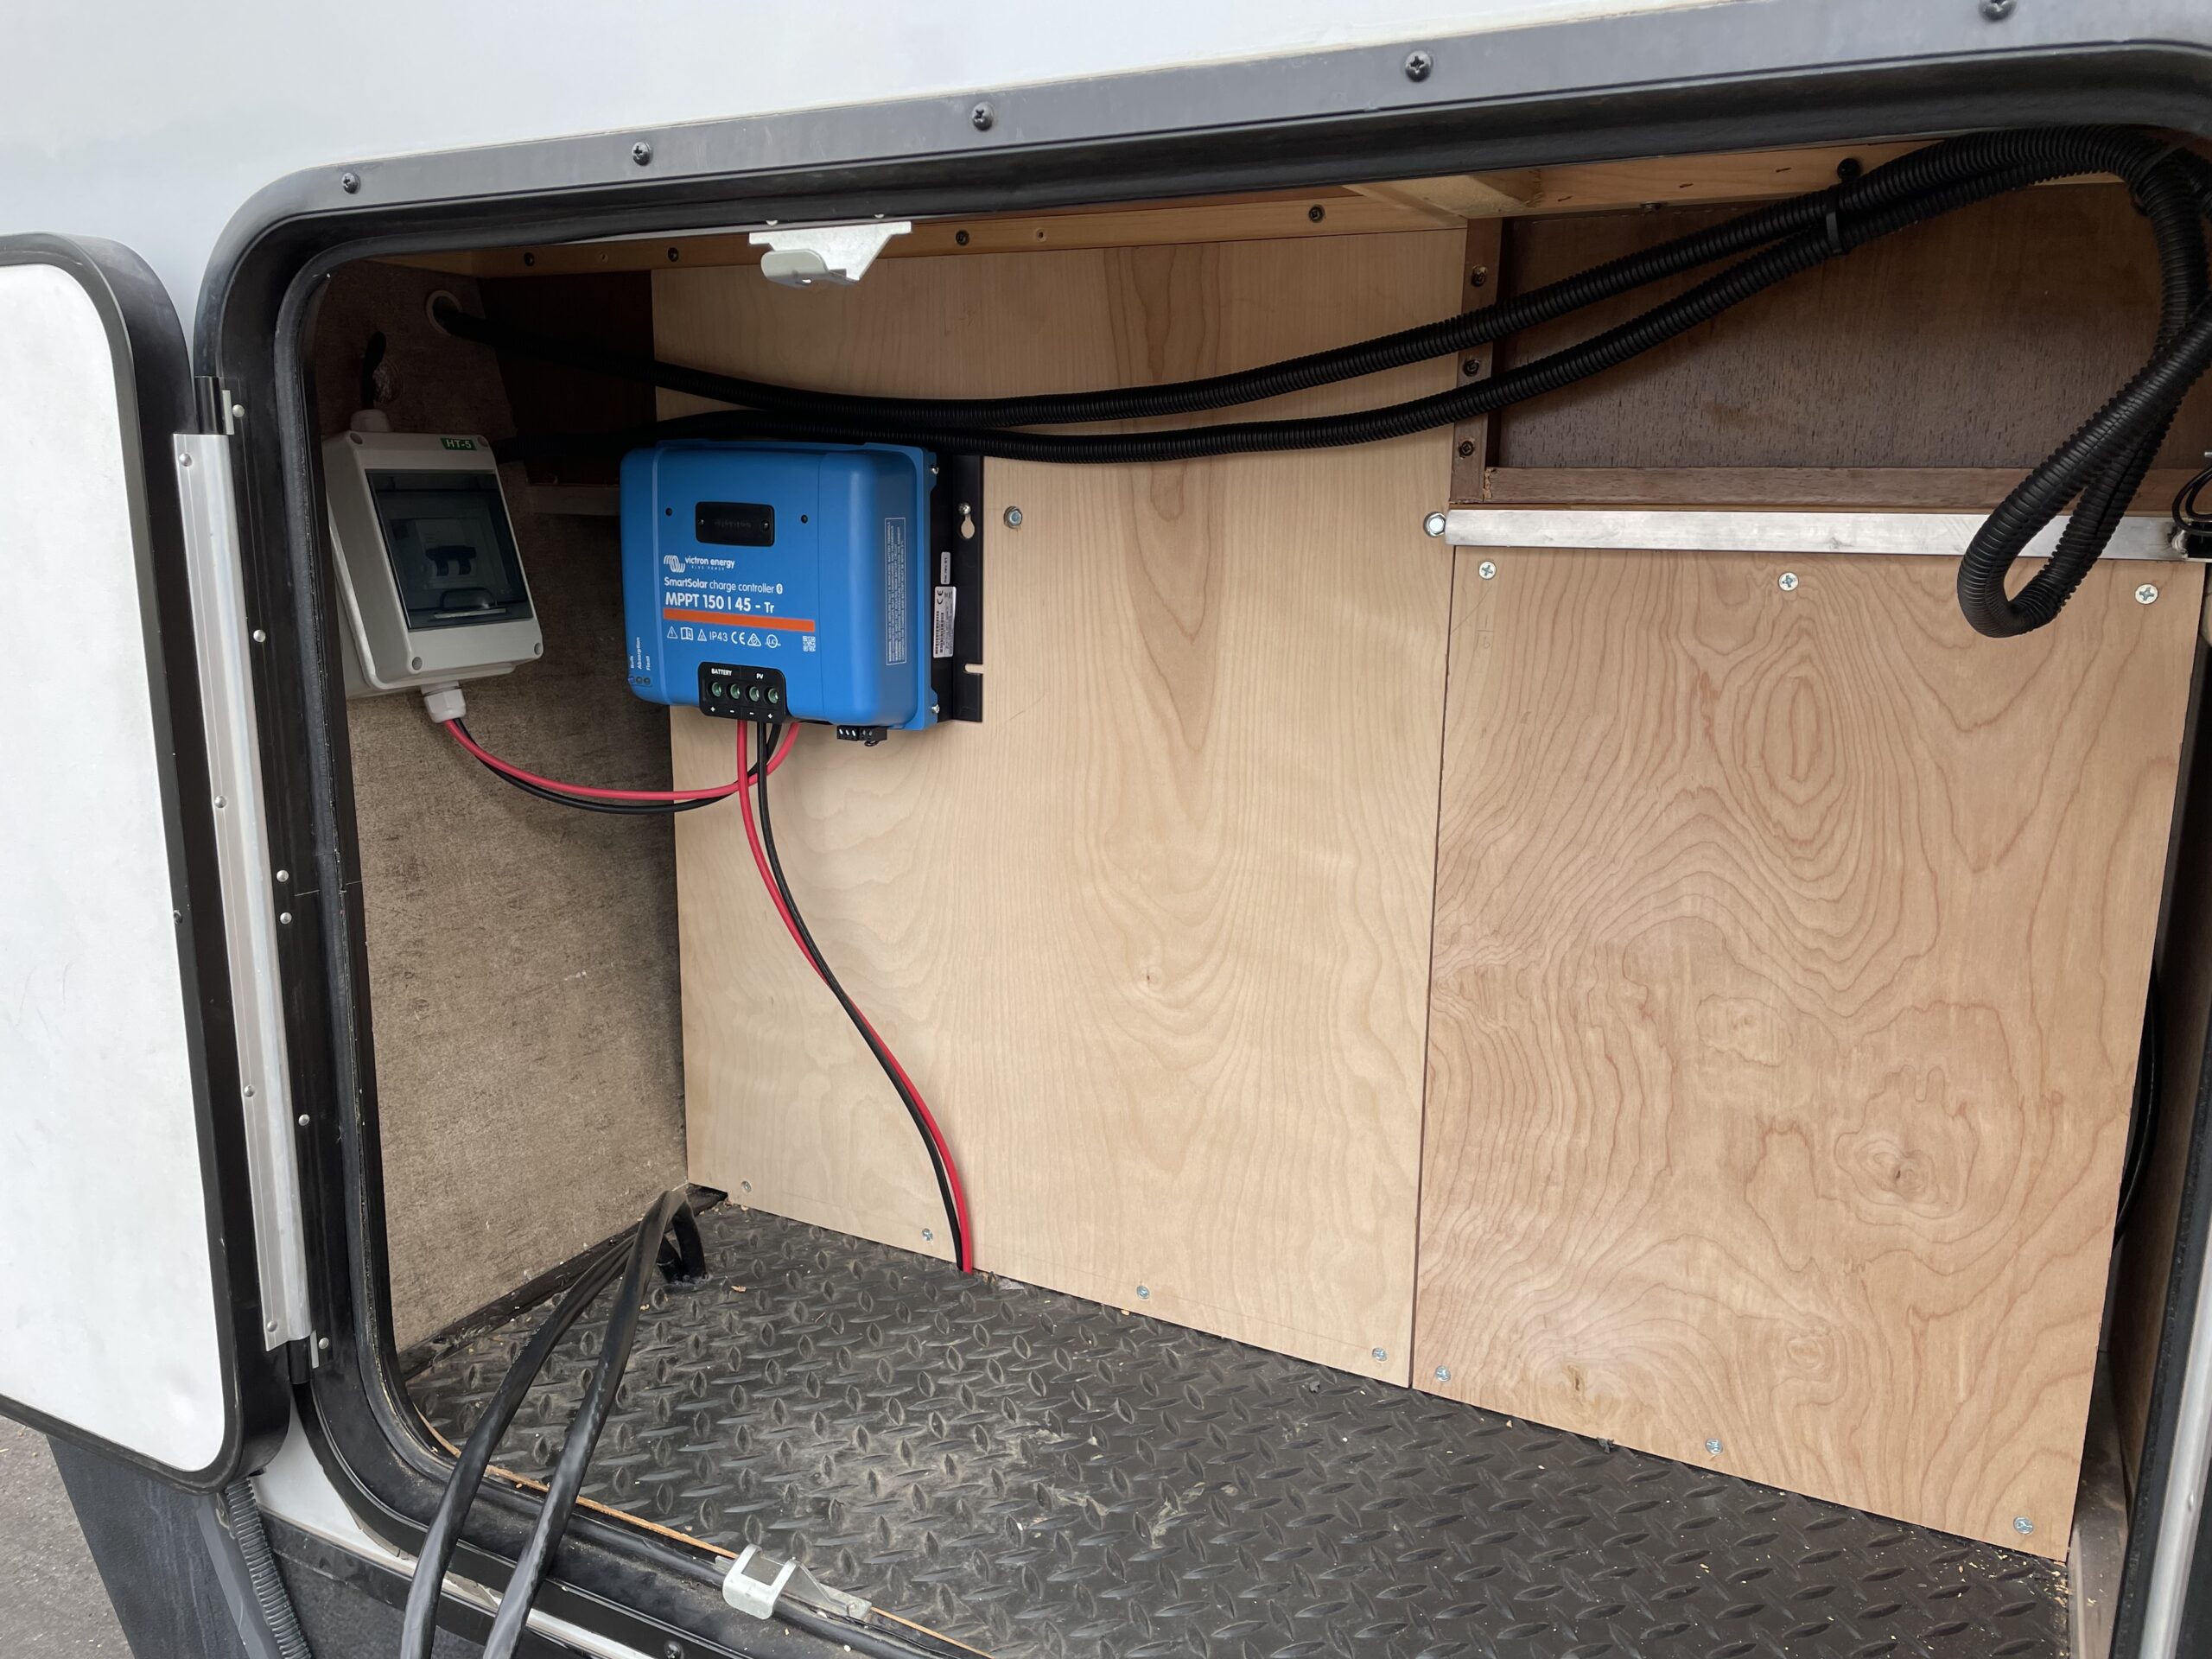
Our power system fits within the left pass-through storage area, illustrated in Figure 1.
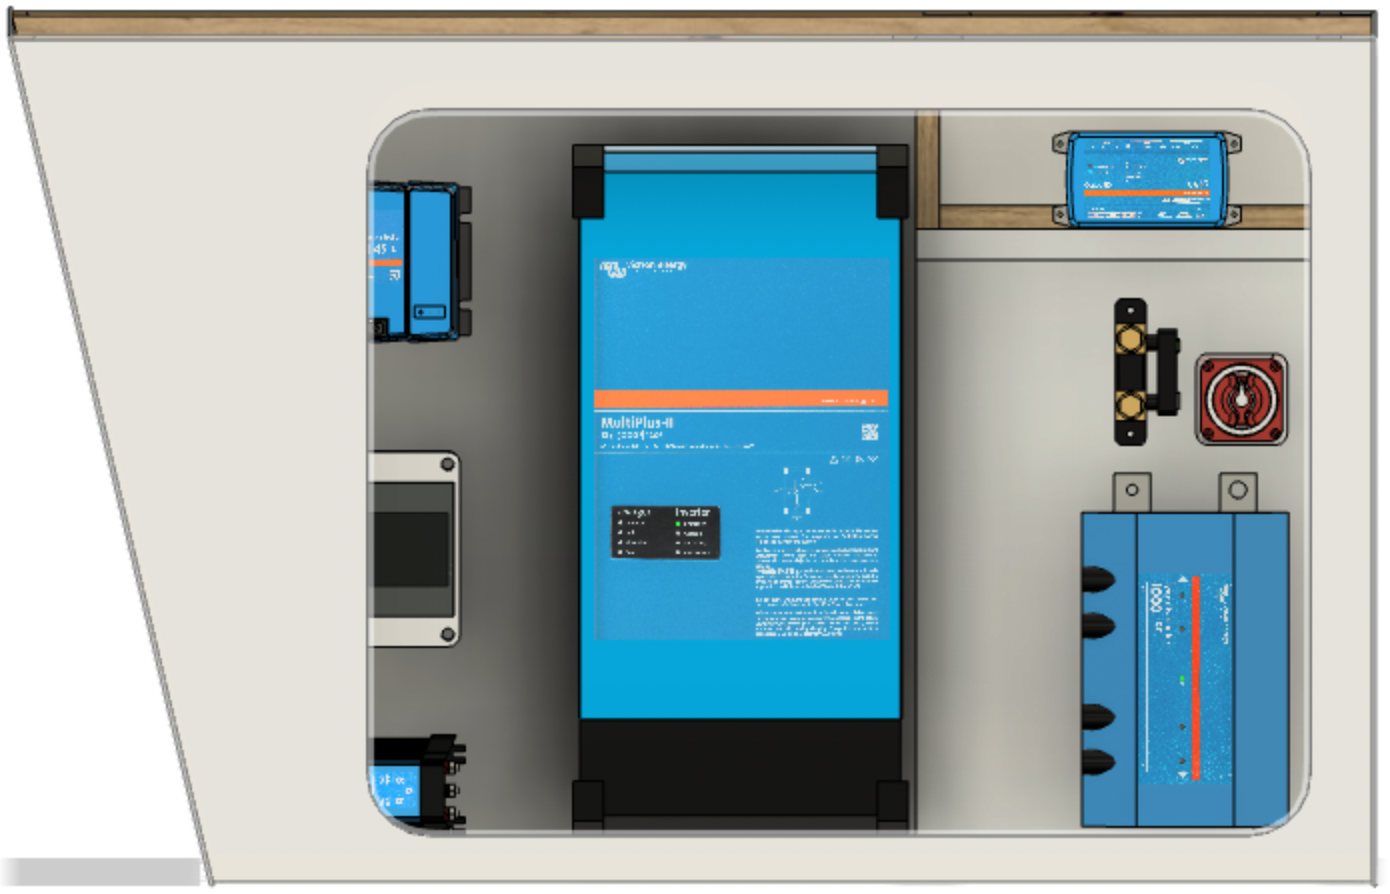
Figure 1 illustrates our complete power center providing 800 W of solar, 360 Ah of Lithium-ion batteries, and a 3kVA invert/charger.
Figure 1 illustrates the major components of our system. There are seven major components illustrated from upper left to lower right:
Solar PV disconnect switch
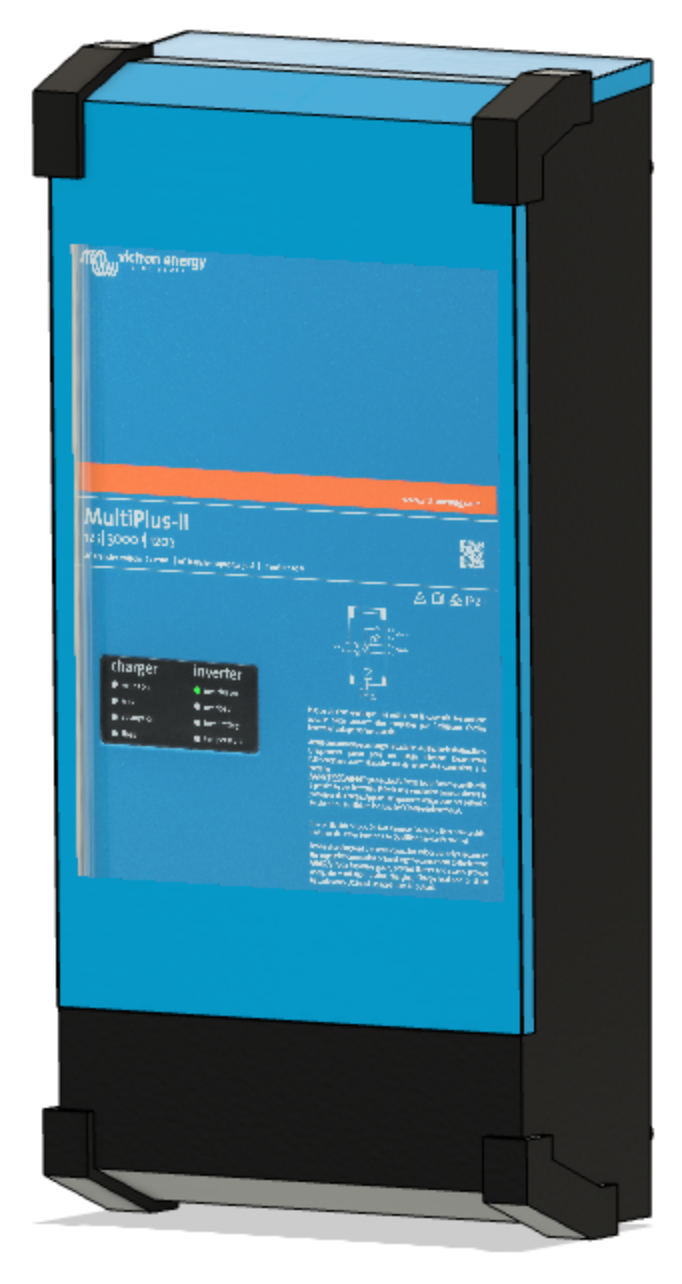
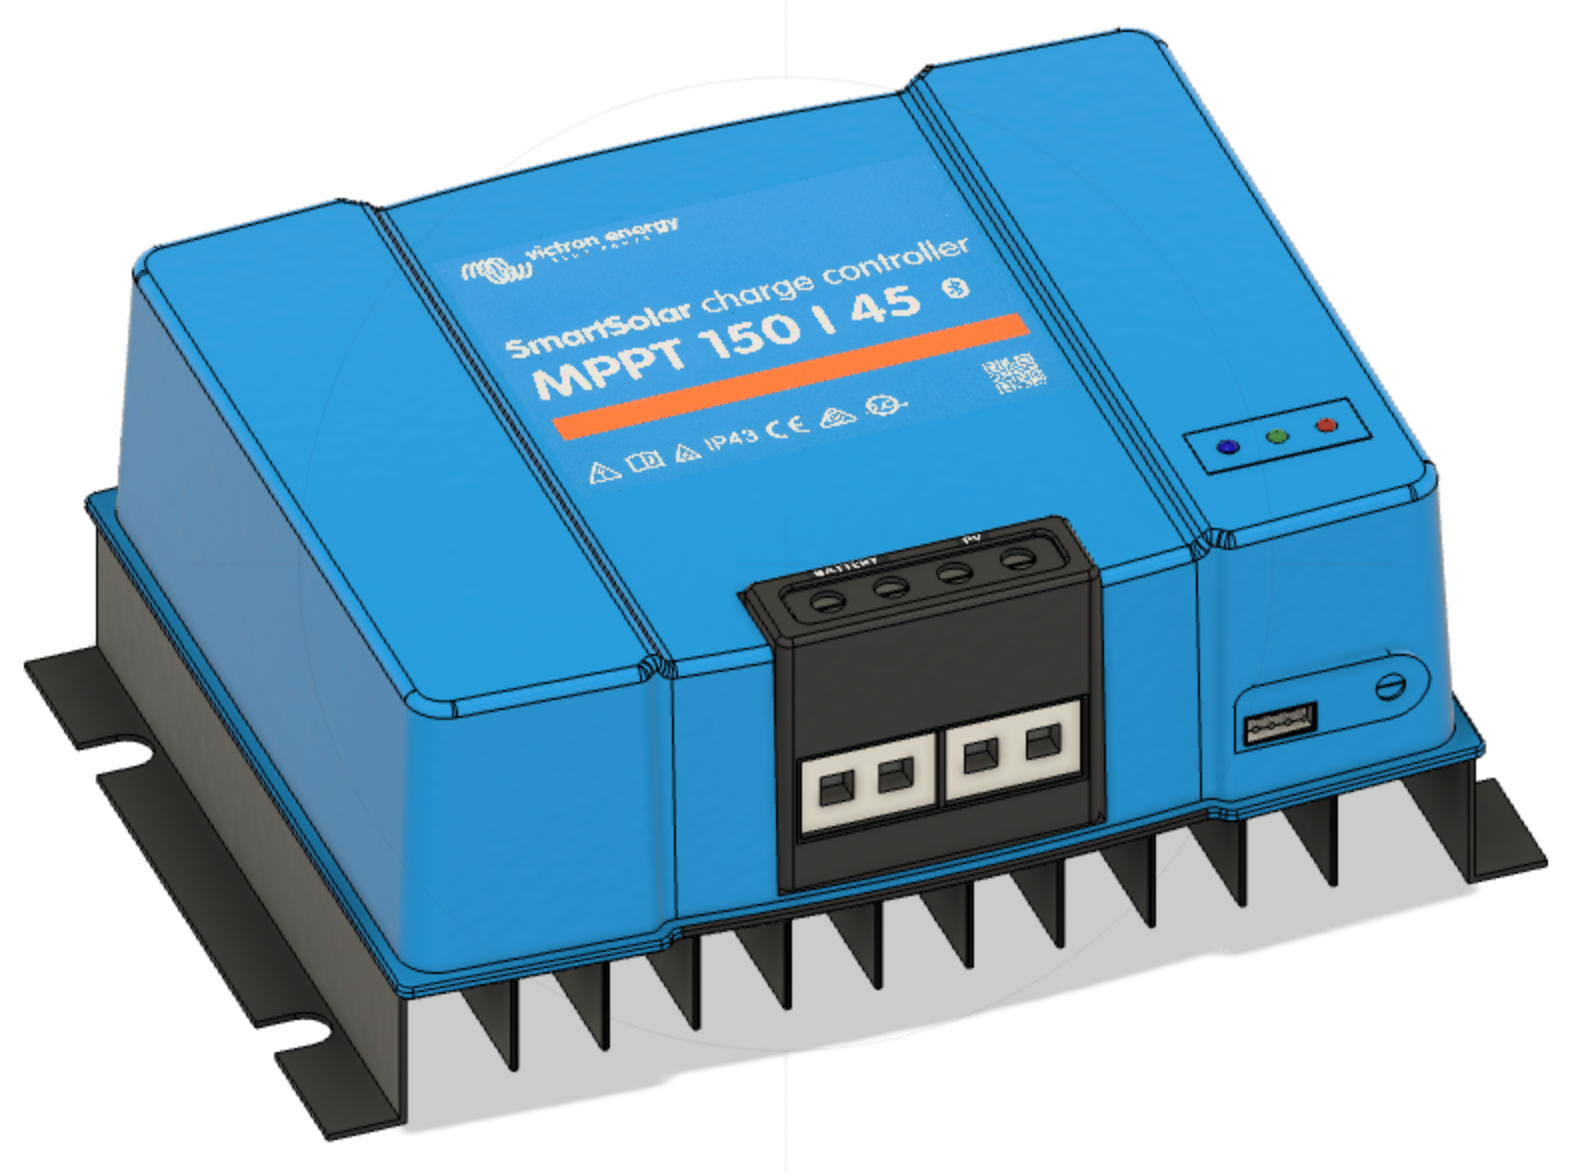
Victron SmartSolar 150/45 solar charger
Victron MultiPlus-II 2x 120V inverter/charger
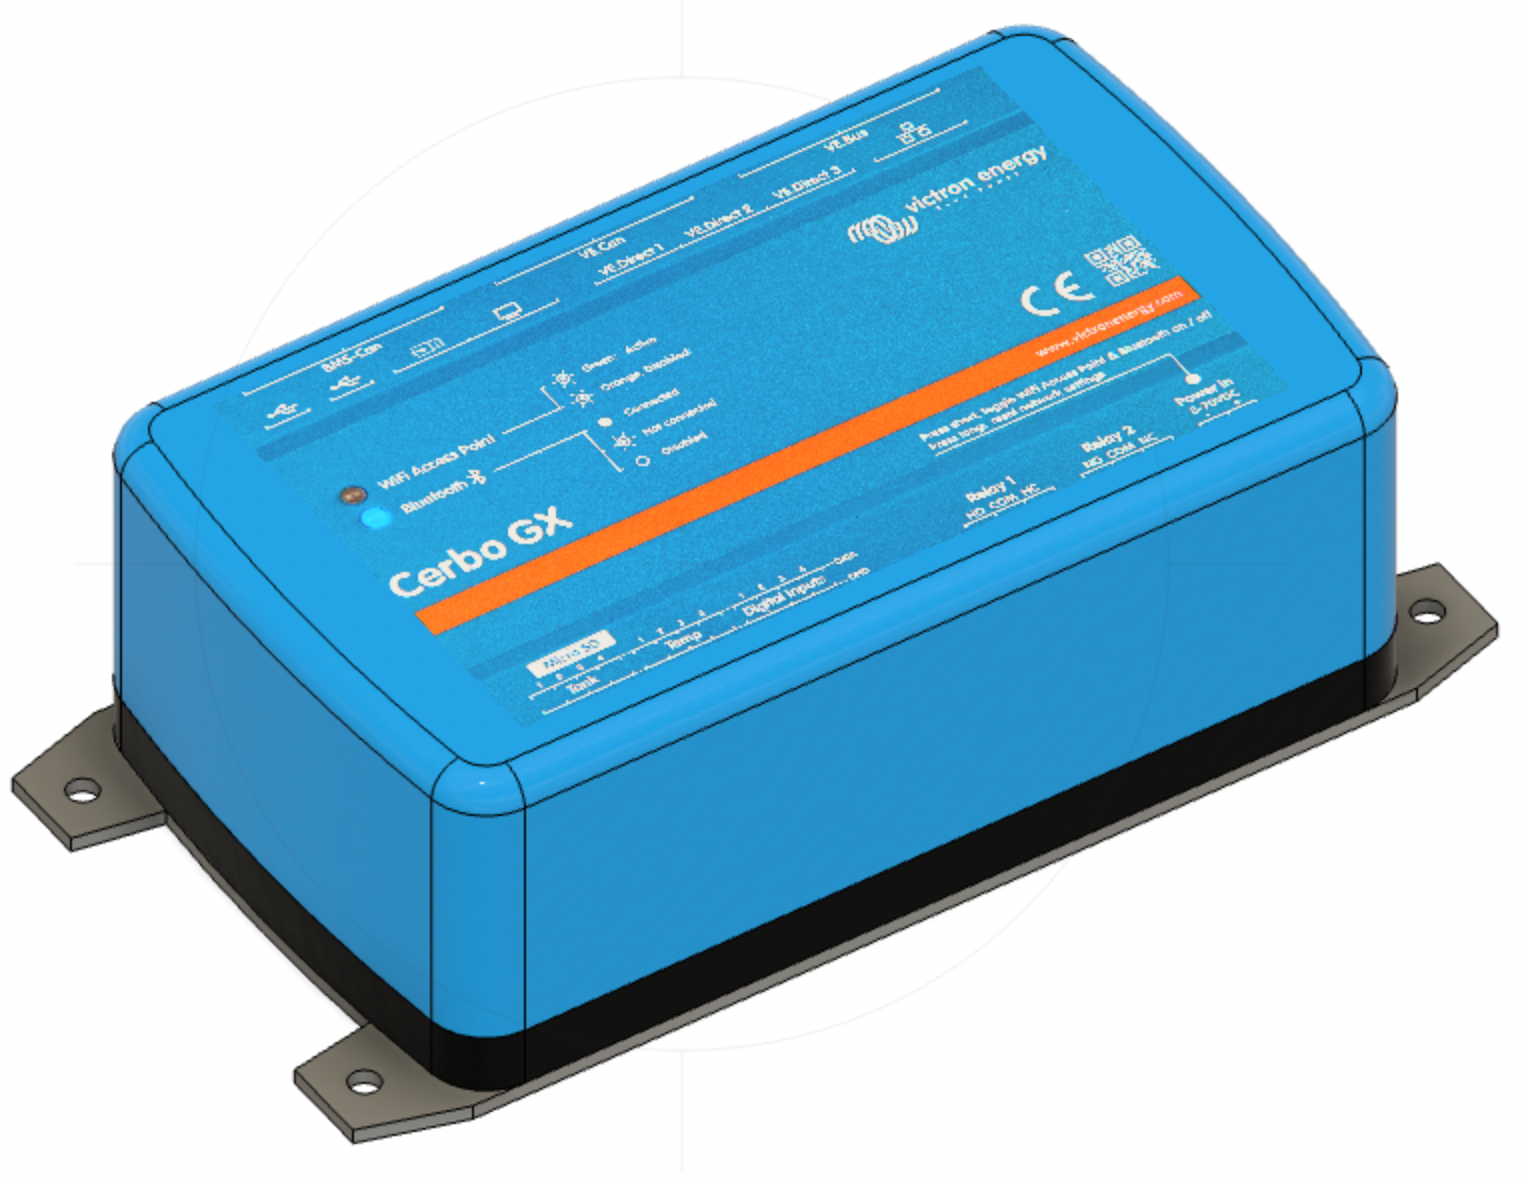
Victron Cerbo GX monitoring system
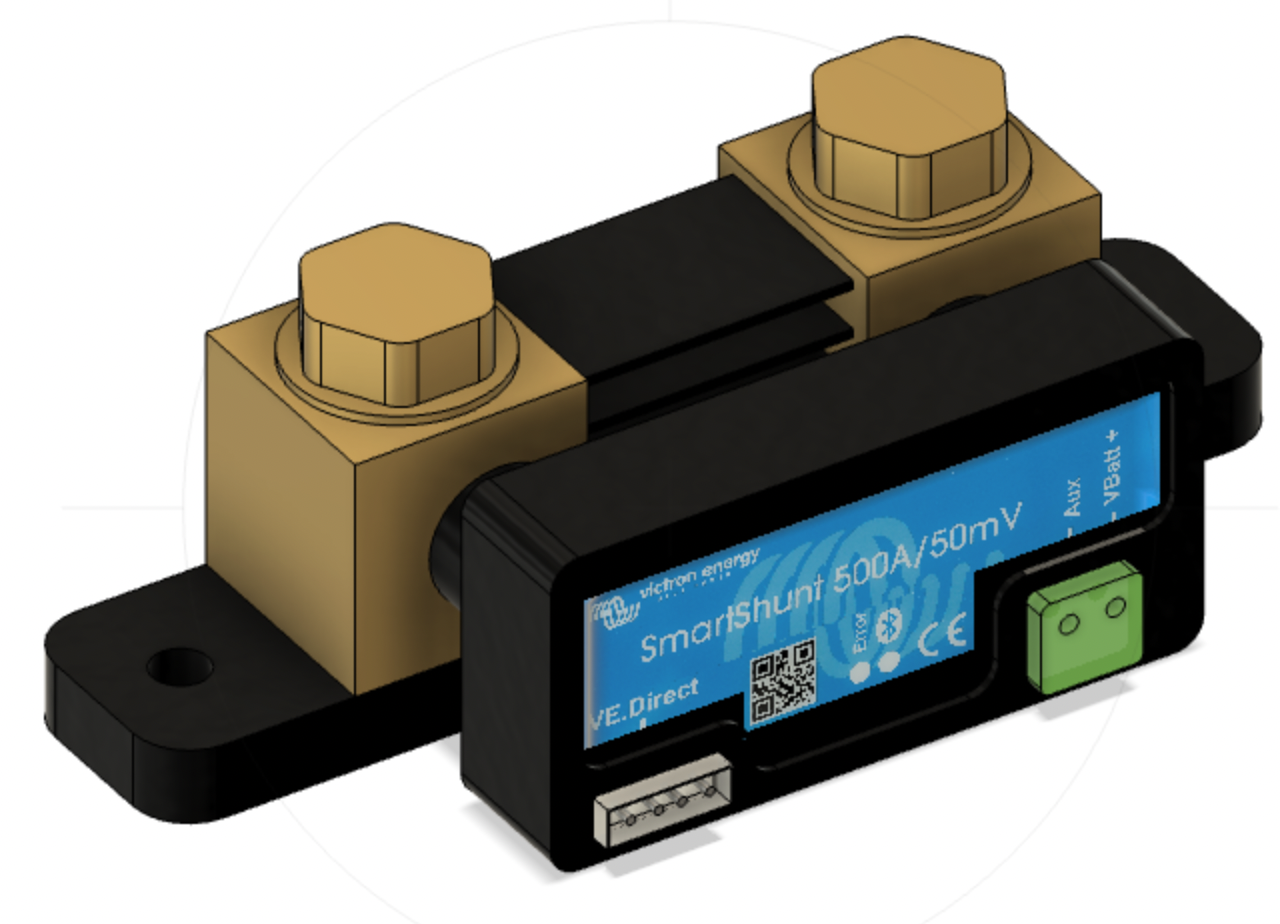
Victron SmartShunt
Blue Sea battery switch
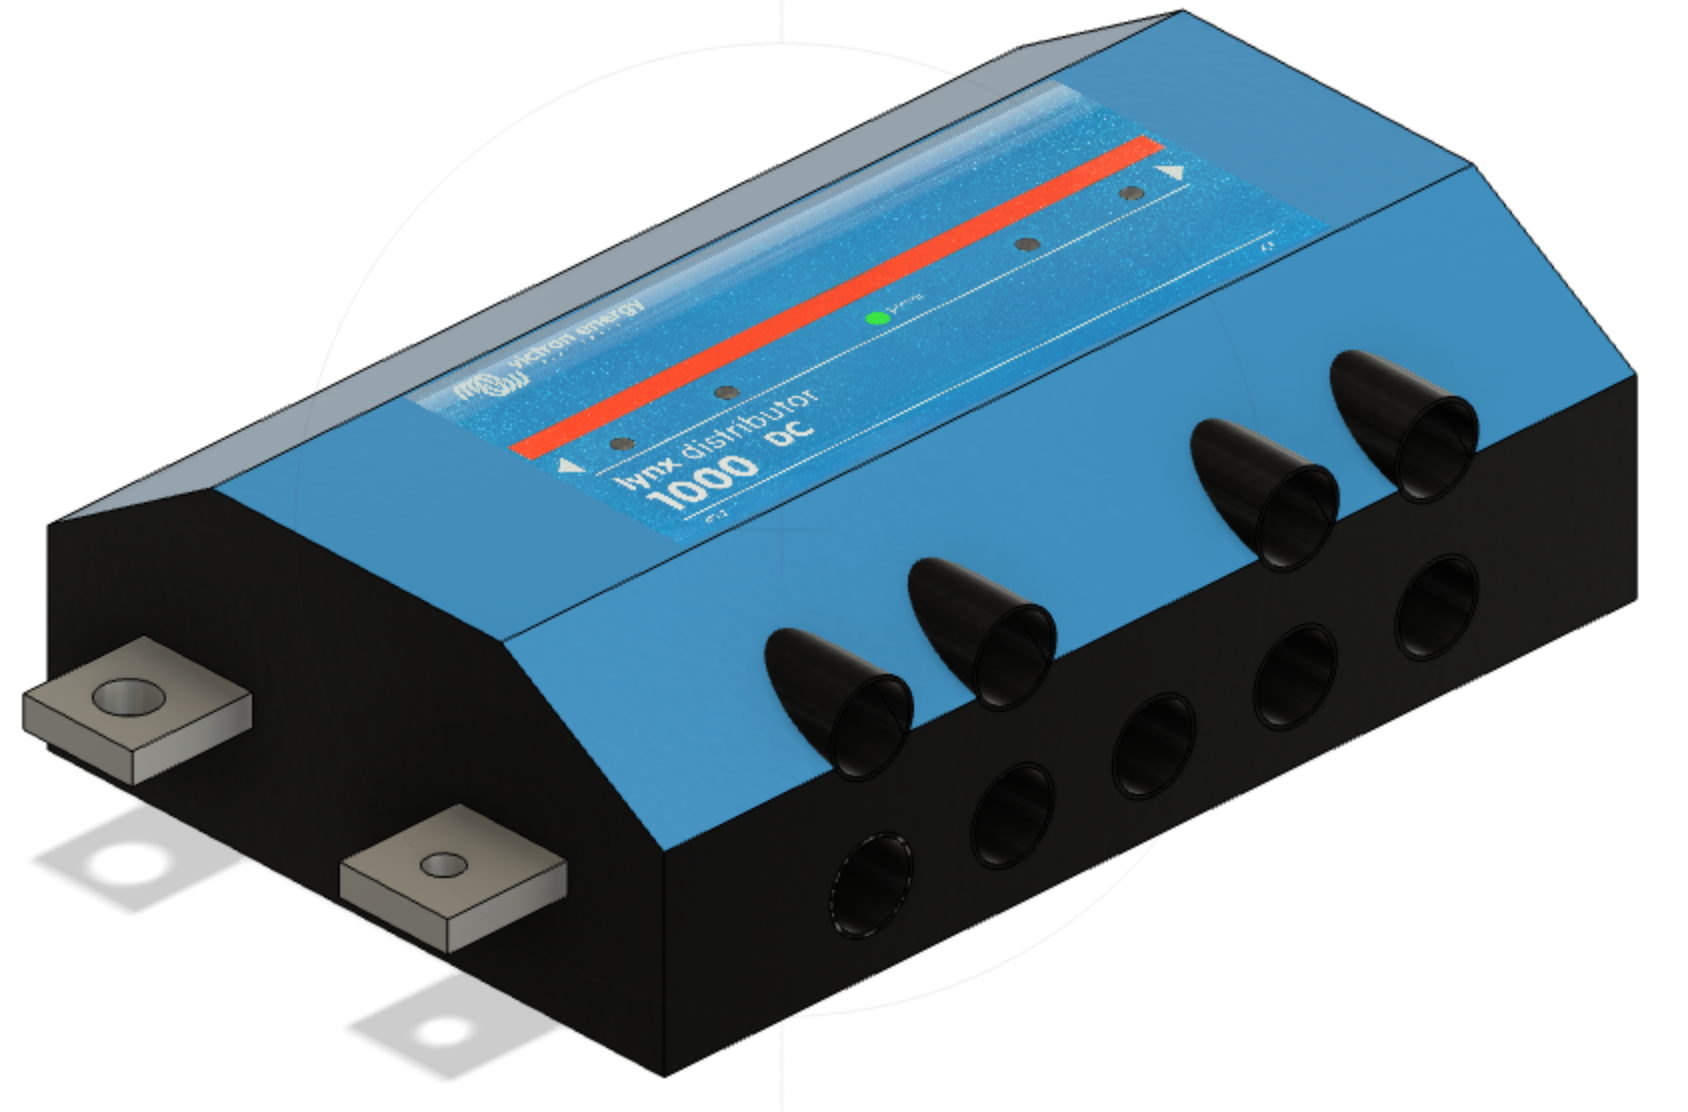
Victron Lynx Distributor
Our 360 Ah battery bank is behind and to the right of this location. The solar charger and the SmartShunt attach to the Cerbo GX via VE.Direct cables. The battery voltage monitor (mounted on the battery bank) and the MultiPlus-II connect to the Cerbo GX via two VE.Bus cables.
Our Outing – Red Canyon, Utah
We spent two nights in Red Canyon Campground in southern Utah in late April. This outing is described in more detail in another post. The daytime temperatures were in the mid-60s, and the lows were in the low-20s. The sun was bright the first day. We had a couple of hours of good sunlight on the second day and then overcast with rain.
Performance
With the nighttime temperatures in the 20s, our furnace periodically ran to keep the trailer at approximately 65 degrees. In addition, we watched television for several hours at night, used lights, and charged a couple of phones, watches, and an iPad. With all of these devices running and charging, we consumed nearly 80 Ah of our 360 Ah battery bank. Our batteries were replenished after just a few hours of good sunlight.
Early in the day, the solar charging system produced about 360 W. I decided to check the cleanliness of the solar panels and was shocked to find them coated in mud. It was thick enough that I could not remove it without a significant amount of water. After cleaning the panels, the system produced just over 500 W. A little water and elbow grease pay off.
Figure 2, our electric fireplace.
After a 5 mile hike, we returned to find our RV an uncomfortable 81 degrees. We flipped on the AC and set the thermostat to 75. The AC drew a constant 1100 W and ran for approximately 30 minutes. Later that evening, the temperature in the RV dipped down to about 68 while we were still up and around, so we turned on the electric fireplace. That unit drew nearly 1400 W but warmed us right up. We tried a few other electric devices to see the practicality. The refrigerator on electric power drew about 22 A, my wife’s curling iron was no big deal at 200 W, and I’ve tried the microwave before at just over 1000 W.
It is a pleasure to use all of our systems without generating noise. We can use the AC, microwave, and TV after campground quiet hours without worrying about bothering others. However, it is funny watching us adapt to this new world. Are we content toasting our bread in the broiler? Of course not; we need a toaster because we can have one! I am sure we’ll add a hairdryer and who knows what else. Nevertheless, I am pleased with the outcome and the comfort it has added to our lives.
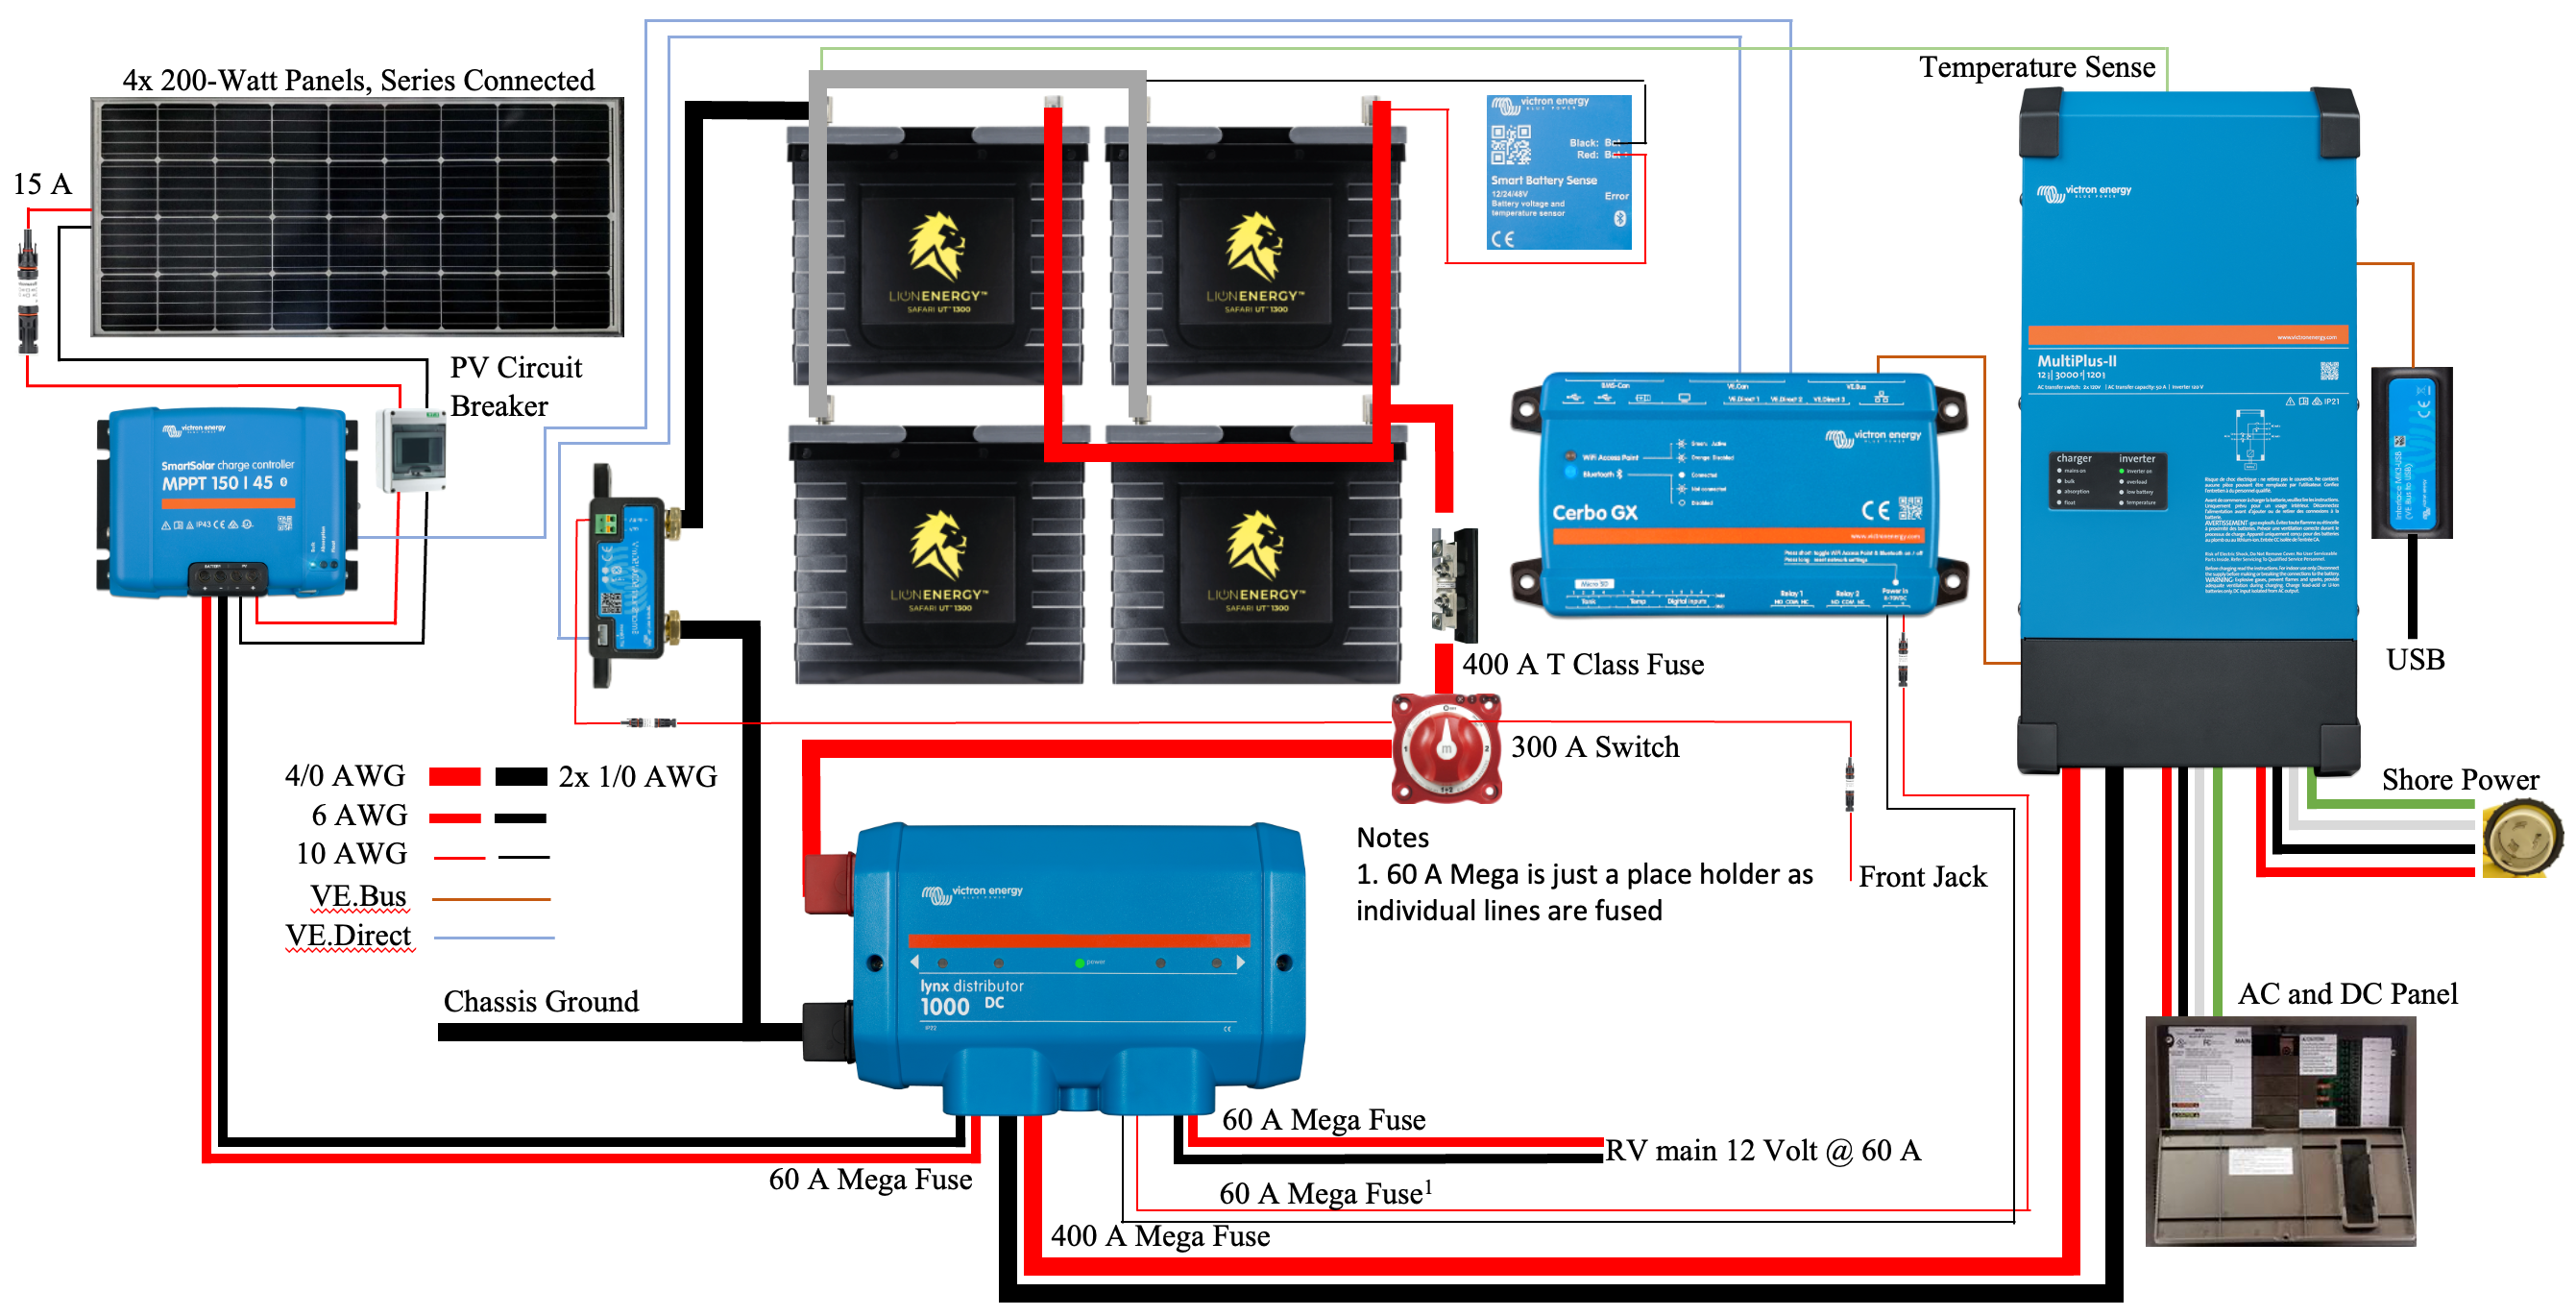
This is the ninth post of a series of articles documenting and describing our RV electrical upgrade. Our previous post in this series described a simplified model of our battery bank, the wiring of our system, the resistance contributed by each component and associated cables, and the expected system voltage drop. Our goal is to keep our voltage drop to 2.5% or less as recommended in Victron’s Wiring Unlimited. This post describes the outcome, reports actual voltage drop measurements, and compares these with those calculated previously. Finally, we evaluate our final results regarding our initial goals, point out a few things we’d do differently, and conclude. For those interested, this page lists the parts, equipment, and tools we used to build our power system.
Initial Design
Figure 1 illustrates the power system proposed in a previous post.
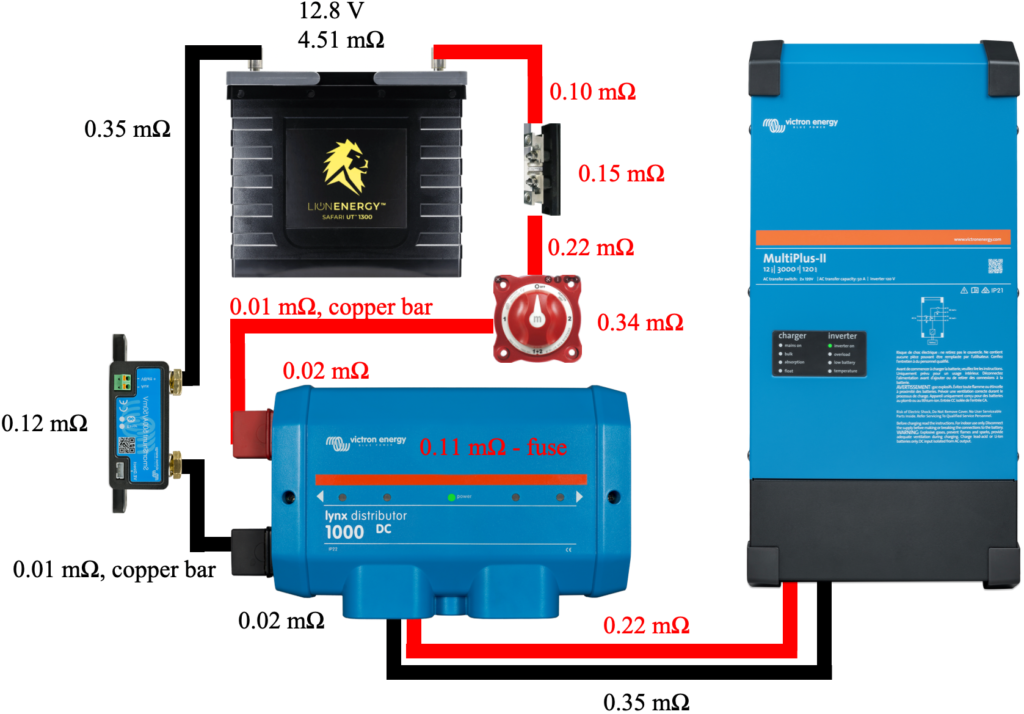
The power system we built, illustrated in Figure 1, was initially proposed in one of our first posts in this series. In our previous post, we introduced the critical path of this system consisting of the circuit from the battery bank to the inverter/charger and back, illustrated in Figure 2.
Figure 2 illustrates the components and cables that make up our system’s critical path and associated resistance values.
Figure 2 includes the measured resistance of each cable and component, such as the 400 A class T fuse, battery disconnect switch, shunt, 400 A mega fuse, and the Lynx Distributor busbar system. These resistances are assumed to be worst-case values as we rounded up measurements and the measurement device’s connection to each component was simply the tension applied by the spring-loaded probes. The total measured resistance of components and cables around our system’s critical path is 1.77 mΩ. With this resistance, we concluded that our system should be capable of providing just over 180 A while remaining at or below our 2.5% voltage drop goal.
Final System
After considerable cold winter work, our design came to fruition. As previously described, our power system fits within the left pass-through storage area, illustrated in Figure 3.
Figure 3 illustrates our complete power center providing 800 W of solar, 360 Ah of Lithium-ion batteries, and a 3kVA invert/charger.
Figure 3 illustrates the major components of our system. There are seven major components illustrated from upper left to lower right:
Solar PV disconnect switch
Victron SmartSolar 150/45 solar charger
Victron MultiPlus-II 2x 120V inverter/charger
Victron Cerbo GX monitoring system
Victron SmartShunt
Blue Sea battery switch
Victron Lynx Distributor
Our battery bank is behind and to the right of this location. The solar charger and the SmartShunt attach to the Cerbo GX via VE.Direct cables. The battery voltage monitor (mounted on the battery bank) and the MultiPlus-II connect to the Cerbo GX via two VE.Bus cables.
We used a Victron MK3-USB device to program the inverter/charger for our specific setup and then used the remote console provided by the Cerbo GX to monitor the initial startup. After turning on the battery switch and the solar PV switch, the system immediately started providing inverted power to the RV, and the solar charger started charging the batteries. Next, using a halogen light and my wife’s toaster, we applied some moderate load to the system and took some readings, found in Table 1.
Battery Voltage
Inverter Voltage
Voltage Drop
Current (A)
Resistance mΩ
12.88
12.84
0.04
25
1.6
12.71
12.61
0.10
73
1.4
12.28
12.04
0.24
157
1.5
As expected, as the system current increases, the voltage drop experienced by the inverter/charger increases. We divided the voltage drop by the associated system current to calculate the system resistance. Averaging these three values, we note that the system resistance is 1.5 mΩ which is 0.27 mΩ lower than the measured 1.77 mΩ.
The system experienced a 0.24 V voltage drop with a 157 A load. A voltage drop of 0.24 V is a percentage voltage drop of just 1.9%, well below our limit of 2.5%. With a resistance of only 1.5 mΩ, we should be able to load our system to nearly 215 A without exceeding our 2.5% goal. These 5-10 minute load tests resulted in almost no heat generation by the inverter/charger or any system components. I am looking forward to more extended tests to see how hot things get.
Summary: How Did We Do
Nearly three months ago, we outlined our goals for our new power center in our first post on this subject. We desired the ability to use our microwave, television, and other 120 V AC systems without having to ruin our camping solitude with a generator. In addition, we wanted to minimize the intrusion of our generator while recharging our batteries. We determined that to meet our needs, we needed several items:
400 Ah of lithium-ion batteries
800 Watts of solar power
An inverter that is capable of producing nearly 3000 Watts of 120 V AC power
A battery charger that is capable of consuming our entire generator output to minimize charge time
We have nearly met each of these requirements. Instead of 400 Ah of batteries, we have 360 Ah, and instead of 3000 W of inverter power, we have 3000 VA or 2400 W continuous. We believe each is close enough to call this project a success. Perhaps more importantly, we learned a lot on the journey and had a lot of fun. If our RV needs to be restored to what we had before this project, here is a brief description of the required tasks.
We did a couple of things right and a few we’d do differently with the new knowledge we possess:
We can’t properly express how great the copper bar approach to connecting the battery disconnect switch and the SmartShunt to the Victron Lynx Distributor is. Using a short segment of 4/0 wire and a lug at each end results in a rather long connection. The copper bar approach saves space, looks clean, and in our cramped environment made our layout possible. You could save ten bucks if you want to make your own, but we saved ourselves the cutting, drilling, and the likely mistakes and bought a pair.
I wouldn’t have initially skimped on our torque wrench purchase. Our fitst purchase had a torqu range of 10-100 ft-lbs and barely registered when being used at the low end. We ended up twisting a bolt head on a battery lug clean off. This was dangerous and could have resulted in a bolt being unretrievable from an expensive battery. Fortunately, just enough bolt was left to enable its removal with a pair of vicegrips. We love our second torque wrench, the Park Tool TW-6.2.
We would definitely use boat/marine wire instead of the 6/3 Romex that we installed. Our RV, like most, is full of Romex making us comfortable that this was a reasonable choice. In addition, 6/3 Romex contains stranded conductors, but not like ultra flexible boat/marine wire such as Ancor’s Triplex Cable.
We would have used lugs suggested by Victron Energy. The 4/0 sized lugs we used are great, but don’t fit very well within the Victron Lynx Distributor. I suspect, but have no evidence that the lugs they suggest would fit much better.
We’re done, it looks clean and neat, and above all else, it works!
This post is the fourth of an ongoing series of articles documenting and describing our RV electrical upgrade. In our previous post, we described our battery bank design and discussed where we would place it. In this post, we describe creating the physical space for our power center, our initial wiring, and our solar upgrades.
Power Center Space
Figure 1, This is a 3D model of the pass-through storage space we intend to use to house our power center.
To house our chosen electrical components, we need to build a space similar to what we previously presented. Our proposed power center is illustrated in Figure 1. Component placement will likely change as we deal with surprises and take advantage of opportunities. However, the basic structure seems sound, and the creation of this space will allow progress.
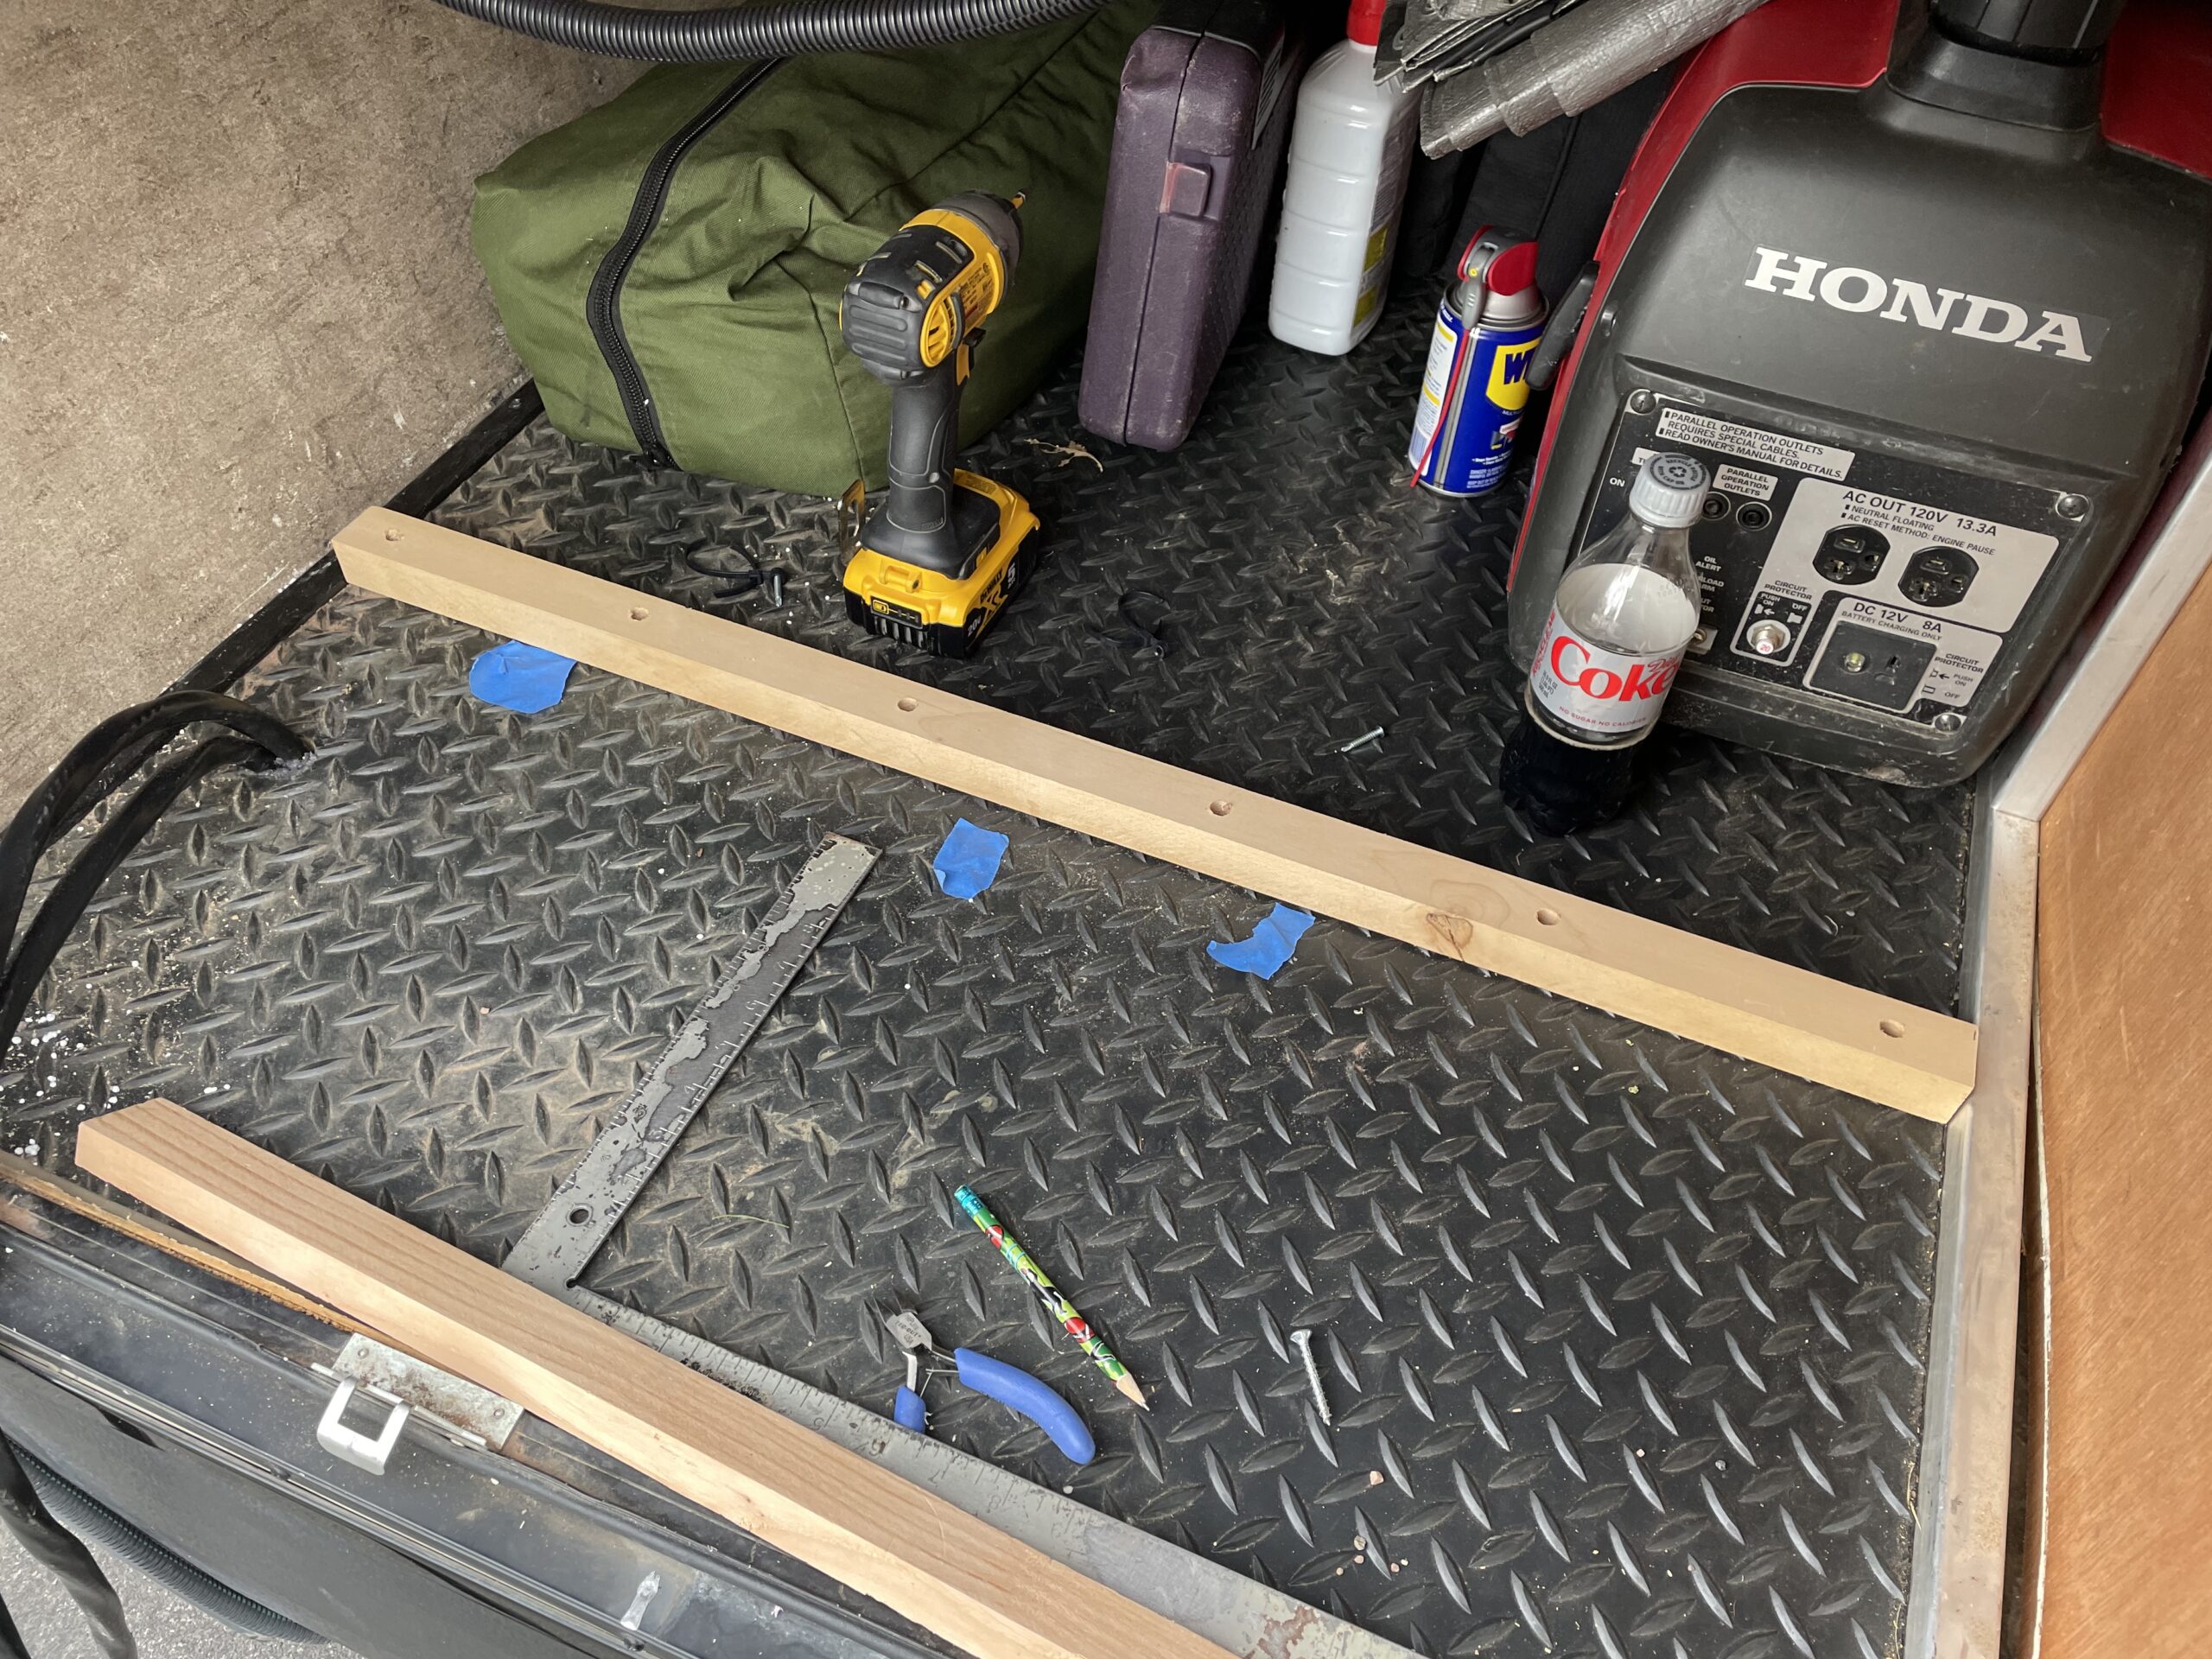
Figure 2 illustrates the physical space we’re starting with and some essential tools, Dewalt impact drill and a Diet Coke. First, we constructed a 3/4″ plywood wall that stretches from the bottom to the top of this compartment and lies flush against the short wall near the top.
Figure 2, This is the space we’re using for our power center. In this picture, we have already run some wires that we’ll describe in the next section.
This approach required a cleat, see Figure 3, attached to the floor to support the plywood wall. To determine the location of the cleat, we held a small piece of plywood against the upper wall and marked the bottom of the compartment with blue tape where it landed when square.
Figure 3, This figure illustrates the lower cleat to support the plywood wall.
The cleat, made of 1-1/4″ by 1-1/4″ lumber, was built by drilling screw holes and countersinking them to allow some 1-1/4″ screws to reach well within the 5/8″ flooring. We also had to add a top cleat, made of the same material, on the right-hand side of this space. The upper cleat was attached to the rectangular aluminum framing using 1-1/4″ self-drilling screws. Finally, before the plywood wall went up, we needed to run a few electrical wires and rescue the Diet Coke.
Initial Wiring
As mentioned in a previous post, our RV is a 2016 Outdoor RV Blackstone 240 RKSB. The floorplan of this model is illustrated in Figure 4. Our new power center will be located in the left-hand side of the pass-through storage area in the upper right-hand corner of Figure 4. Our shore power outlet is located at the left rear of the trailer, while our circuit breaker panel is located just under the refrigerator in the lower left of the figure.
Figure 4, This is the layout of our RV, a 2016 ORV 240 RKSB.
120 Volt AC Wiring
The shore power electrical outlet is wired directly to the circuit breaker panel. However, in our design, the shore power connector must be wired to the inverter/charger, and then the inverter/charger is wired to the circuit breaker panel. We ran Southwire 6/3 Romex from the circuit breaker panel area to the power center to accommodate this need. This line will carry the 50 A shore power to the inverter/charger. We then ran a second piece of 6/3 Romex from the power center back to the circuit panel area. This wire will carry inverter/charger output to the circuit breaker panel to energize our appliances.
Many discussions in RV forums berate Romex because it shouldn’t be used in high vibration environments like RVs and boats. However, Southwire Romex larger than 10 AWG uses stranded wire for three conductors and a solid ground wire. Therefore, we used Romex instead of running a PVC conduit and pulling eight strands of 6 AWG THHN wire through it.
We intended to run this wire ourselves, but it was a task I was not looking forward to. However, our local RV center, where we purchased our trailer several years ago, was willing to run the Romex for a few hundred dollars. That was a deal we couldn’t pass up. They ran the wire neatly and securely and left extra wire coiled behind the circuit breaker panel and in our power center.
Solar PV Wiring
The original solar setup on our trailer was a single 150 W panel on the roof. The installer fed the PV cables through the roof and into an upper cabinet in the bedroom. An inexpensive PWM solar charge controller was installed in that cabinet and then wired down through the trailer cap to the a-frame-mounted batteries.
Soon after purchasing the trailer, we upgraded this setup by replacing the single 150 W panel with three 200 W panels and the PWM controller with an MPPT controller. This upgrade used the existing wiring, and the new controller remained in the bedroom closet. This work aims to improve all aspects of our solar setup and get the solar charge controller out of our cupboard.
We ran new 10 AWG PV cables from the roof through the portal and into the trailer attic near the front of the trailer. Next, we routed the PV cables behind the trailer cap and into our power center. Unfortunately, we purchased 20′ lines with MC4 connectors on each end. We intended to cut the connectors off of one end and fish the cable to its destination. However, we inadvertently cut off the wrong connectors and ended up having to install our own. We should have purchased cable and installed MC4 connectors after they were in place.
Battery and House Wiring
Eventually, as described in our previous post, we will move our battery bank and will need to provide 12 V from our power center to the rest of our trailer. For now, the batteries remain on the a-frame and feed the rest of the trailer from there. Therefore, we need to tap into the existing 12 V and ground line so our new solar charge controller can charge the batteries. Our completed project will eliminate the lines to the batteries.
Figure 6, Power and ground distribution travel through this space from the battery bank to the trailer.
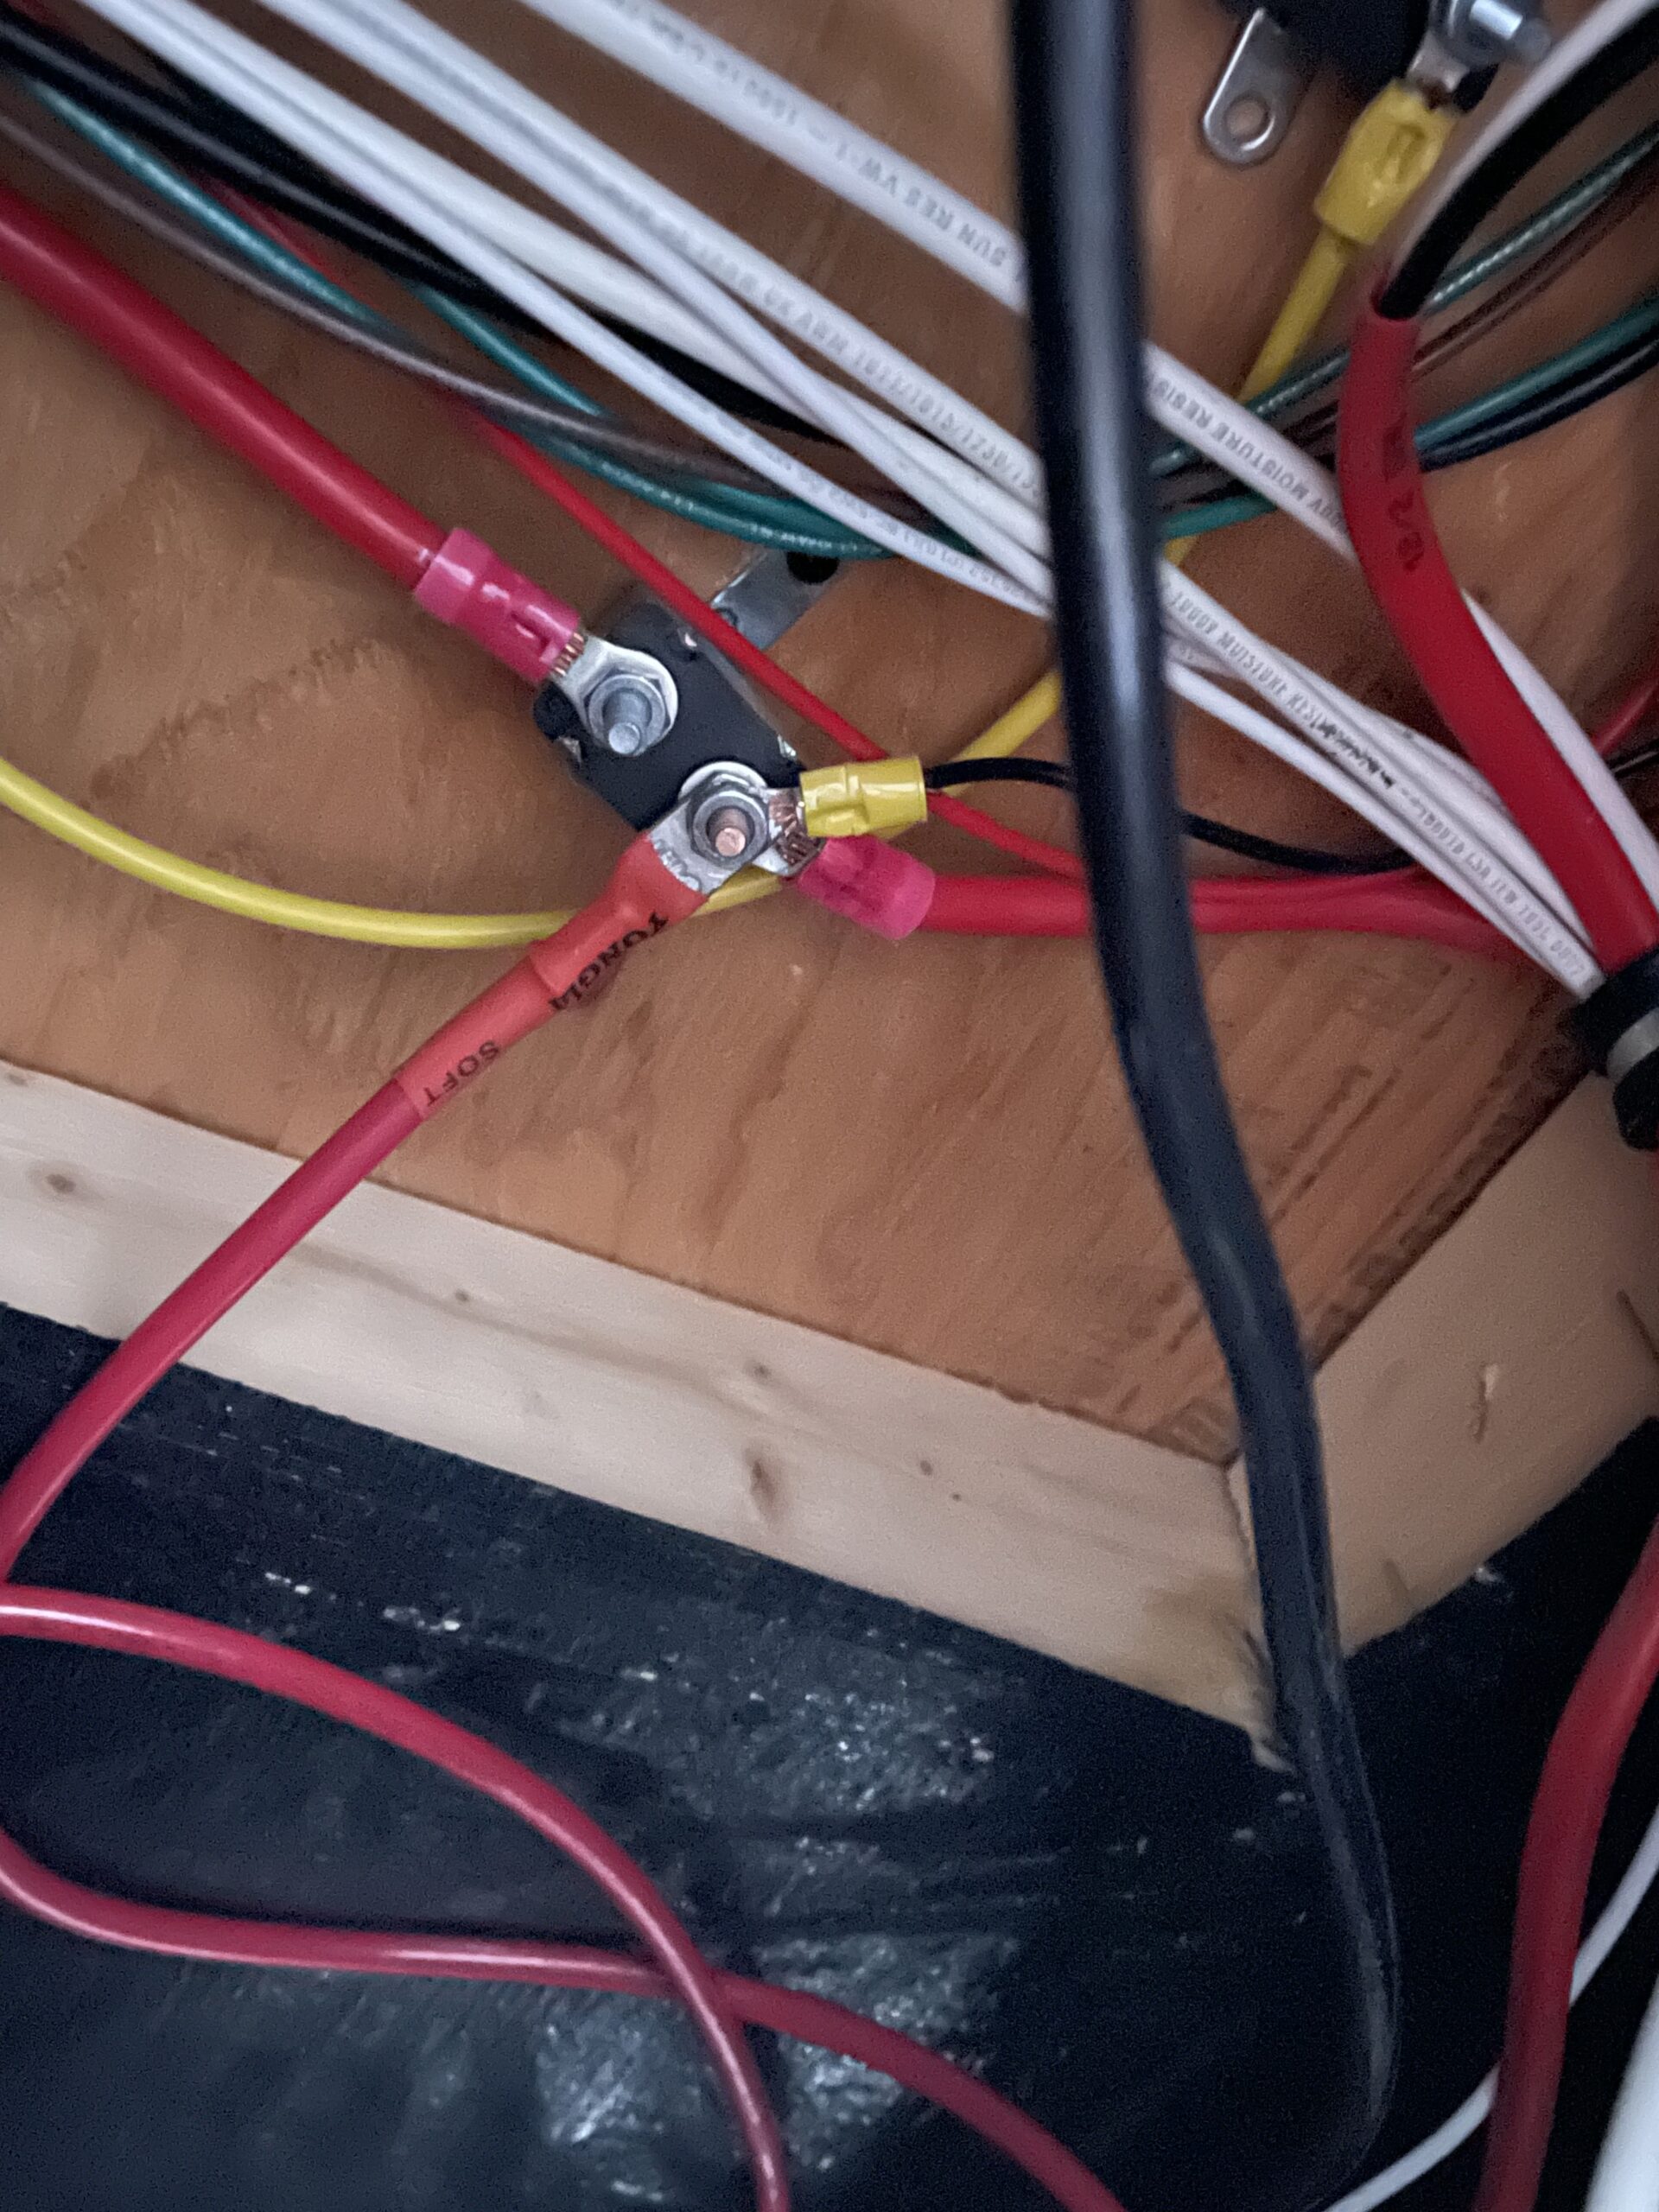
On the underside of the subfloor near the a-frame of our trailer, we found several auto reset circuit breakers. The breaker illustrated in Figure 6 has a direct connection to the positive terminal of our batteries. The positive terminal of our batteries and the trailer emergency brake are attached to the shown stud. We attached a 6 AWG THHN wire with a lug to that terminal and fished the wire into our power center.
Figure 7, We used a Morris connector to connect a ground wire from the existing ground to our power center.
A ground wire also travels through this area from the negative terminal of our batteries and into the trailer. We obtained ground by cutting the ground wire that travels through this space and connected both ends and a new 6 AWG THHN wire with a 3 position Morris connector, illustrated in Figure 7. These connectors are amazing and easy to use. Finally, we fished the new ground wire into our power center.
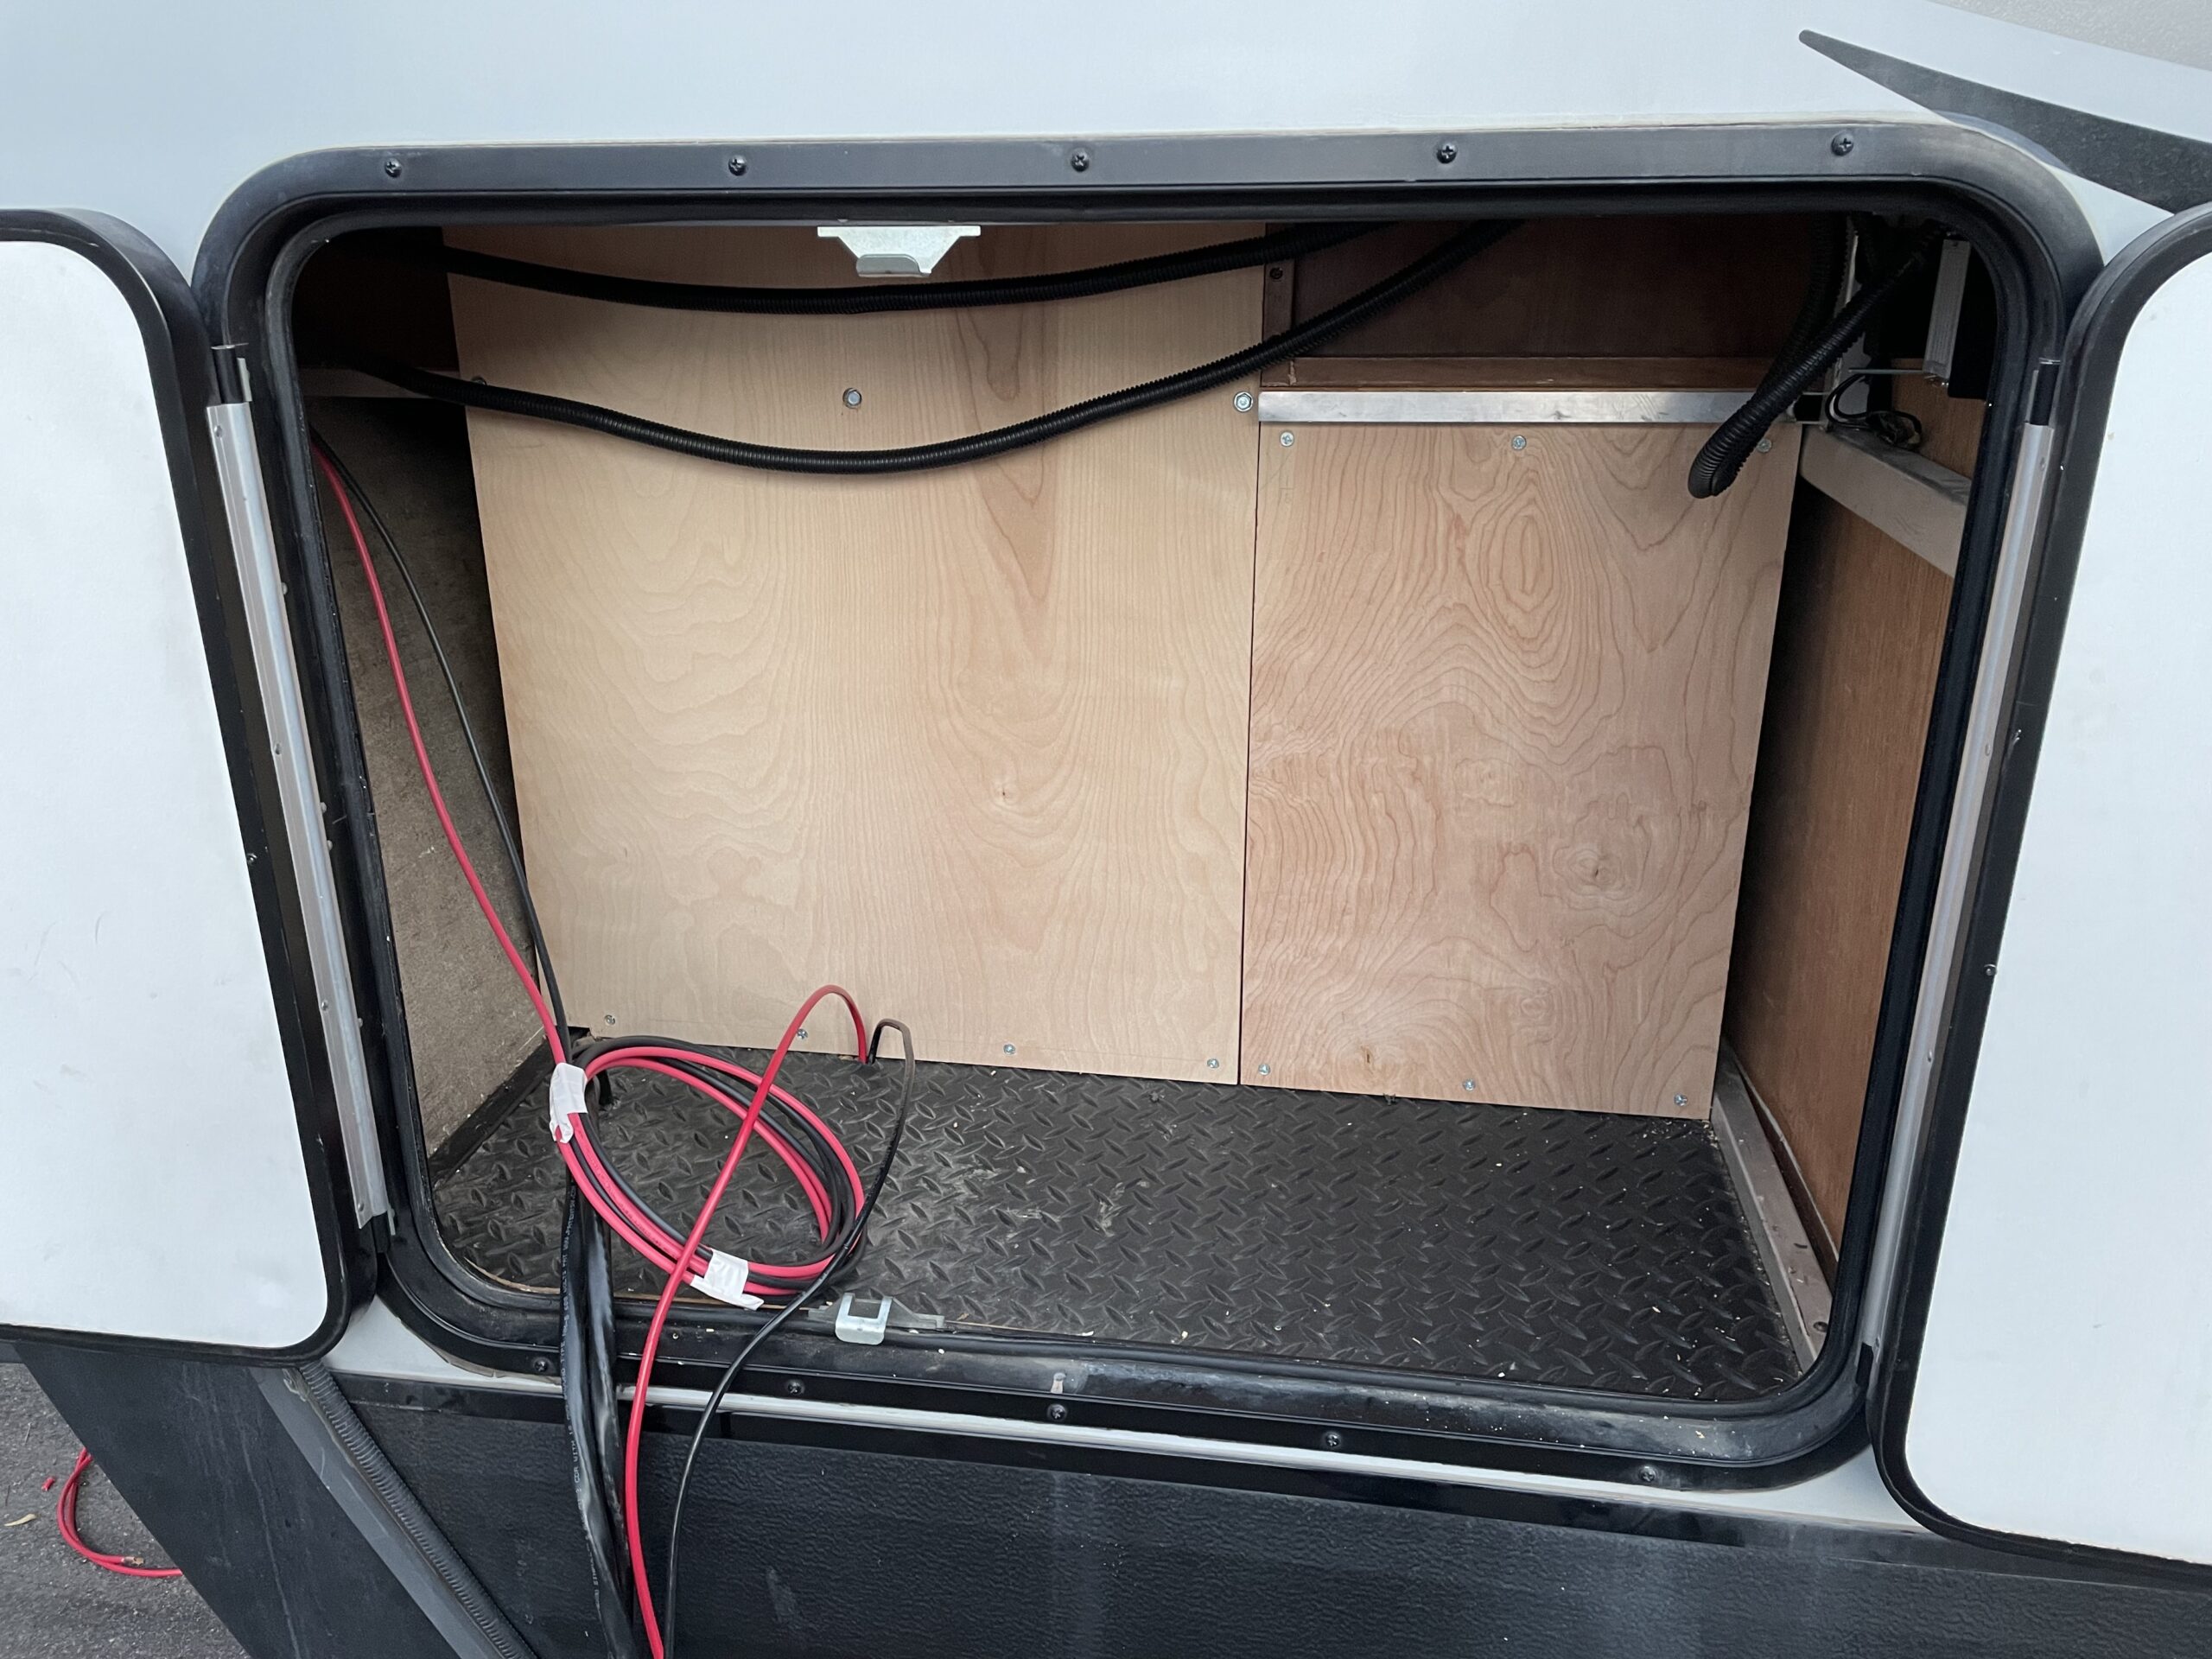
After the 120 V AC, solar PV, and 12 V DC wiring were complete, we installed the plywood walls. With this done, the power center is ready for the addition of components. The empty power center can be seen in Figure 8.
Figure 8, The empty power center is illustrated with 120 V AC, 12 V DC, and solar PV wiring in place.
Solar Additions
On the roof of our trailer, we installed a fourth 200 W solar panel, as illustrated in Figure 9. We couldn’t obtain another panel identical to the three we had, so we chose a panel with similar voltage characteristics and a current capability that slightly surpassed our existing panels. This panel will not constrain our system or be significantly limited by our existing panels; it should be a good match.
Figure 9, A fourth 200 W solar panel was added to the roof and connected in series to the existing panels.
Before celebrating the installation of our new panel or our wire routing prowess, we measured a voltage of 60 V across the PV cables. The addition of the fourth panel increased the PV voltage to approximately 80 V; success!
We connected the PV cables to a disconnect switch/circuit breaker mounted in a DIN breaker box in our power center. Next, we used a couple of short lengths of PV cable to run from the breaker box to our Victron SmartSolar 150-45 solar charge controller. Finally, we connected our 12 V DC lines to the solar charger, and we’re back in business. Figure 10 illustrates the result.
Figure 10, The completed power center with solar charge controller and PV disconnect switch installed.
The End Result
We’ve reached the end of another sub-project, and the trailer is once again ready to be used. We successfully created our power center space prepared to receive additional components. In addition, we routed all necessary power cables to this new space. Finally, we added a solar panel and upgraded our MPPT solar charge controller.
This article is the second of an ongoing series of posts documenting and describing our significant RV electrical upgrade. In our previous post, we outlined our requirements and created a schematic of a system that would meet our needs. We also discussed our desire to do the work incrementally, leaving the trailer in working order after each sub-project. Finally, we discussed our desire to build a 24 V system. In this post, we discuss a potential need for an alternative design and present its schematic. We also discuss the need to model our finished product, and we share our results.
Alternative Design
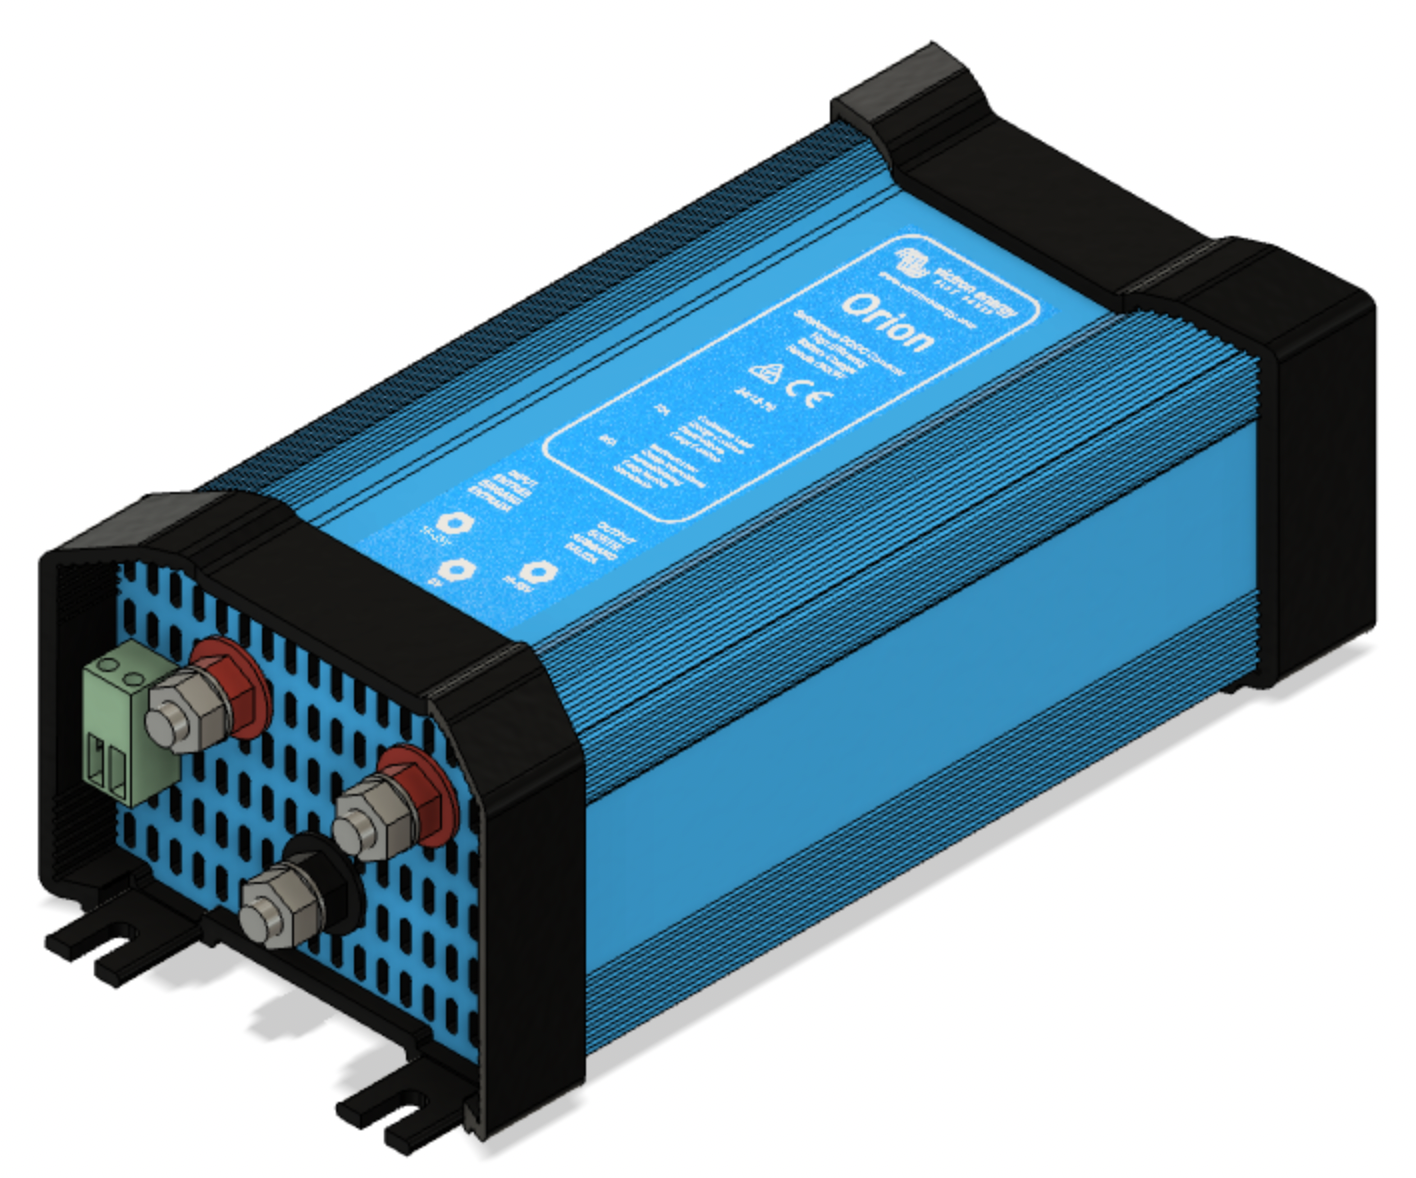
While we desire to build a 24 V system to reduce currents, Victron Energy does not currently produce a 24 V version of their MultiPlus-II 3000 VA 2x 120 V inverter/charger. However, we are hoping they announce such a device at the METS 2021 conference.
Figure 1 illustrates a schematic for a 12 V system that meets our requirements.
In case a suitable product does not become available, we have designed an alternative 12 V system. This version would not need a 24-12 V DC-DC converter, but increased system currents require larger wires to connect the battery bank to the inverter/charger. Figure 1 illustrates the schematic for our alternative design.
Modeling the System
Our desire to make incremental progress without wasting time or money requires us to see the outcome before taking our first steps. If we don’t know where each component will go and how it will be oriented, we will likely make mistakes that waste resources.
To visualize our project, we used Autodesk’s Fusion 360 3D modeling software to create a model of our RV’s pass-through storage space, our under-bed storage area, and the significant components of our system. Then, by placing the scale versions of the desired components into the modeled spaces, we can arrange and rearrange them to ensure the best overall final implementation. We can then undertake small projects without worrying about them negatively impacting future work. We can also simultaneously work on multiple projects that don’t interfere with one another.
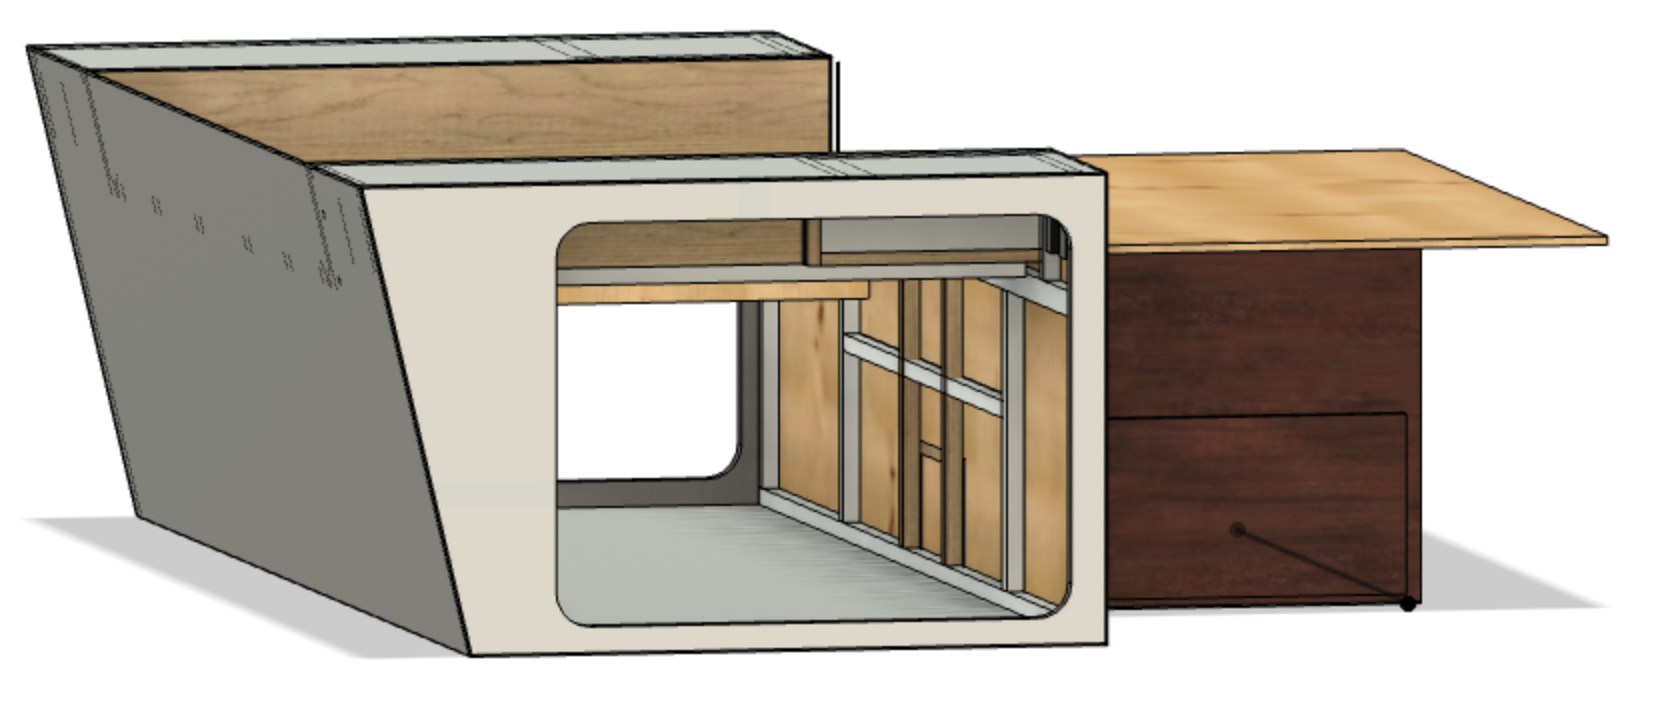
RV Storage Spaces
We initially thought we would put both the power center components and the battery bank in the pass-through storage area. However, we decided to place the battery bank in the under-bed storage to reduce the temperature extremes it would otherwise experience.
Figure 2, The pass-through storage area, under the bed drawers, and storage space beneath the foot of the bed. Immediately above these modeled objects is where the mattress sits within the trailer.
Figure 3, The pass-through storage area is on the left, and the under-bed storage space is on the right.
Figure 2 illustrates the pass-through and under-bed storage areas of our trailer. It might be helpful to note that the mattress sits immediately on top of these modeled objects. The under-bed storage comprises two drawers, and immediately above them, a small storage space accessible by lifting the foot of the bed. The area illustrated in Figure 3 seemed to be an ideal place for our battery bank.
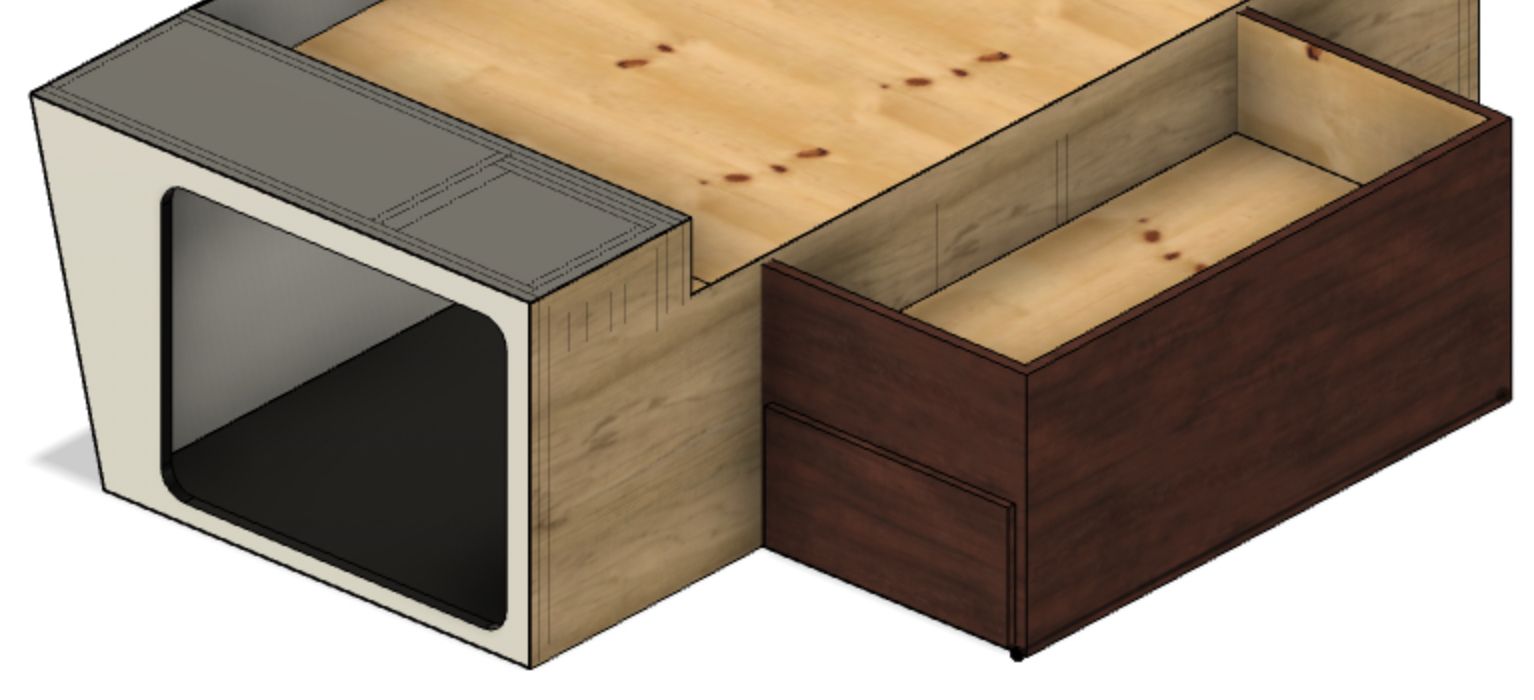
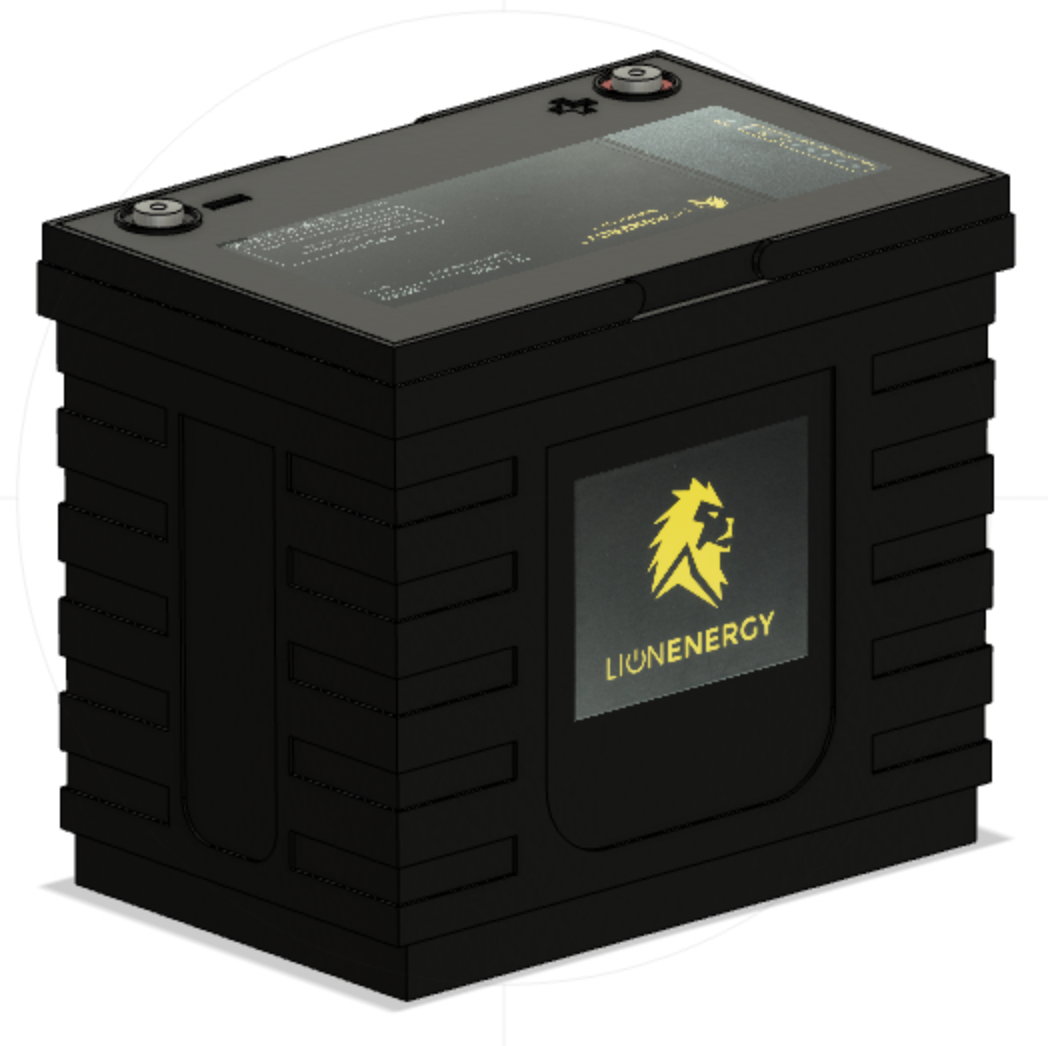
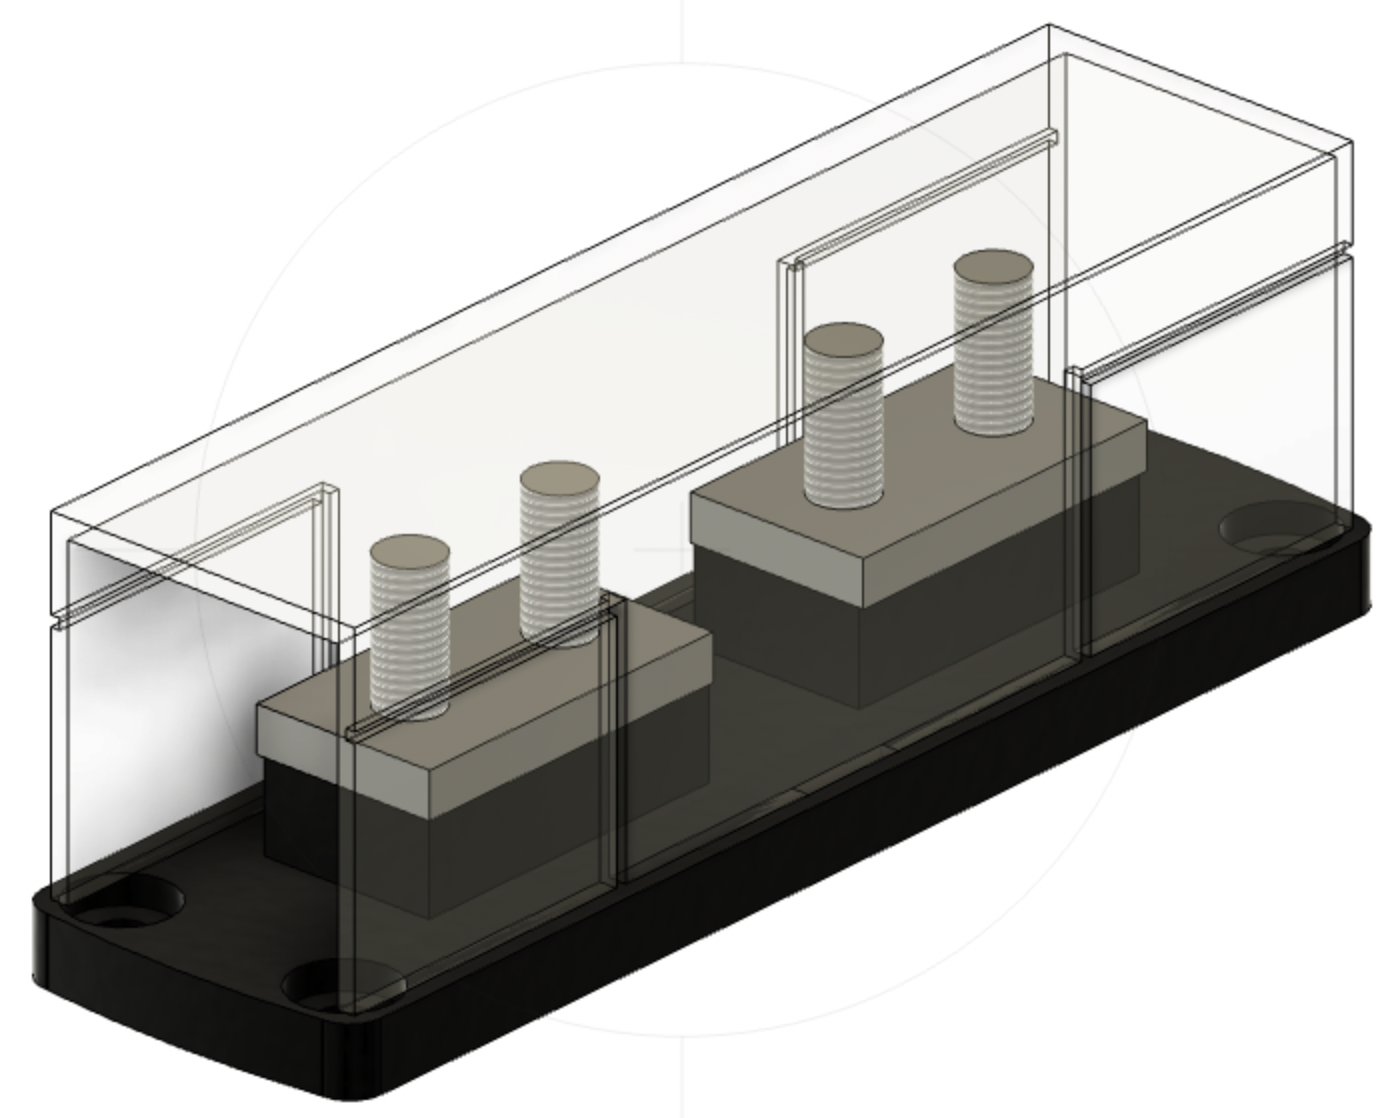
Figure 4, The space between the drawers is sufficient for four Lion Energy UT 1200 batteries.
However, we discovered some completely wasted space between the two drawers during our modeling efforts, see Figure 4. This space is almost large enough for four Lion Energy UT 1200 batteries. Some modifications will be necessary, but using this space will leave both the under-bed and pass-through storage areas free for their intended purposes.
This example points out the sound practice of measuring things out and opening up places in your RV to determine what is there and what’s available. You never know when you may need a bit of space for one thing or another.
Modeled Components
Modeling the trailer spaces gave us a great reason to learn a bit about Fusion 360. While we aren’t experts, we learned enough to model each of the major components we’ll use in our system. These models are not precise, but their overall dimensions and appearance are accurate enough for our purposes.
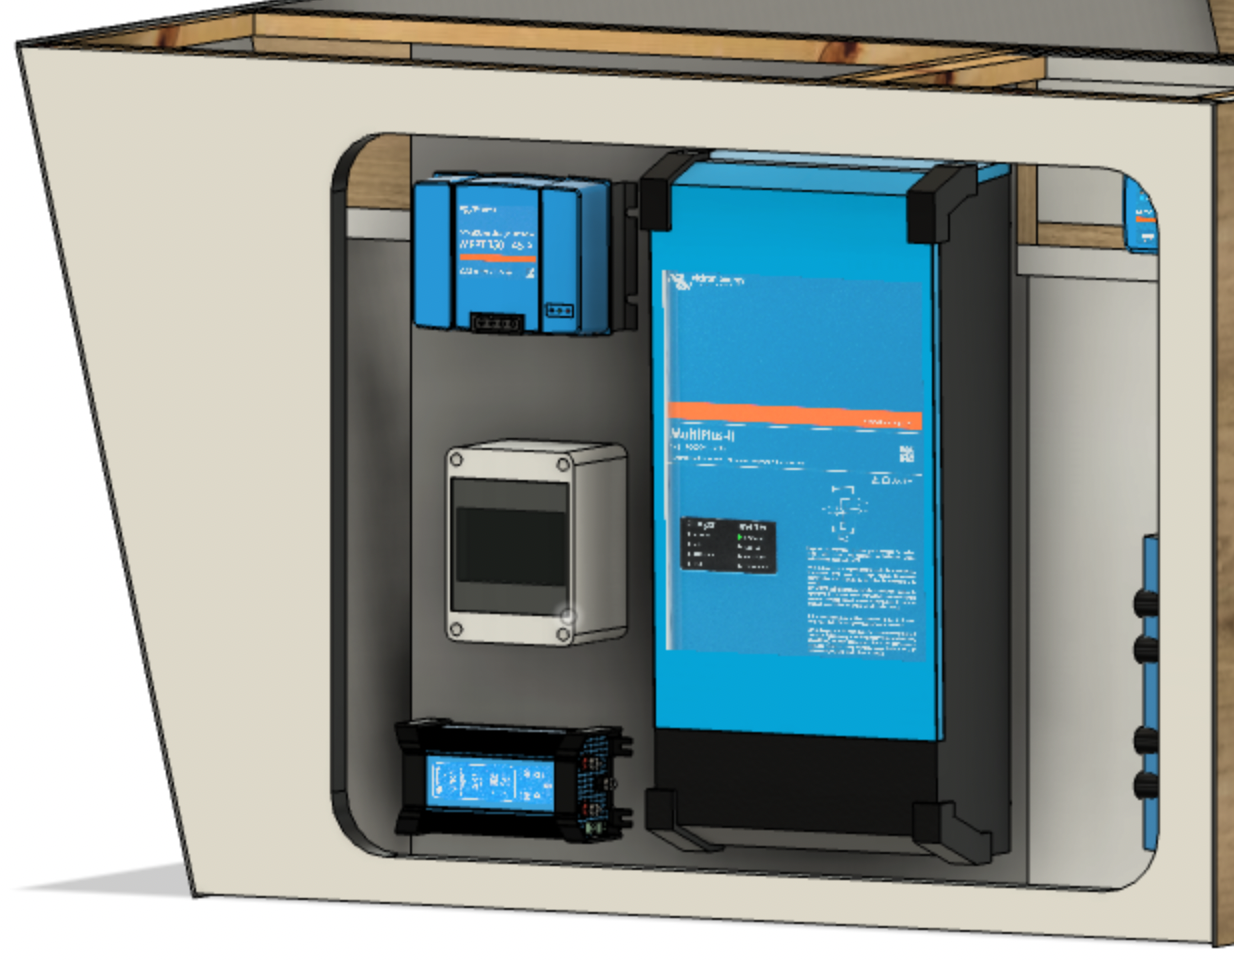
This modeling effort enabled us to place each component, move them around, ensure adequate spacing, etc. The implementation illustrated in Figures 5 and 6 was achieved by adding a wall in our pass-through storage space and placing the modeled components. As previously mentioned, we may have to implement a 12 V alternative by removing the DC-DC converter and adjusting fuse values appropriately.
Figure 5, This is the front view of the RV Power Center showing the layout of all major components. The solar charge controller and PV breaker are in the upper left. The DC-DC converter is in the lower left. The inverter/charger is in the center of the figure, while on the right side, we have from top to bottom the Cerbo GX monitoring system, the SmartShunt, battery disconnect switch, and the Lynx Distributor.
Figure 6, This top view of the RV Power Center component layout demonstrates sufficient clearance from all devices, walls, doors, etc.
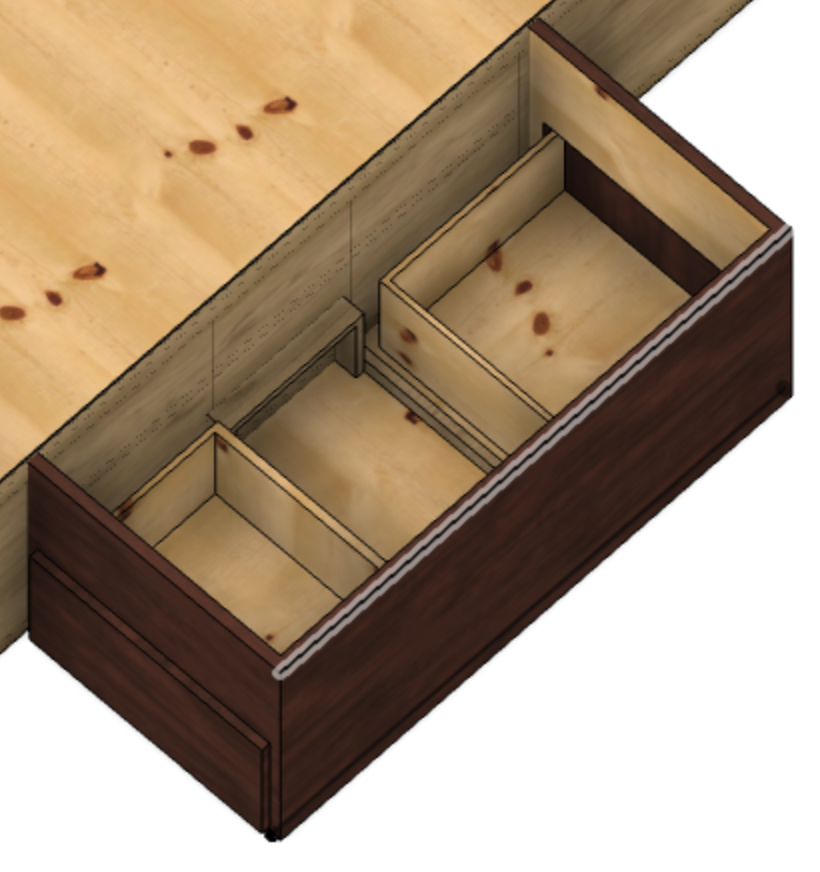
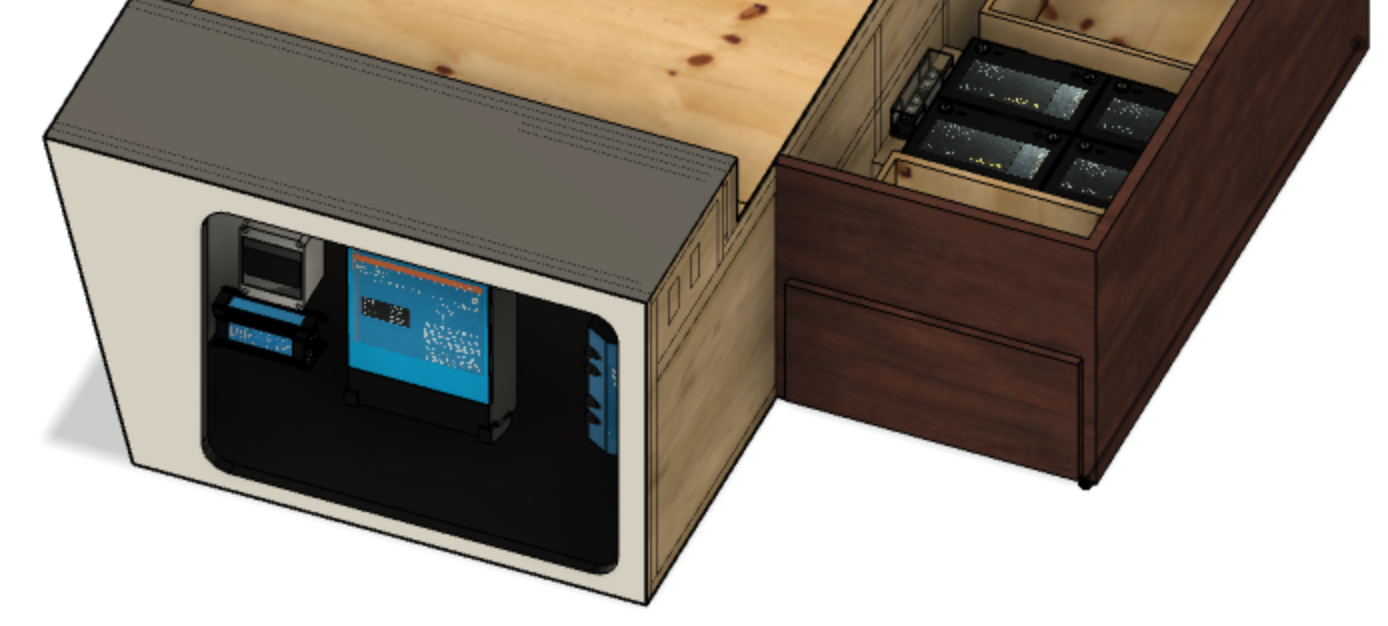
Figure 7, The four batteries fit nicely between the drawers with the 300 A Class T fuse nearby.
As previously mentioned, the battery bank will be located between the drawers in the under-bed storage area. In addition, we’ll build a small shelf near the batteries where our 300 A Class T fuse will be located. The battery cables will pass through the thin wall between the under-bed area and the pass-through storage area and then travel down to the left in Figure 7 until they reach the battery switch and SmartShunt.
Summary
In this post, we discussed our alternative 12 V design and modeled the physical spaces and components in the hope that we get it all right the first time around. This may be an optimistic goal, but having this detailed plan in hand will enable small projects to fit more seamlessly together. Now the work begins.